Overview
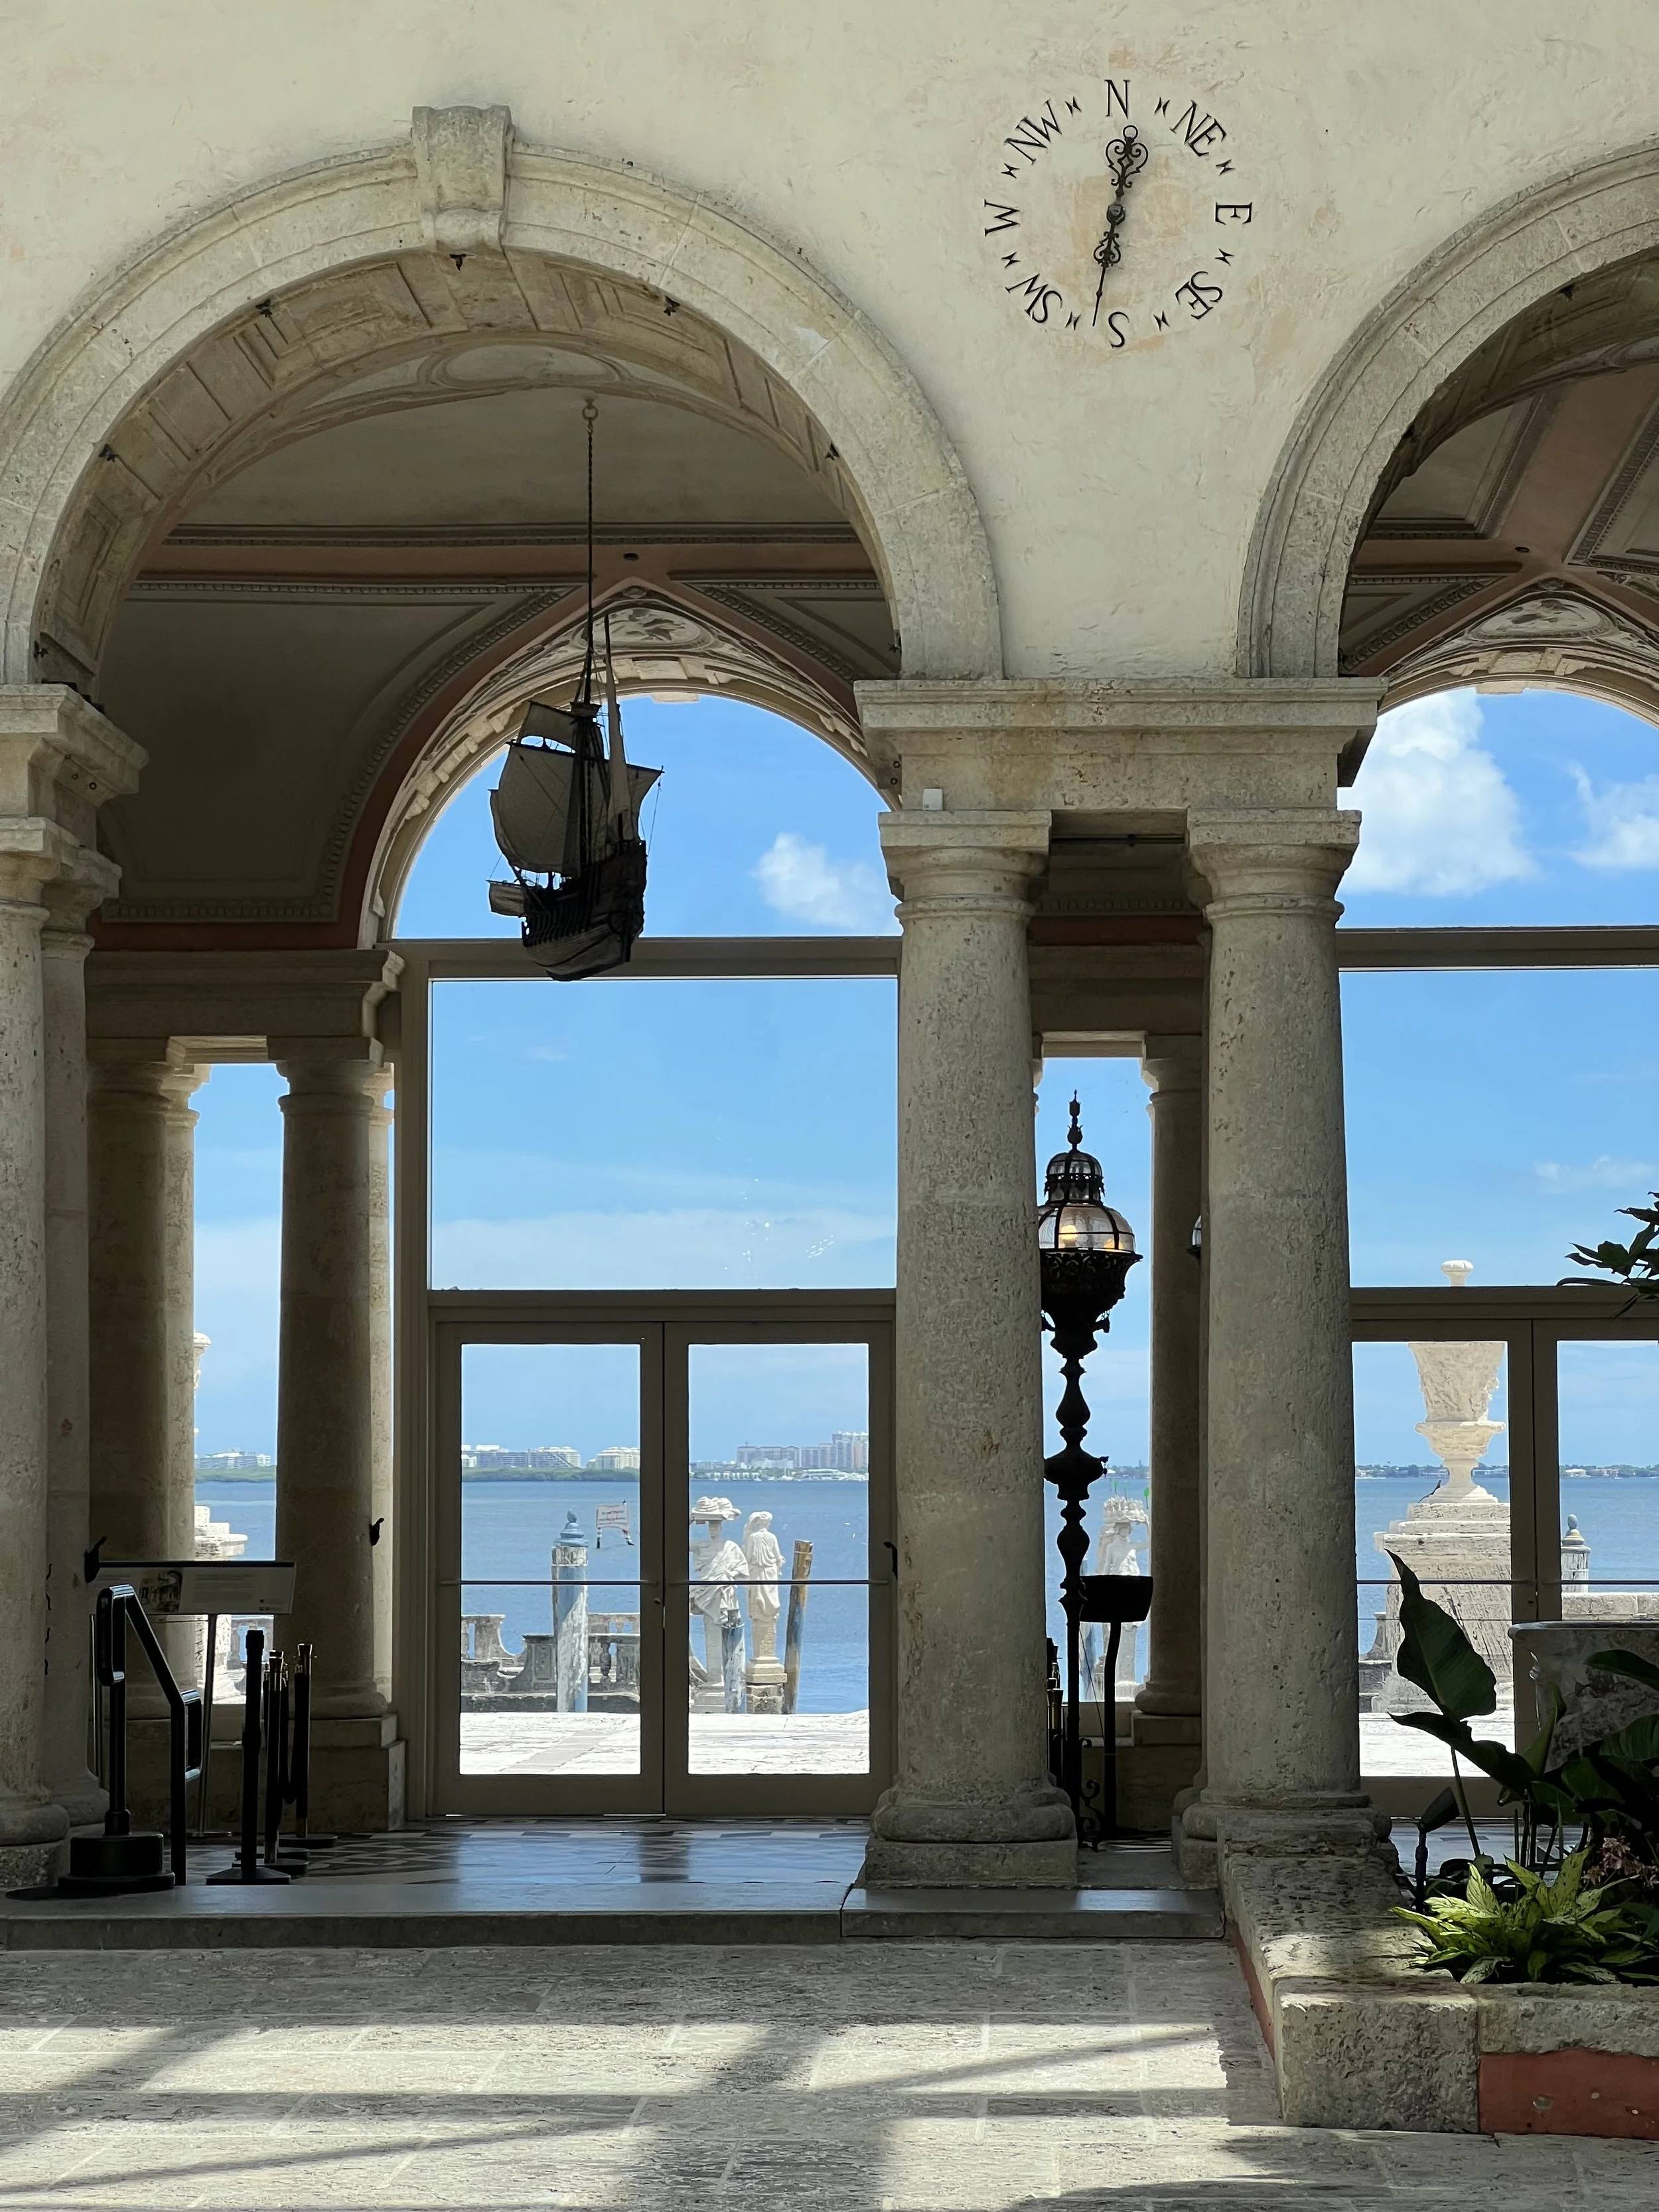
Vizcaya Museum and Gardens is a National Historic Landmark and accredited museum in Miami, Florida. The main building, Villa Vizcaya (or Main House), was built from 1914 to 1922 by industrialist James Deering in the Mediterranean Revival style. It consists of 34 elaborately decorated rooms with antique European furnishings (15th-19th centuries), an open central courtyard, and 10 acres of formal French-Italian gardens featuring 100+ stone, cast stone, and lead sculptures, fountains, native forests, and an extensive orchid collection.
During this internship in Conservation & Collections Care in Summer 2025, I assisted in the cyclic maintenance of the architecture and the preservation of the museum’s collections. My responsibilities include preventive conservation, treatment, condition assessment, documentation, Integrated Pest Management, photogrammetry, rehousing, and dry-cleaning.
I worked on objects treated in situ within Miami’s subtropical climate rather than in a controlled laboratory setting, shifting the focus to cyclical preventive care, including regular cleaning, environmental monitoring, and on-site stabilization. Performing conservation during open visitor hours required clear public communication about our work, the house, and its collections. I also collaborated closely with conservators, registrars, and maintenance staff, aligning ethical decision-making with institutional priorities. This experience deepened my understanding of preventive conservation as a continuous process balancing historical authenticity, preservation, and public access.
Supervised by Stefania Marino, Ella Andrews, and Paris Bowers.
* All photos are taken by Rylan Nguyen if not otherwise indicated.
* All conservation methodologies presented were developed and led by my supervisor, conservator Ella Andrews. As an intern, I worked under her supervision to carry out each treatment. Here, I will focus on what I learned through this hands-on work, including material testing, preparation, treatment techniques, set-up design, and in situ decision-making.
Collections Care
✳︎
Conservation
✳︎
Documentation
✳︎
Preventive
✳︎
Assessment
✳︎
Collections Care ✳︎ Conservation ✳︎ Documentation ✳︎ Preventive ✳︎ Assessment ✳︎
2025
Miami
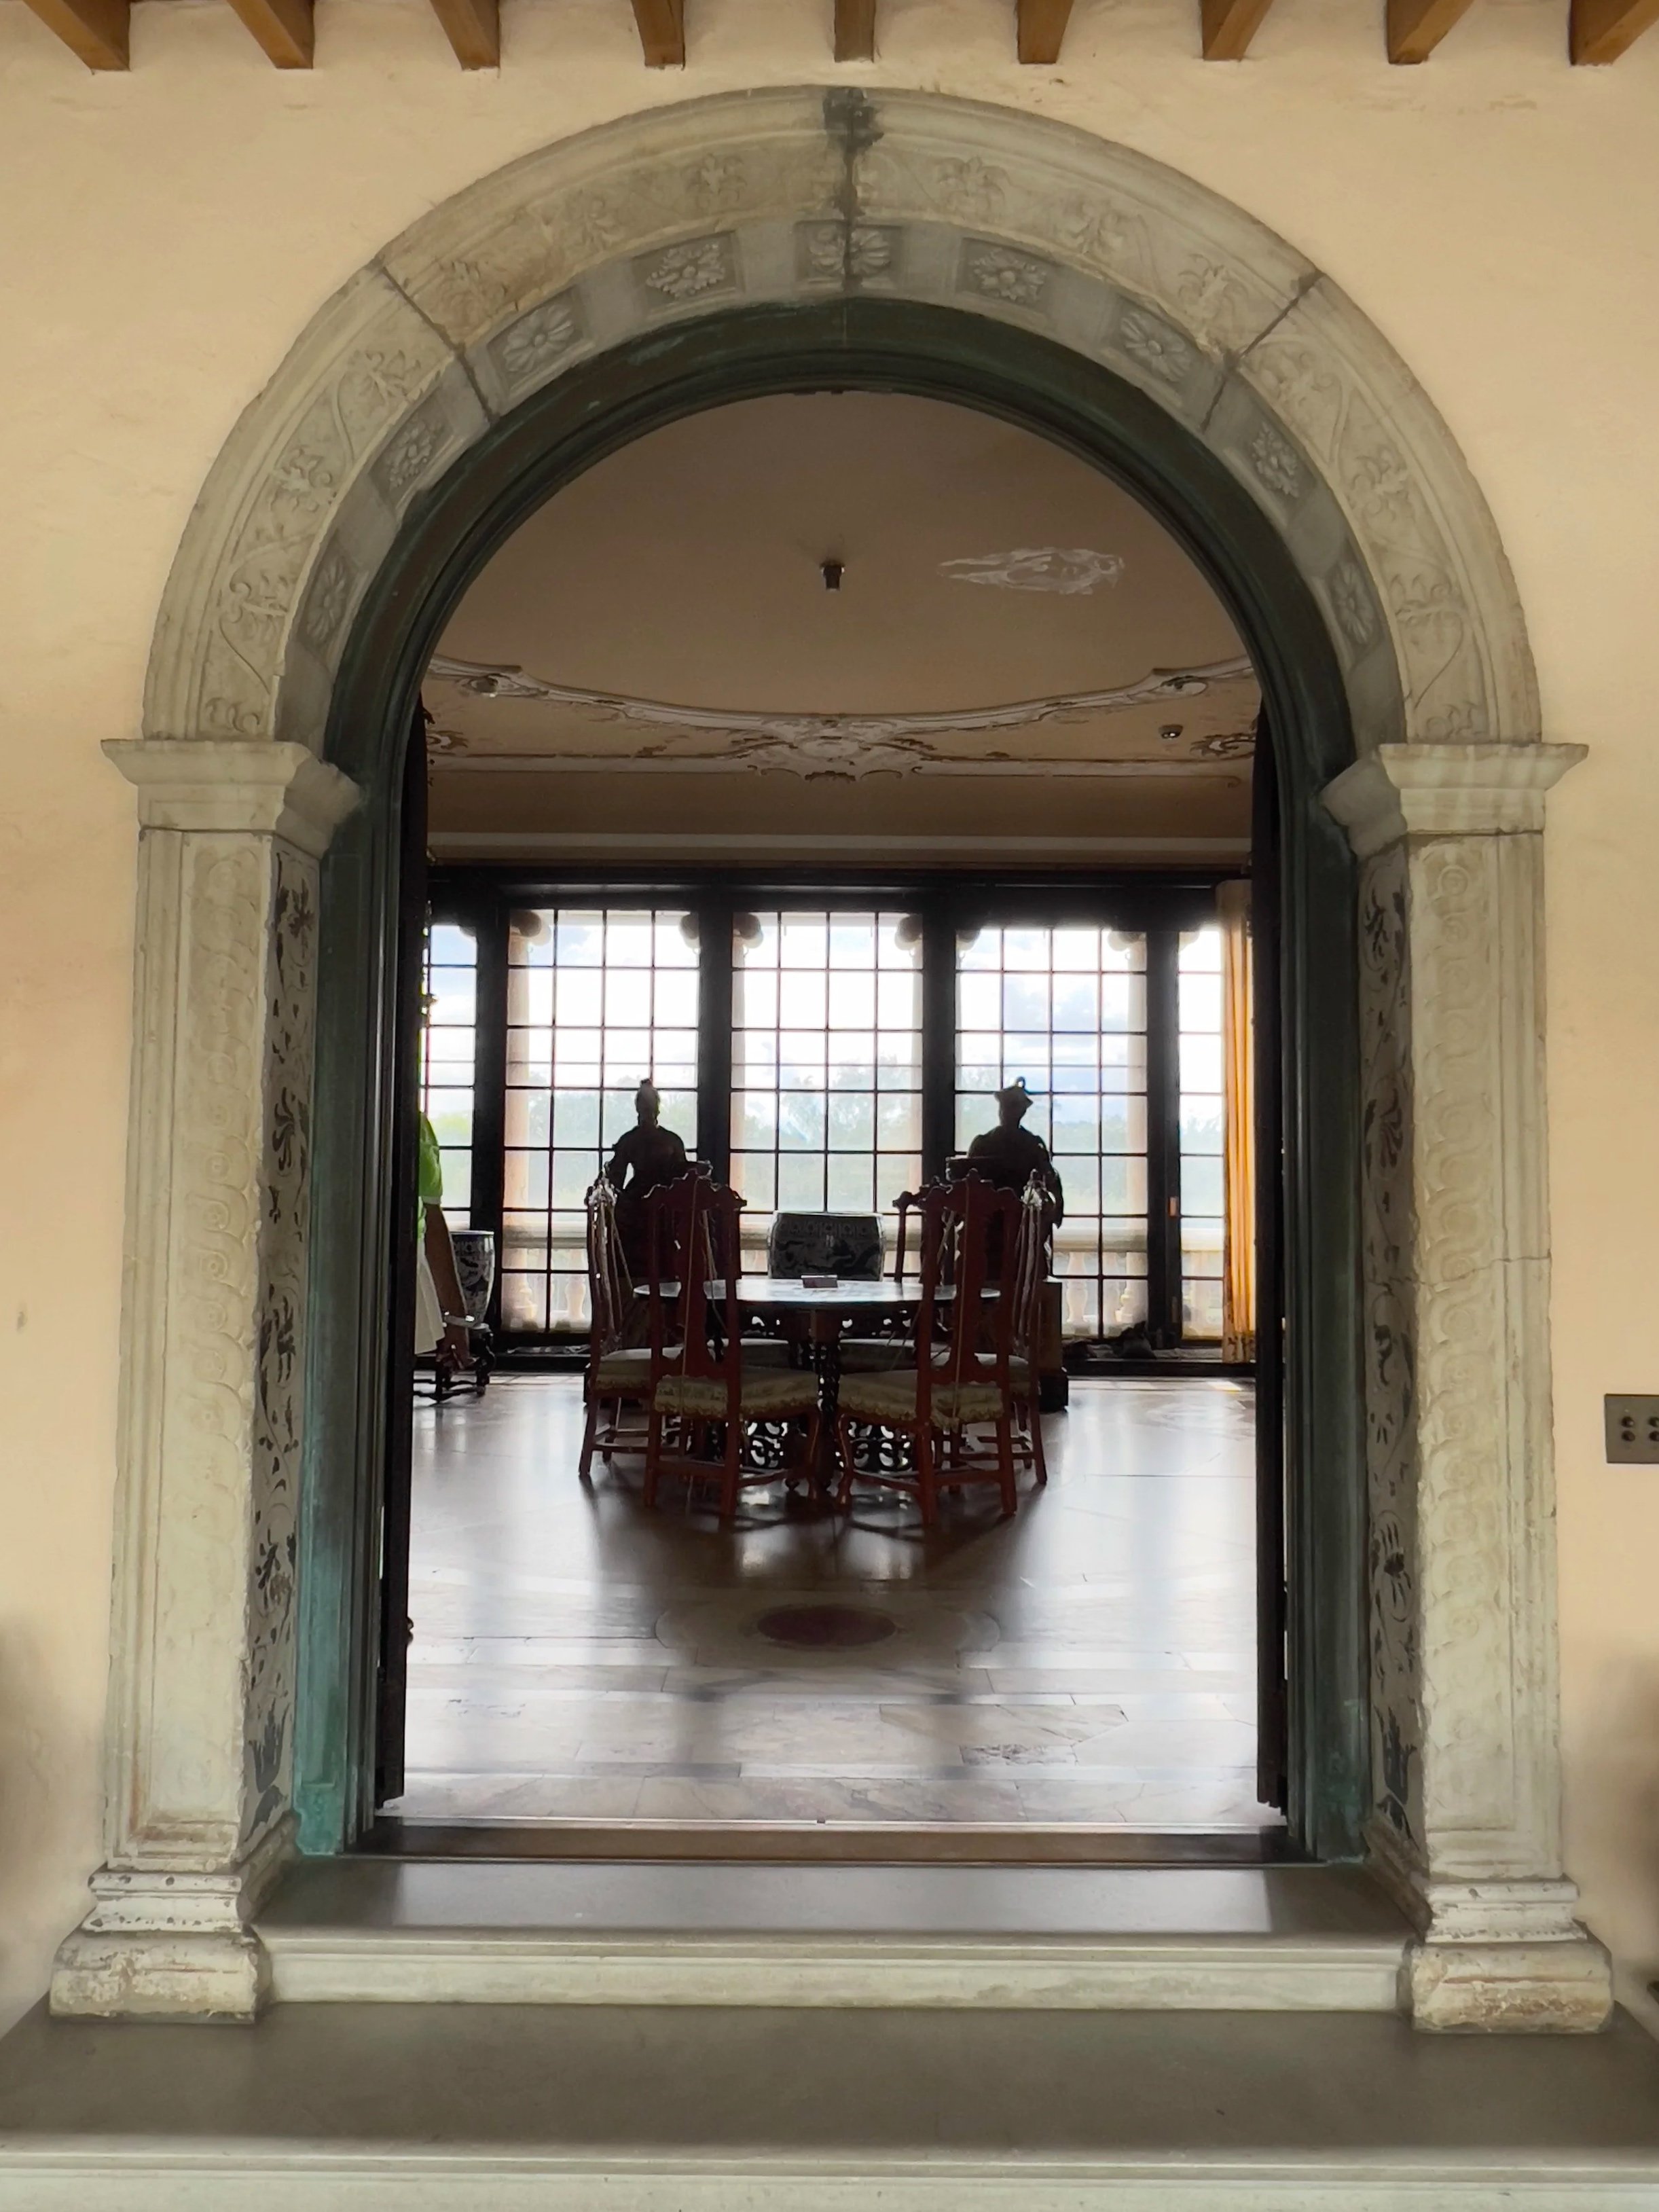
Marble Door Jambs of the Breakfast Room - After treatment.
(Photo taken on 09/18/2025)
Conservation Treatment of
Marble Door Jambs
This project involved the conservation treatment of a 16th-century Venetian stone archway at the entrance to Vizcaya’s Breakfast Room, an area frequently touched by visitors. Over time, repeated contact caused yellow discoloration from hand oils and surface grime, disrupting the architectural detailing. The treatment aimed to reduce surface discoloration while respecting the historic material, ensuring the arch remained visually coherent within its original context.
This treatment was carried out at the direct request of the museum director, who identified the discoloration as visually disruptive and prioritized its conservation ahead of public display.
Conservators: Rylan Nguyen, Sophie West, under the supervision of Ella Andrews
-
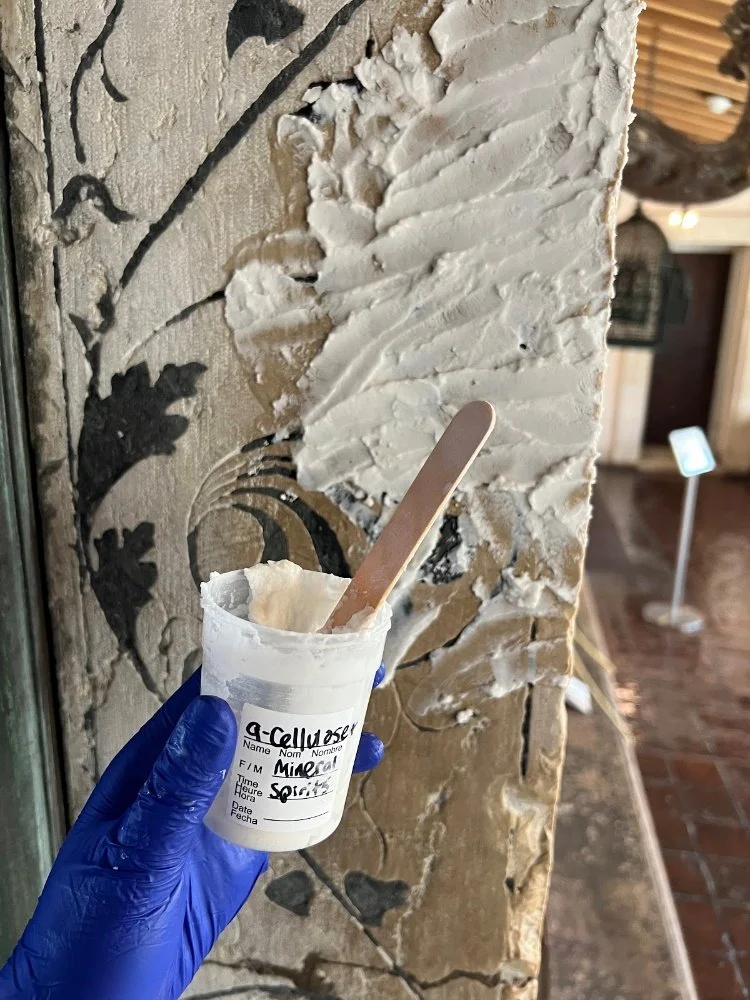
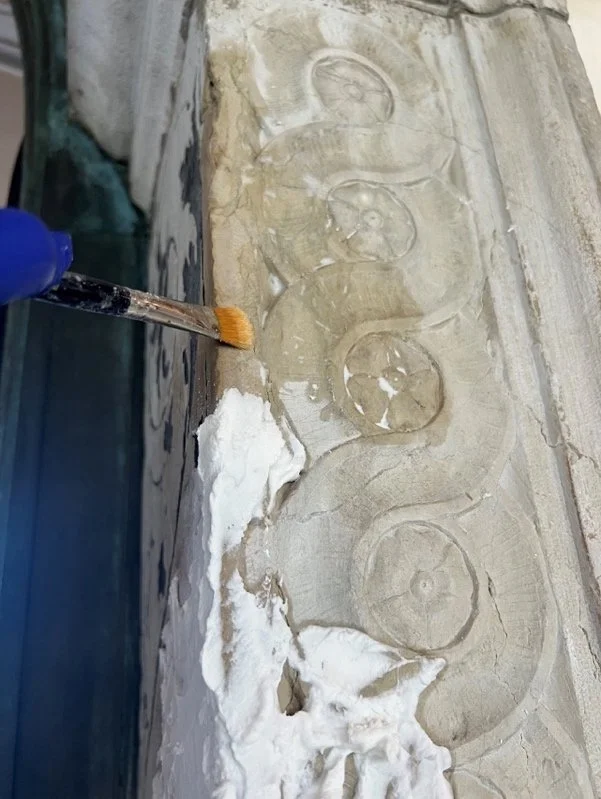
1. Solvent testing for discoloration.
2. Poulticing (alpha cellulose powder + odourless mineral spirits).
3. Removing the poultice.
4. Clean the stone with a fine horsehair brush and a Nilfisk vacuum. -
1. Mineral Spirits
2. Alpha cellulose powder
3. Cotton
4. Bamboo sticks
5. Small horsehair shine brushes
6. Popsicle stick
Before & After Photos
Proper Left - Front View: Before & After,
(Photos taken on 07/08/2025 by Rylan Nguyen, Sophie West, and Ella Andrews)

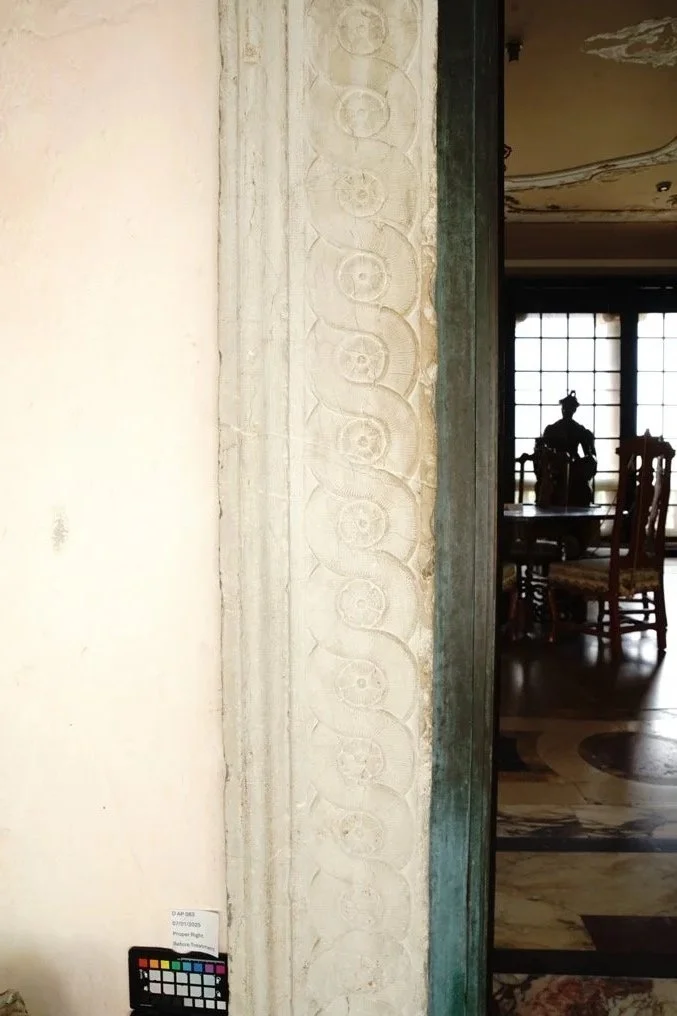
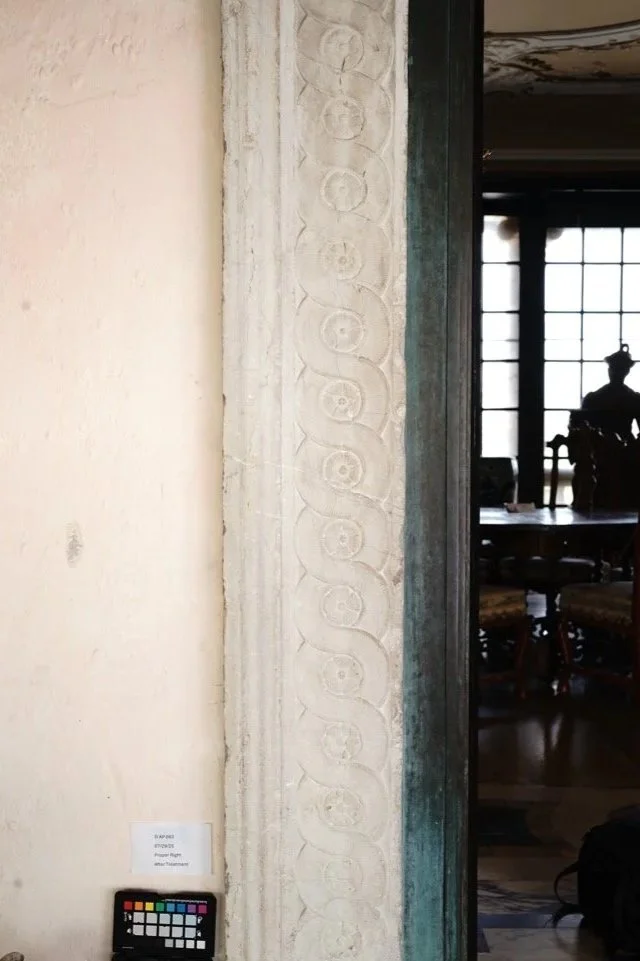
Proper Right - Front View: Before & After,
(Photos taken on 07/08/2025 by Rylan Nguyen, Sophie West, and Ella Andrews)
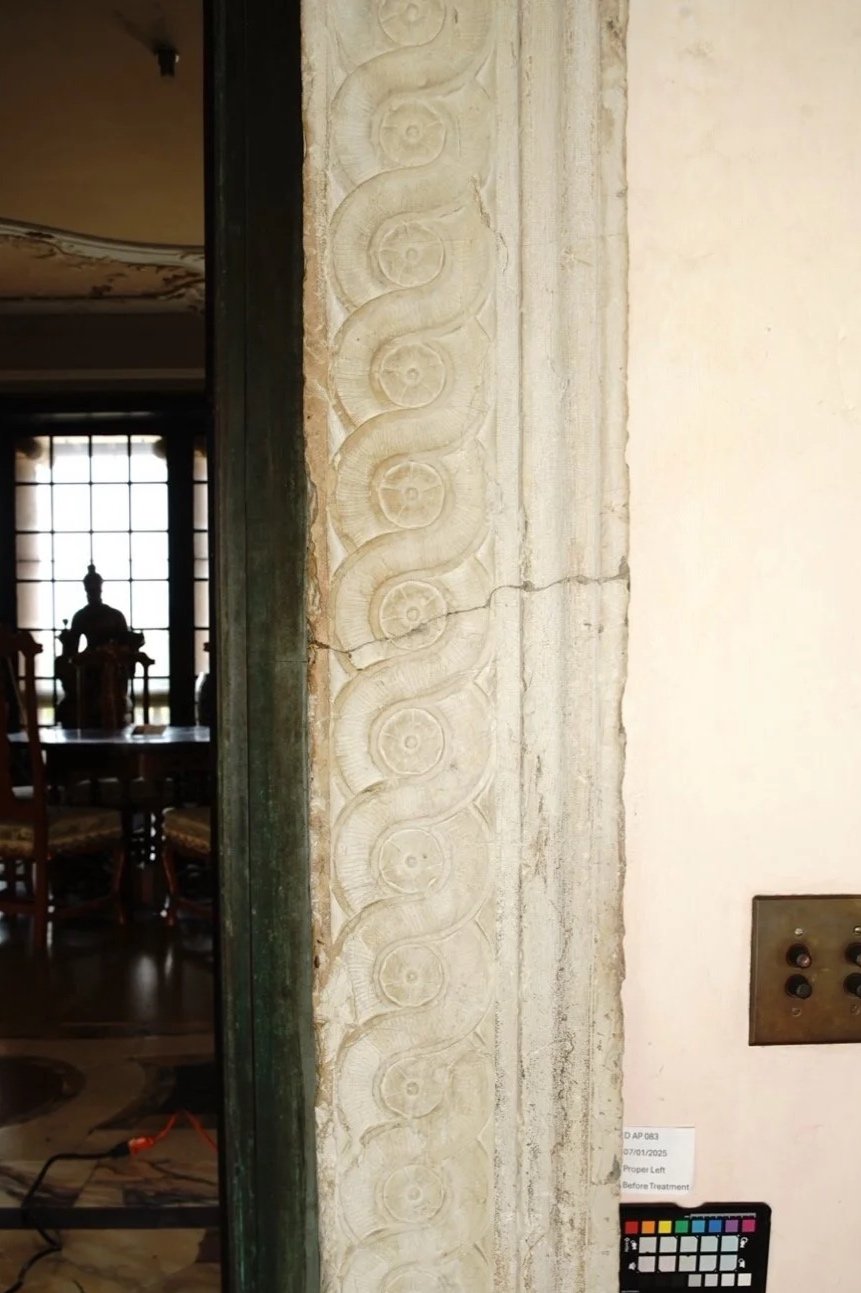
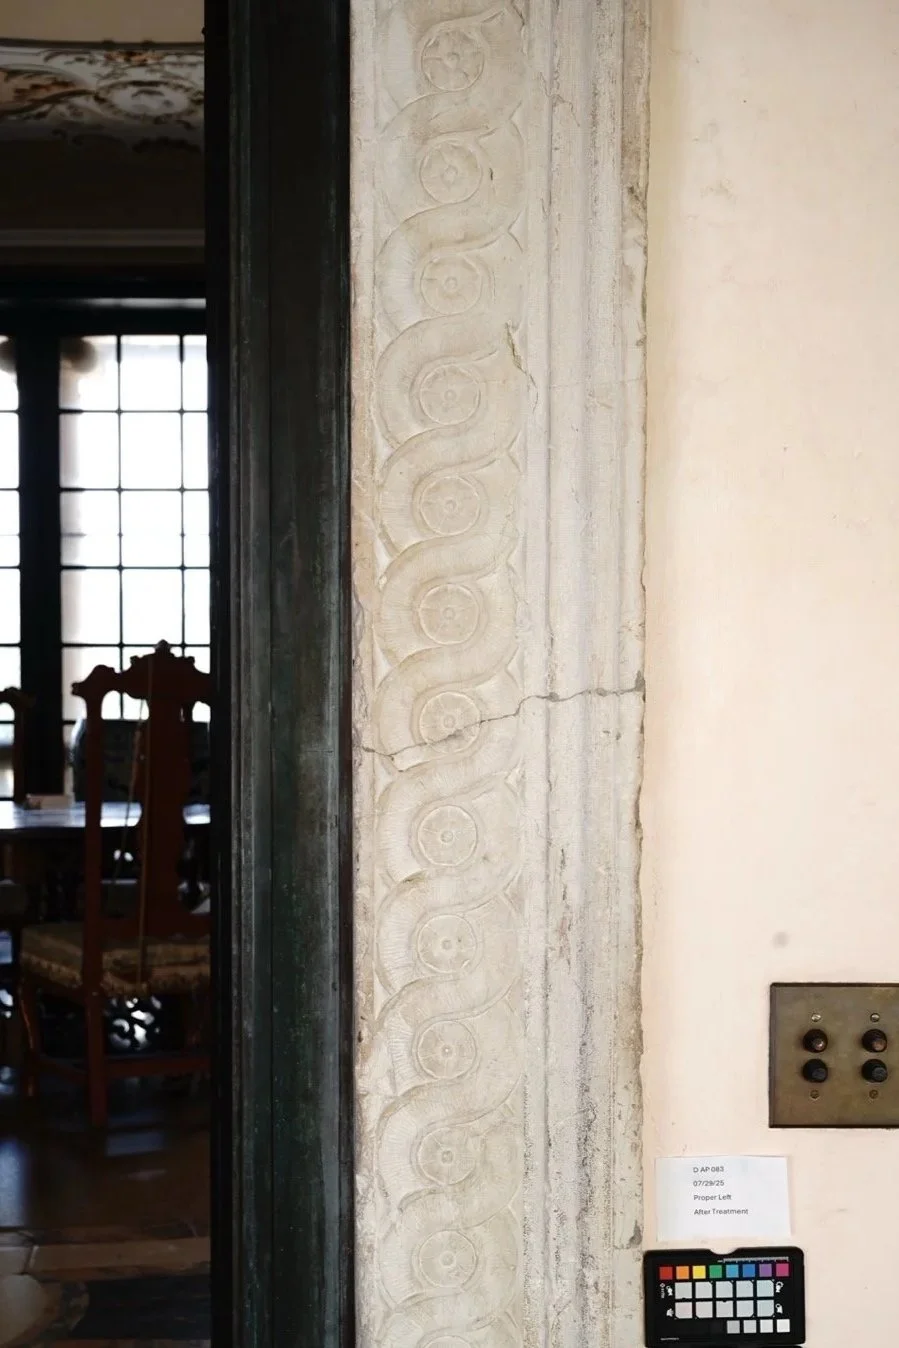
Proper Left - Side View: Before & After
(Photos taken on 07/08/2025 by Rylan Nguyen, Sophie West, and Ella Andrews)
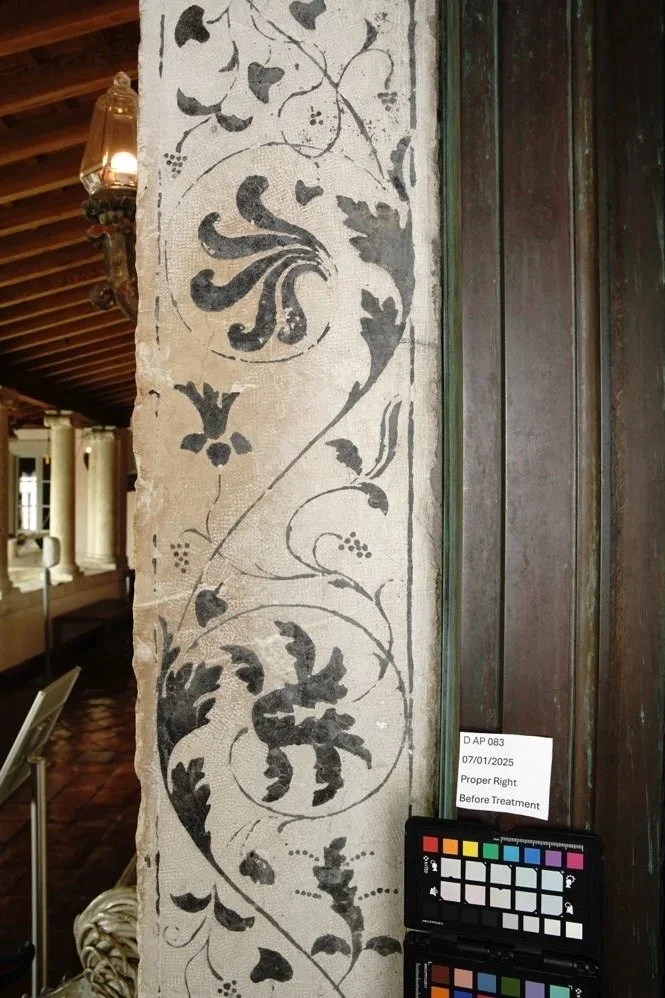
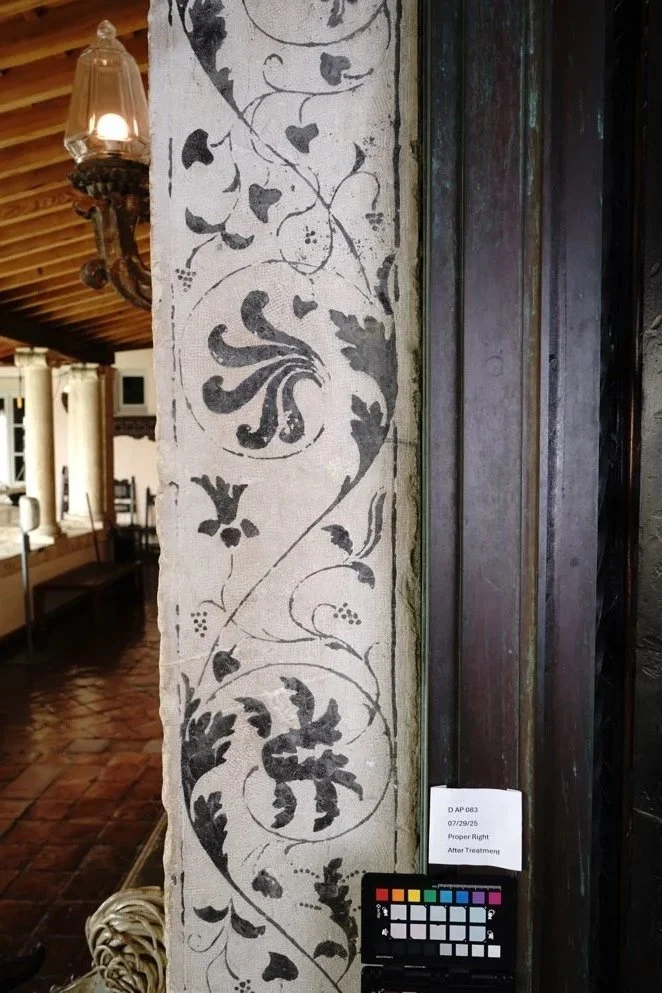
Proper Right - Side View: Before & After
(Photos taken on 07/08/2025 by Rylan Nguyen, Sophie West, and Ella Andrews)
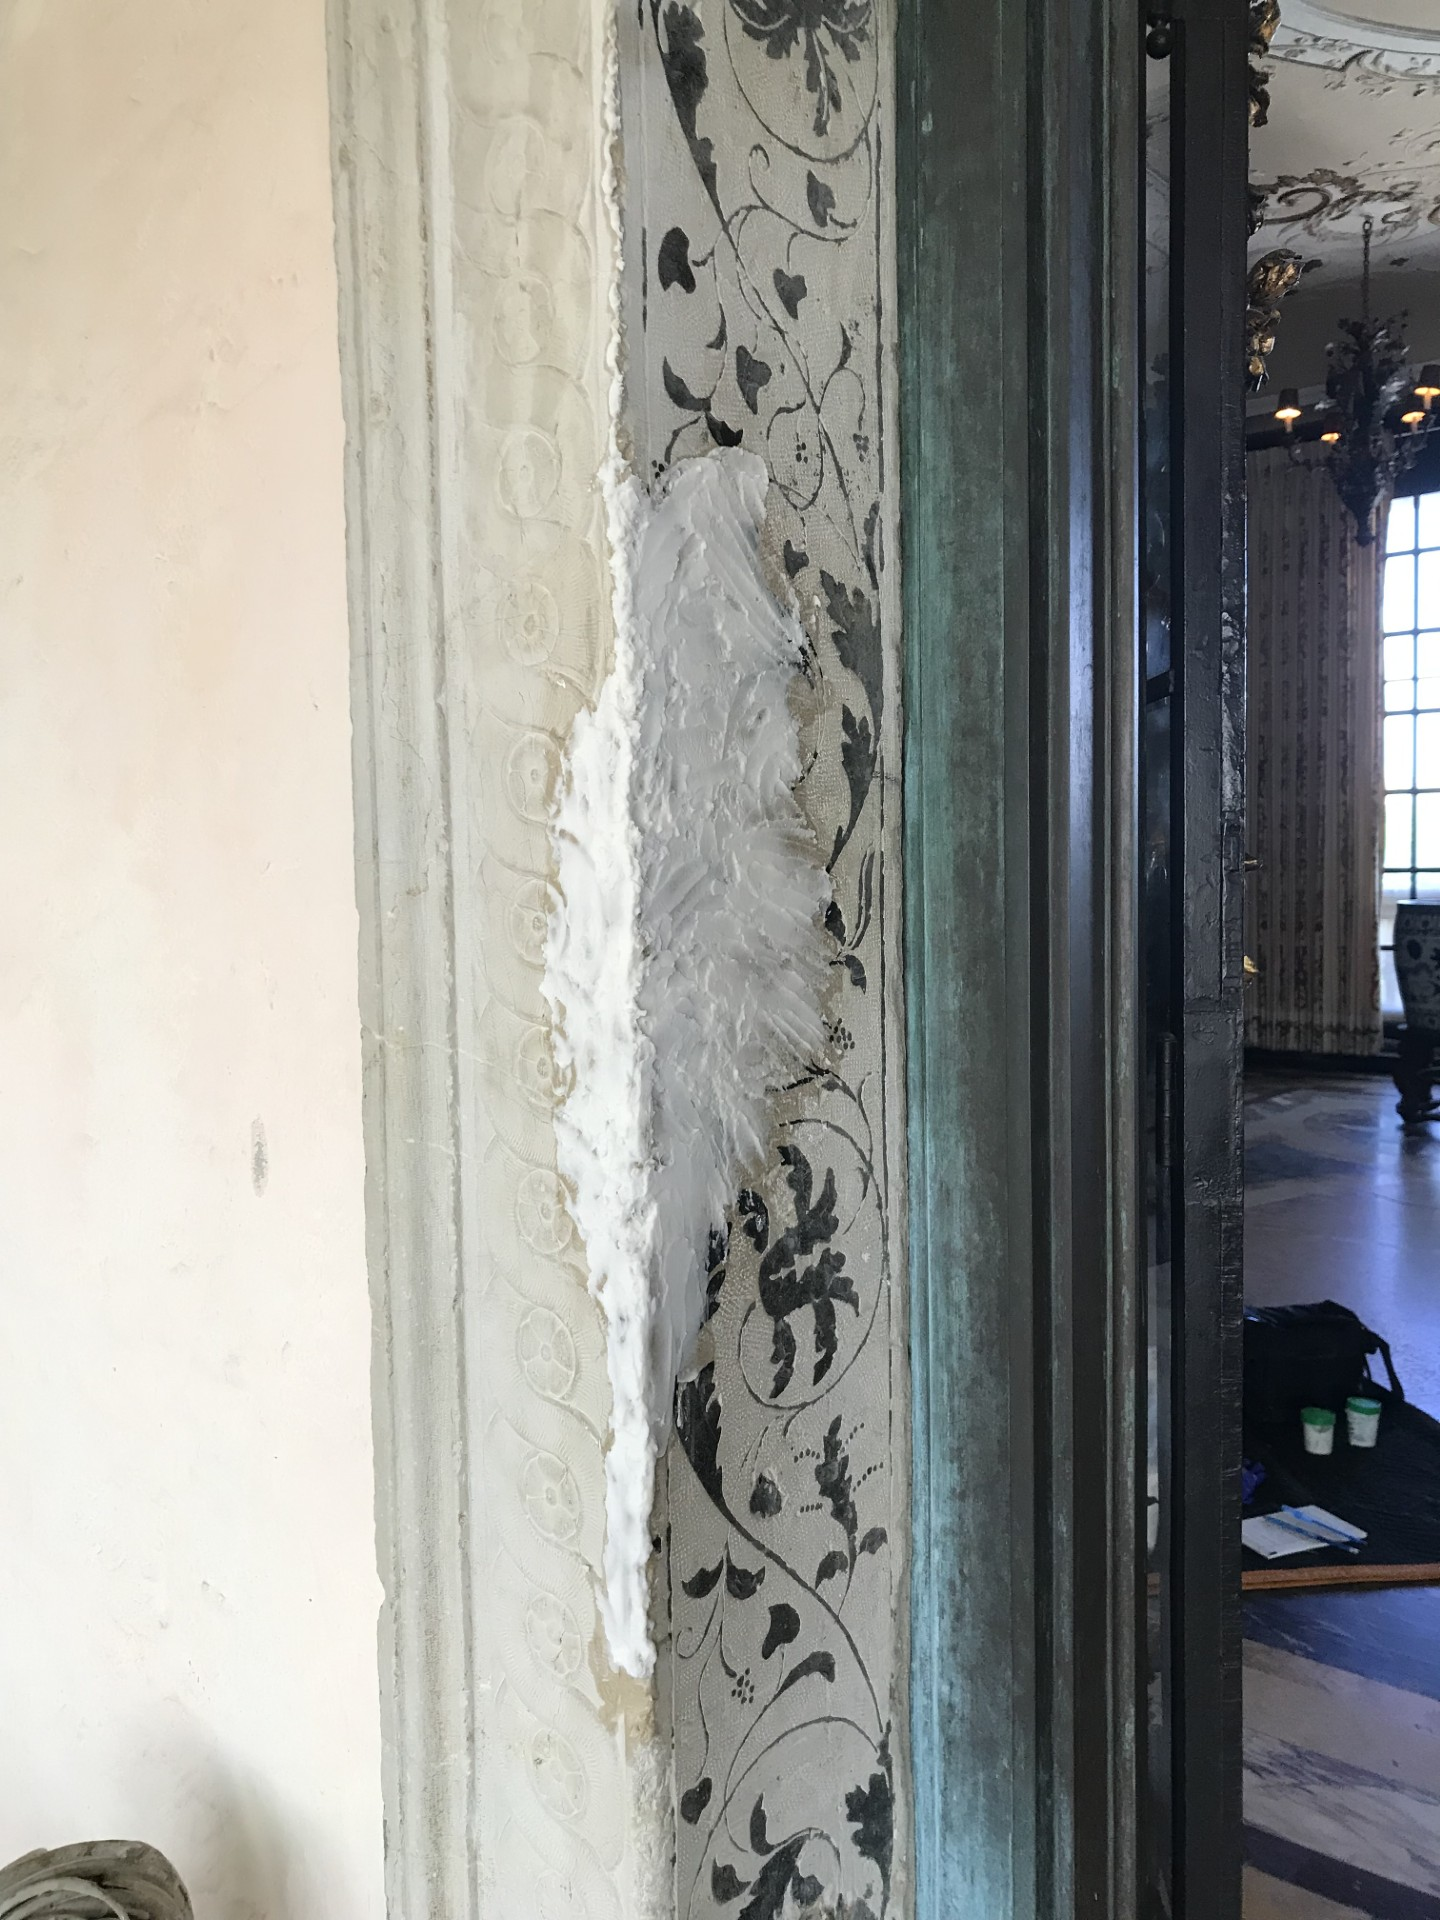
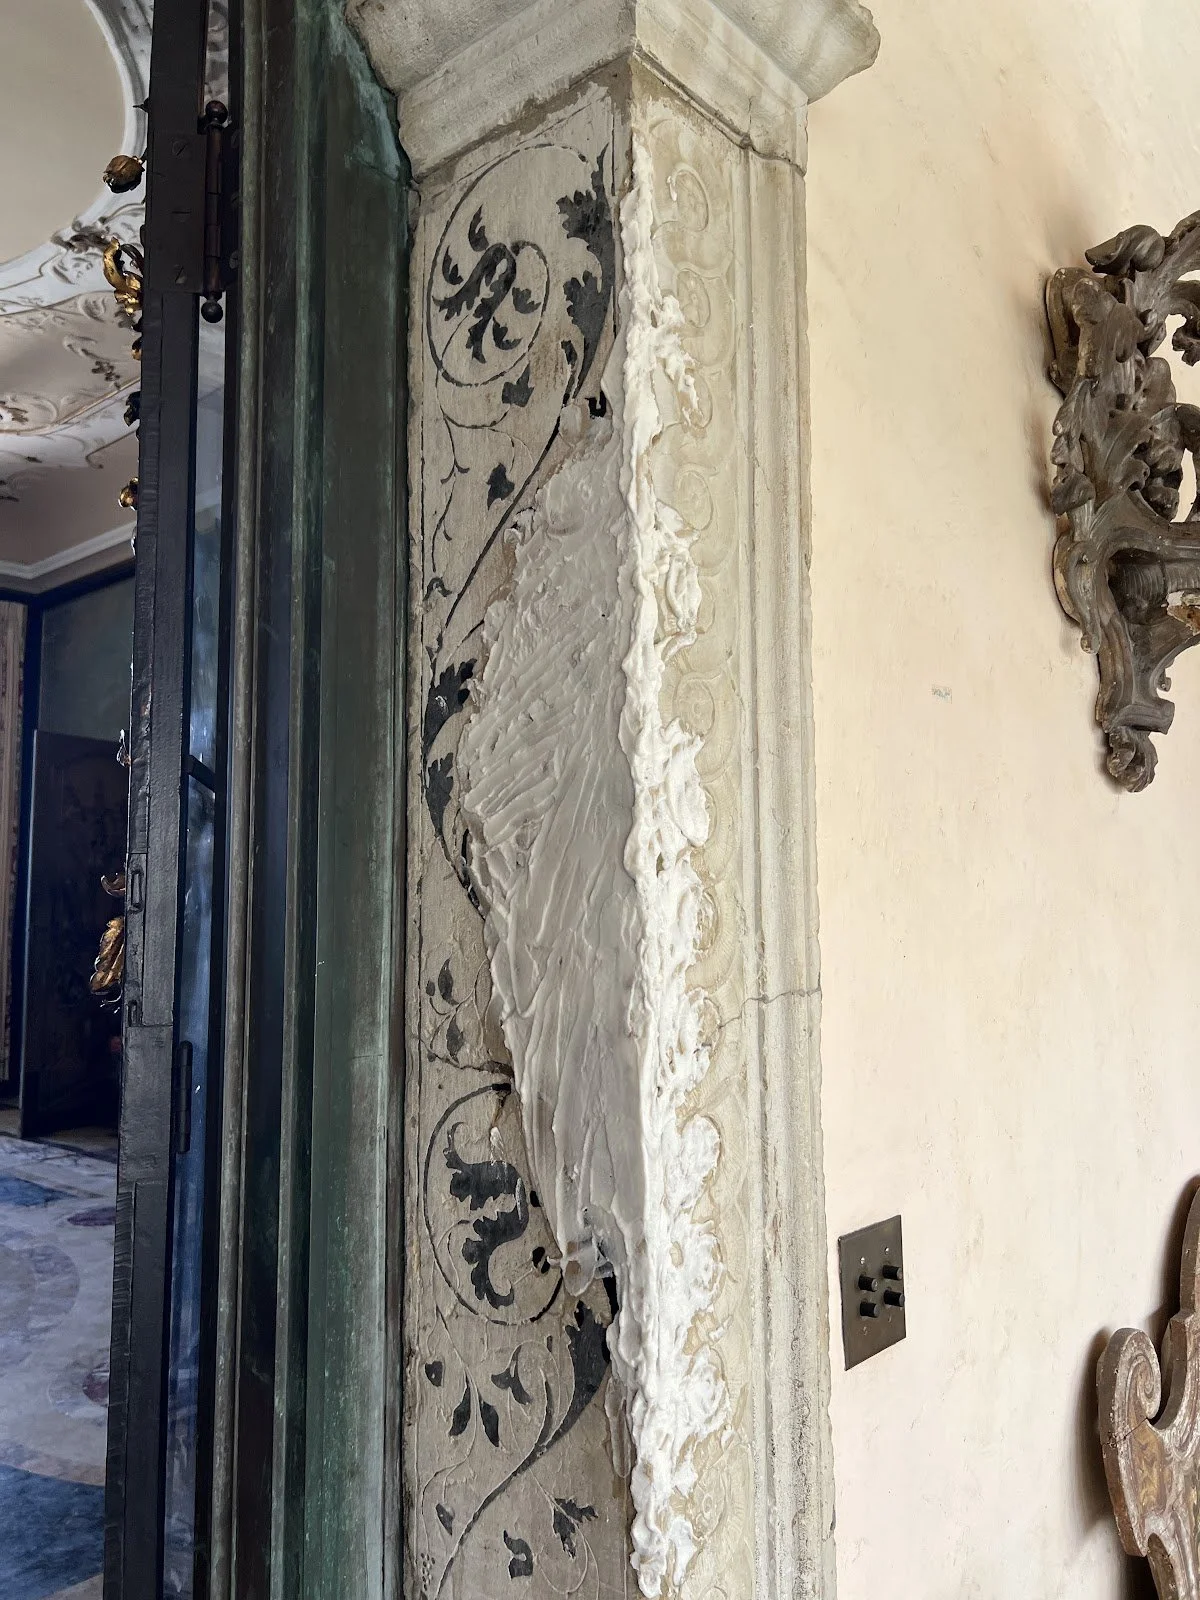
Condition Assessment
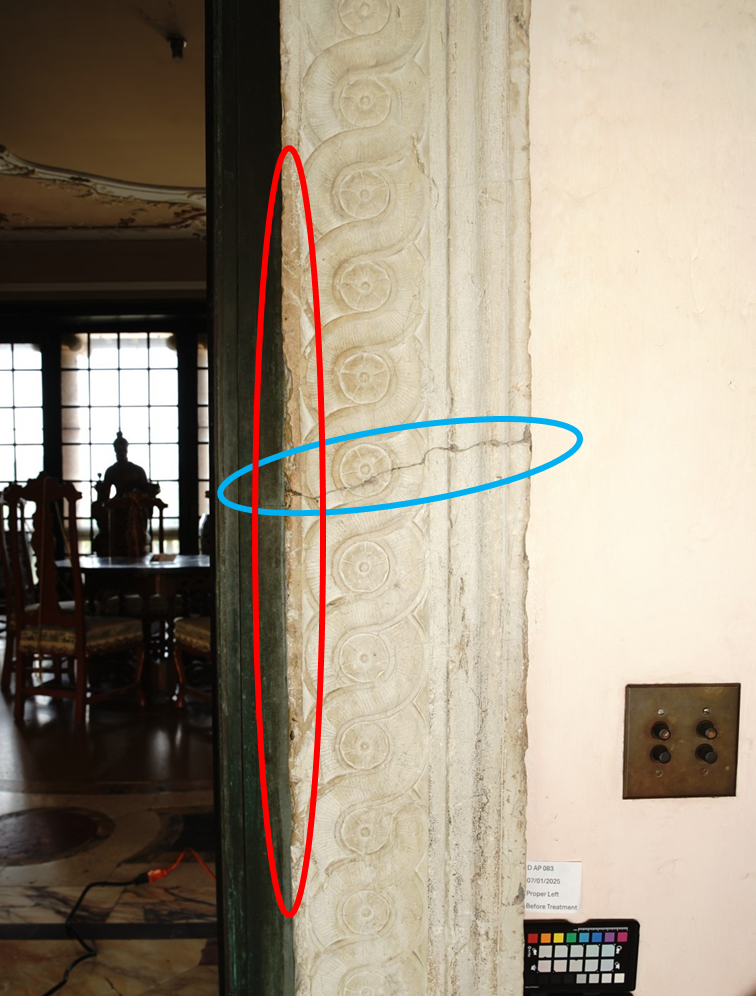
Proper left, before treatment. Red circle: Yellow discoloration (72cm) on the limestone by the oxidation of oil (from visitors’ hands) and dust. Blue circle: A fairly deep crack. (Photos taken on 07/08/2025 by Rylan Nguyen, Sophie West, and Ella Andrews)
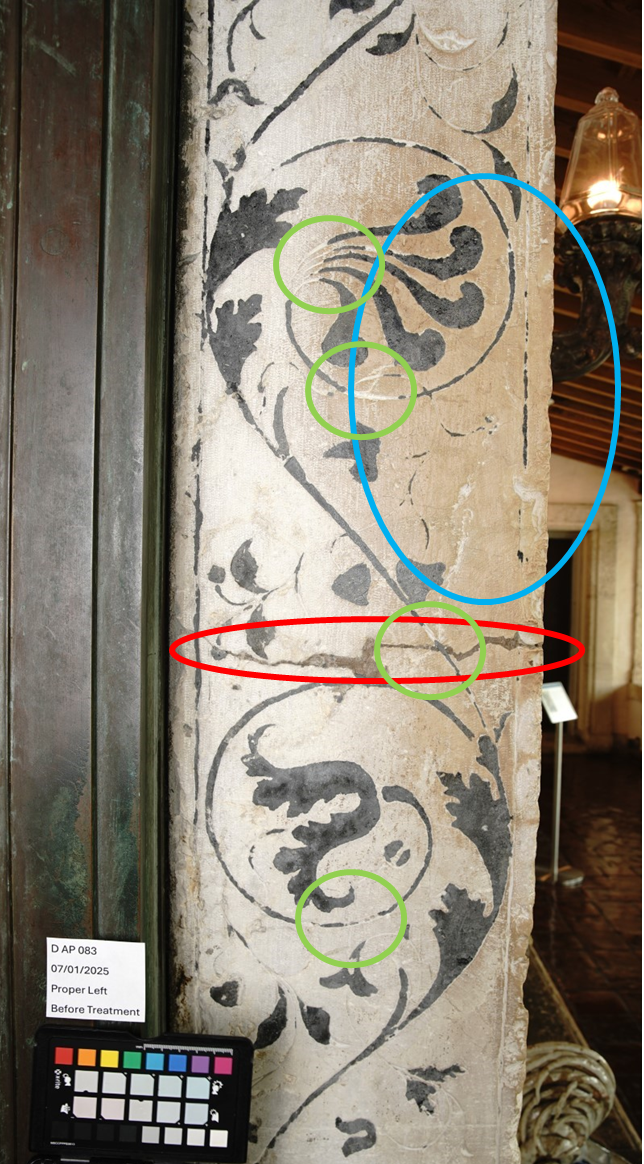
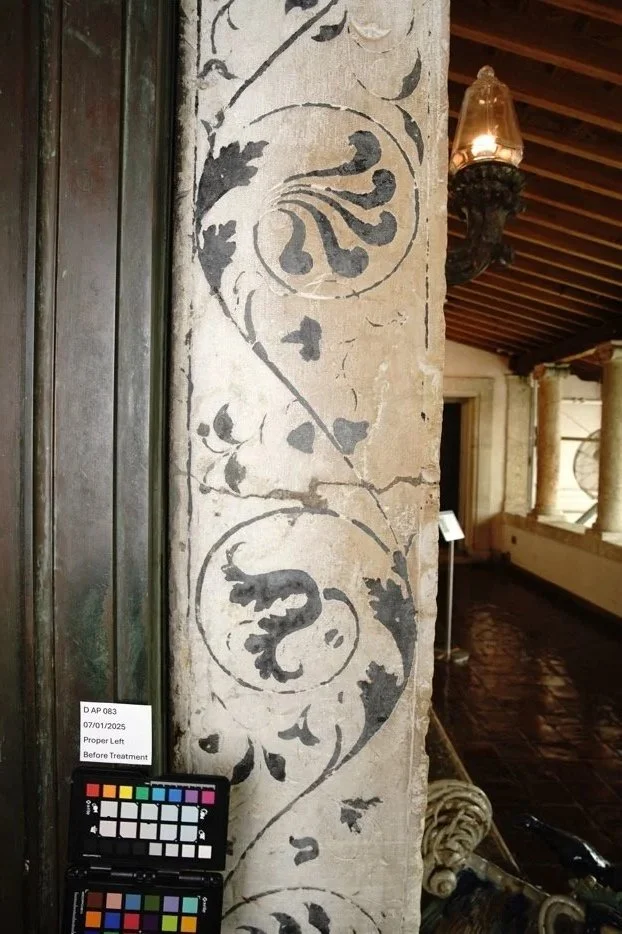
Proper left, before treatment. Blue circle: Yellow discoloration (6.8 x 69cm) by the oxidized hand oil. Green circles: Missing the grey inlays of the ornaments. Red circle: Shallow crack with a discolored brown fill. Areas of black ornamentation are more eroded, with some coming off on the swab during the water test for solvent. (Photos taken on 07/08/2025 by Rylan Nguyen, Sophie West, and Ella Andrews)
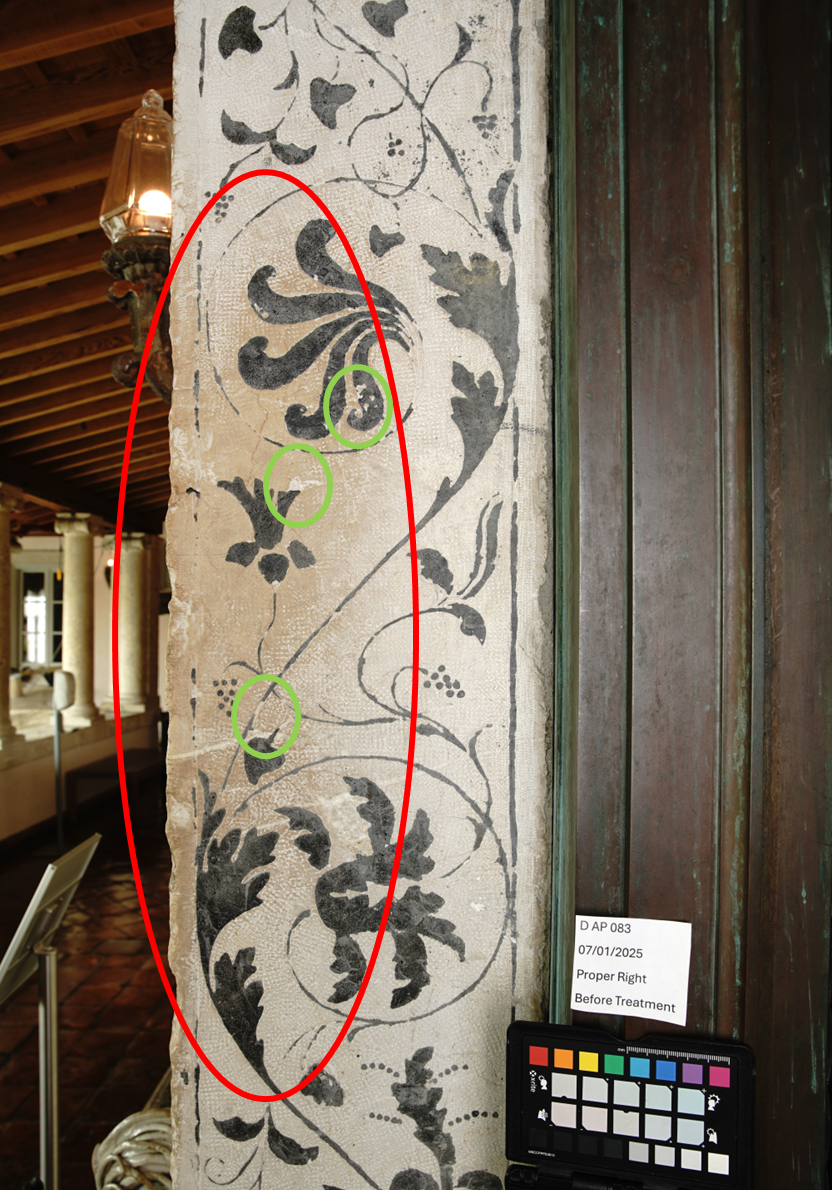
Proper right, before treatment. Arch has yellow discoloration (49 x 6.6 cm) from hand oils (as indicated by the red circle) and loss of inset black stone (as indicated by the green circles). (Photos taken on 07/08/2025 by Rylan Nguyen, Sophie West, and Ella Andrews)

Proper right, before treatment. Door frame has yellow discoloration on the interior of the arch, as indicated by the circle. (Photos taken on 07/08/2025 by Rylan Nguyen, Sophie West, and Ella Andrews)
Solvent testing showed that aqueous systems (water, water with Vulpex, and water with Onus) produced only slight surface change and mobilized black staining on the proper left black inlays, indicating sensitivity to moisture. Polar solvents (ethanol and isopropyl alcohol) resulted in minimal cleaning with limited effectiveness across both sides. Acetone produced moderate improvement on the proper right white stone, but remained inconsistent and posed a higher risk.
Odourless mineral spirits achieved the most effective and controlled cleaning, producing a moderate reduction of discoloration on both sides without mobilizing black staining, and was therefore selected for treatment.
During Treatment
(Photos taken on 07/08/2025)
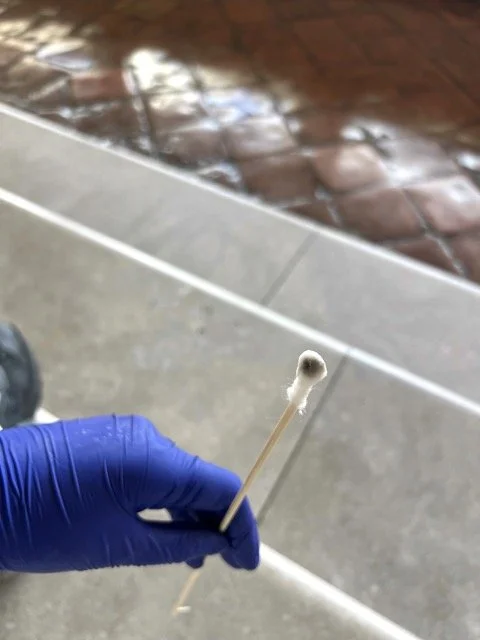
Erosion on the left proper coming off on the swab after the water test.
(Photos taken on 07/08/2025)
A fairly thick coat of the poultice was applied on the surface with popsicle sticks onto the heavily stained area. It was decided not to leave it on for longer as it might make the cleaned area significantly brighter than the rest of the surface.
(Photos taken on 07/08/2025)
After drying, the poultice formed a semi-wet clump that could be easily peeled off by hand. Horsehair and small brushes removed cellulose powder from the porous stone with minimal friction, avoiding harsh abrasion. As the poultice was removed in sections before complete moisture evaporation, a cotton swab lightly dampened with mineral spirits was used to clean the area further until no oil or grime was visible on the swab.
2025
Miami
Manin Room during Preventive Conservation.
(Photo taken on 09/02/2025)
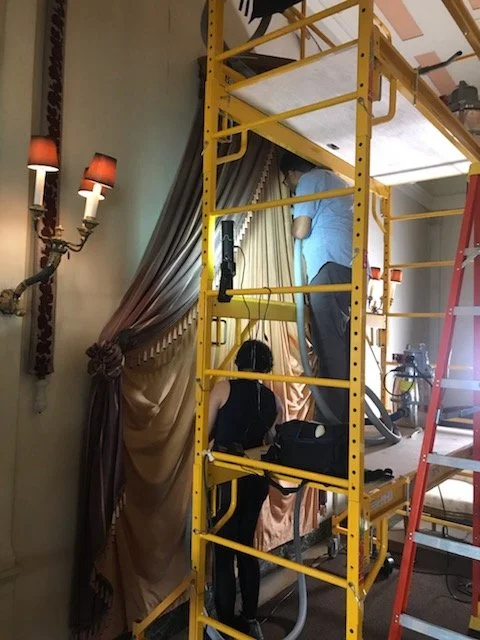
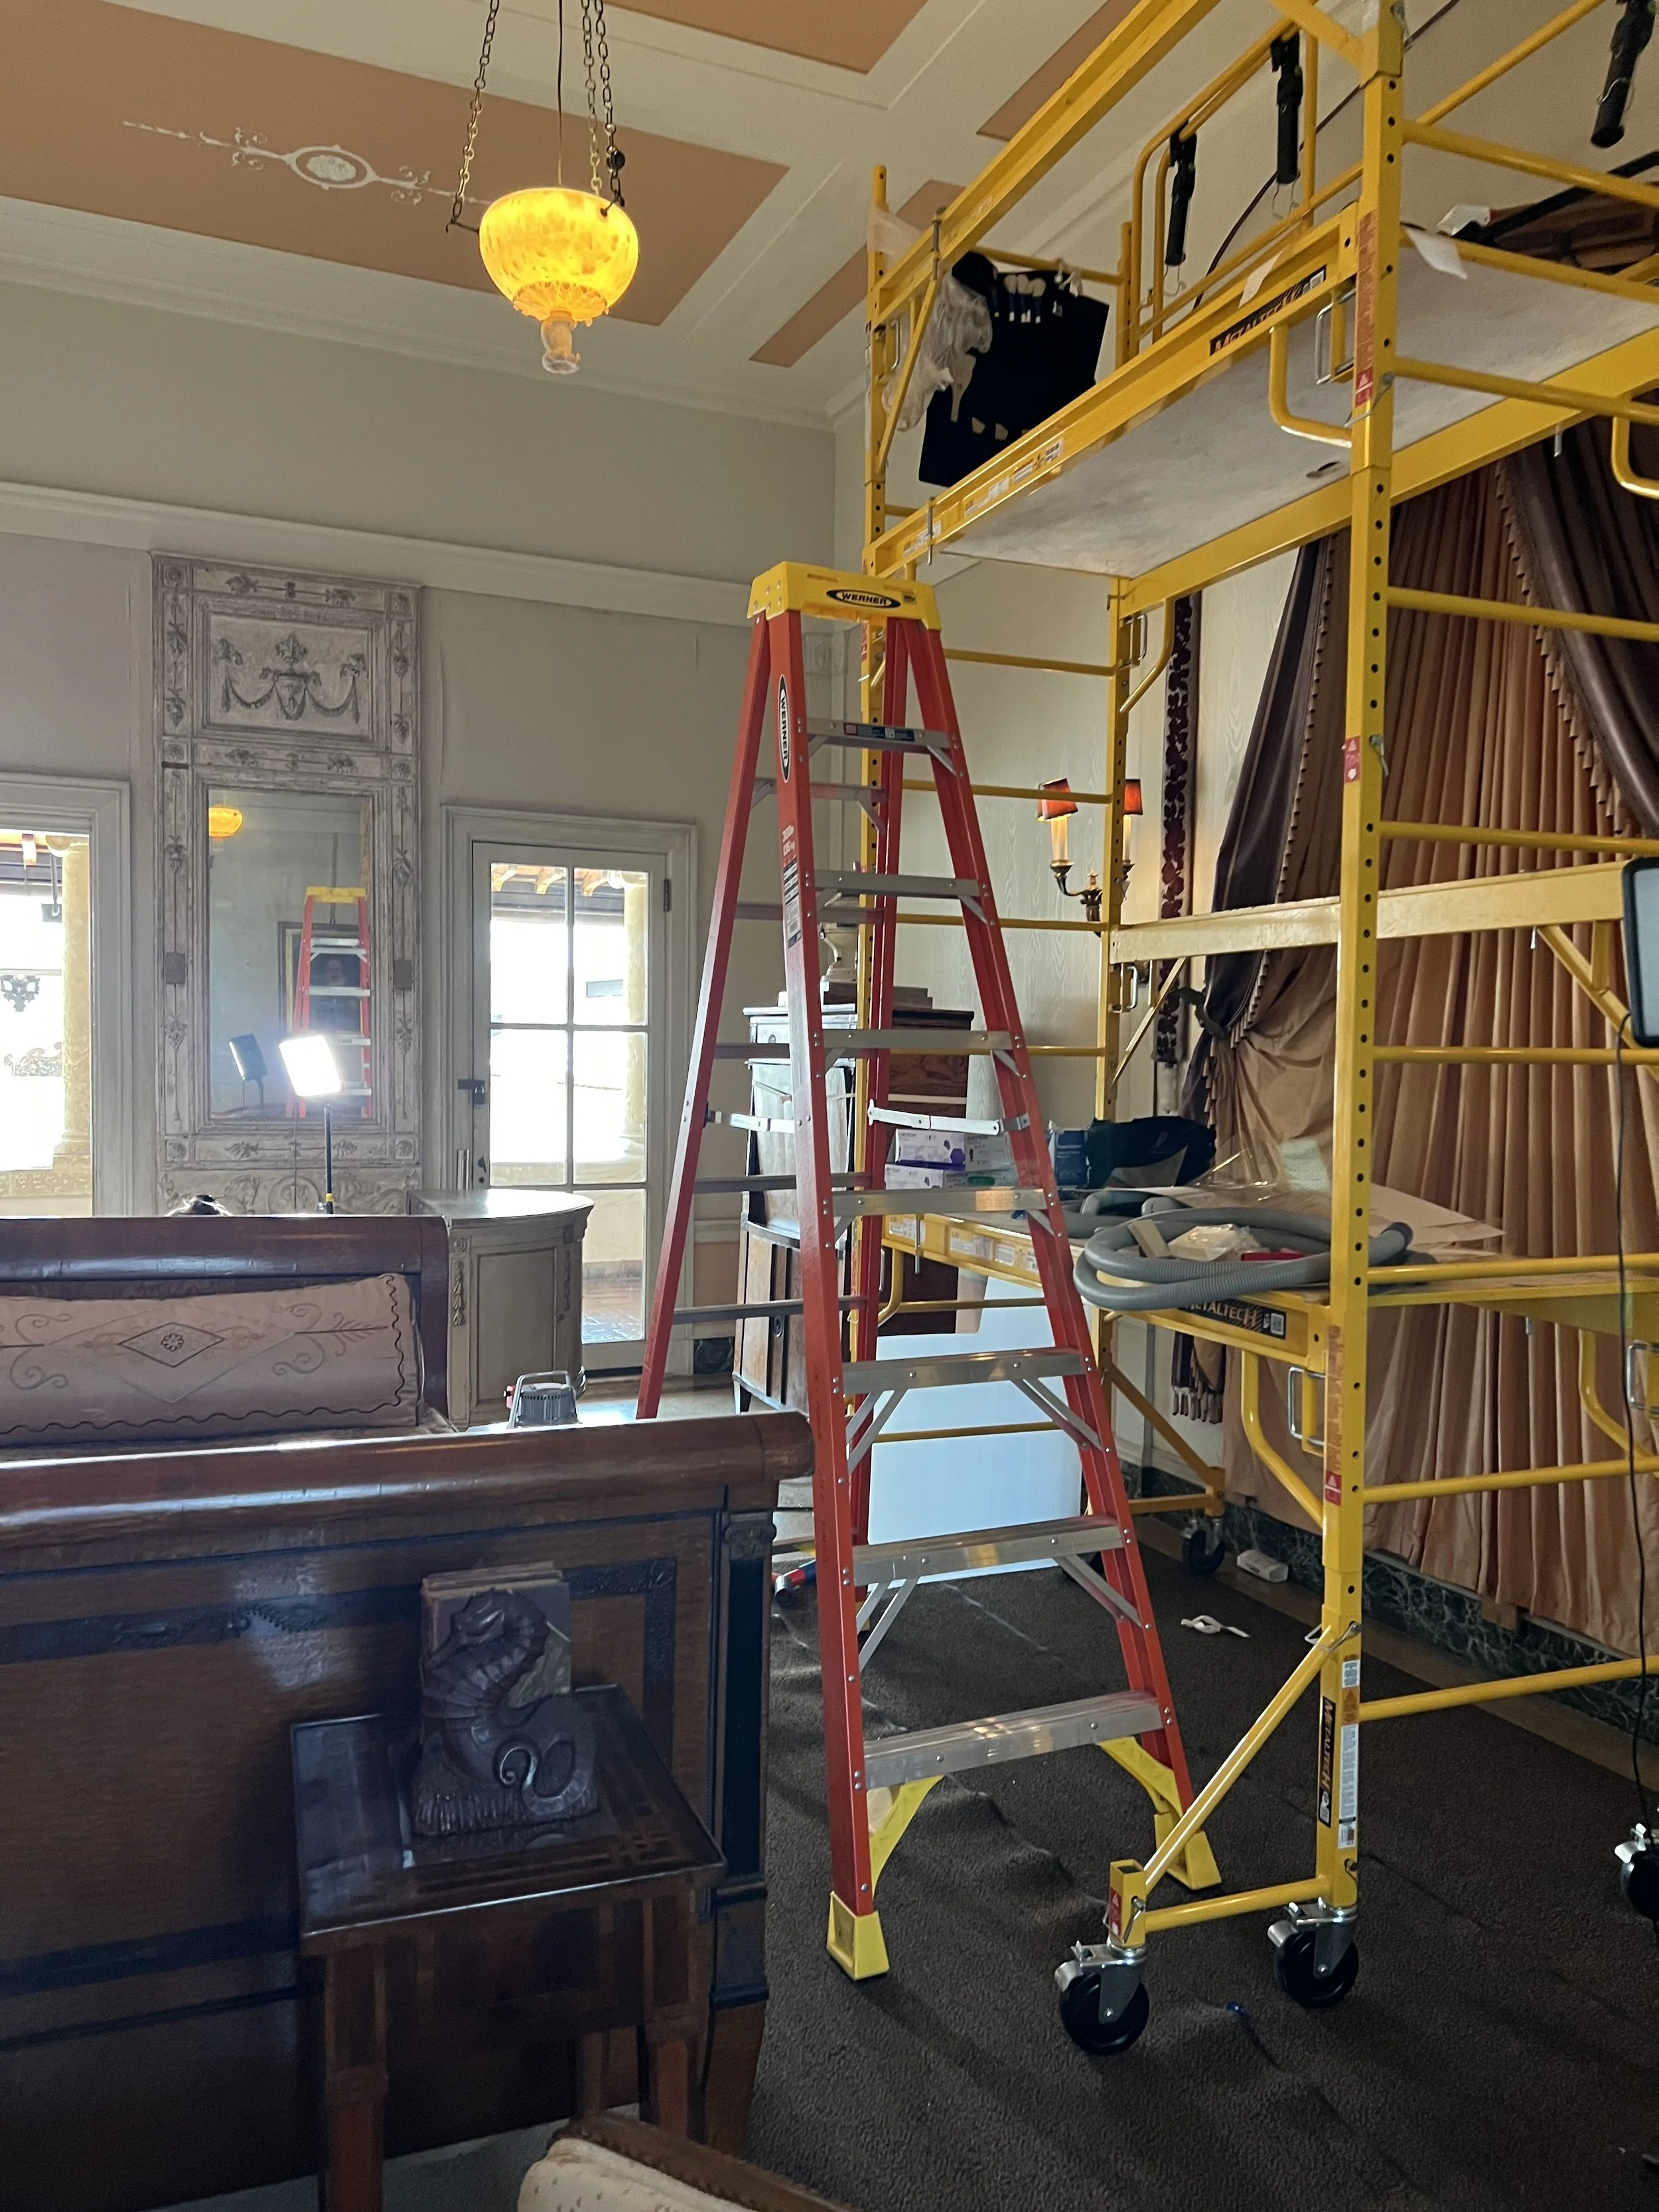
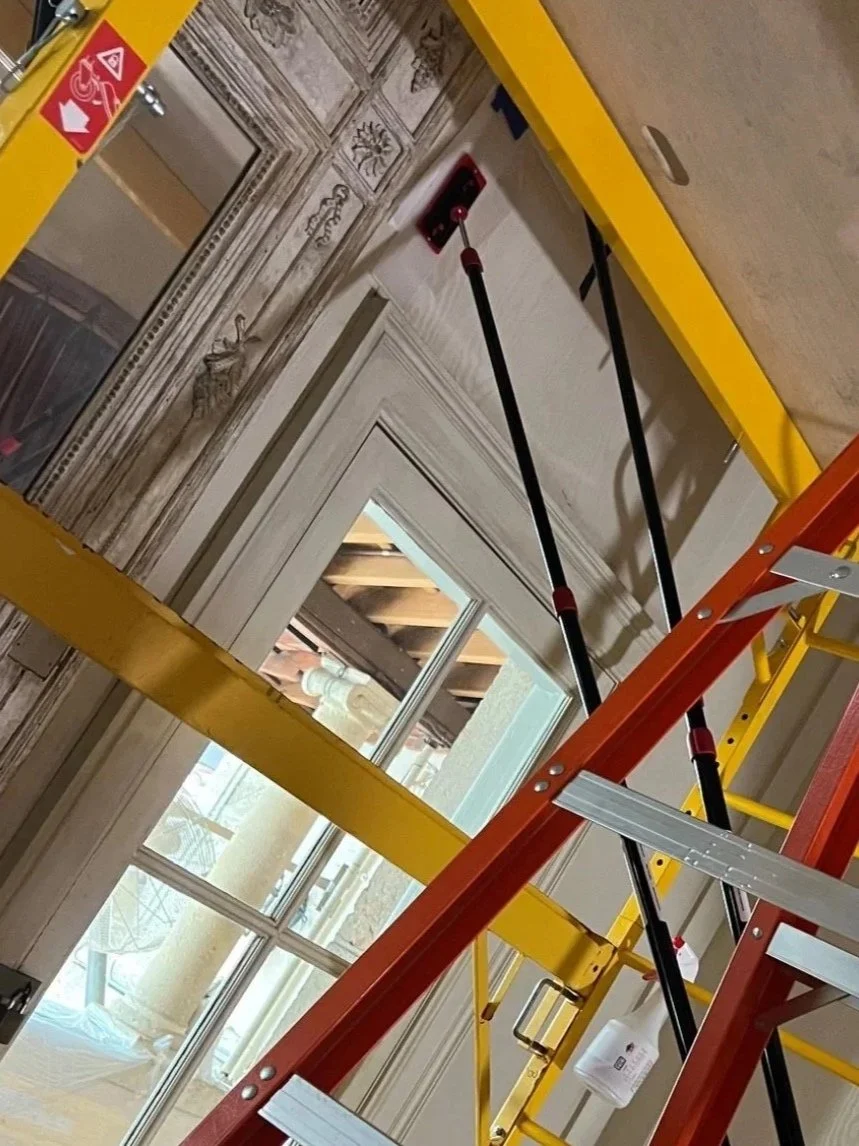
Each year, Vizcaya selects one room for intensive preventive conservation, involving the dismantling of the space and the installation of scaffolding to allow thorough cleaning, documentation, and treatment. This year’s project focused on the Manin Room. The work was especially critical since the Manin Room’s windows were later consolidated as part of hurricane preparedness, requiring the room’s condition to be stabilized and all objects to be assessed and relocated in advance.
Manin Room
Preventive care
-
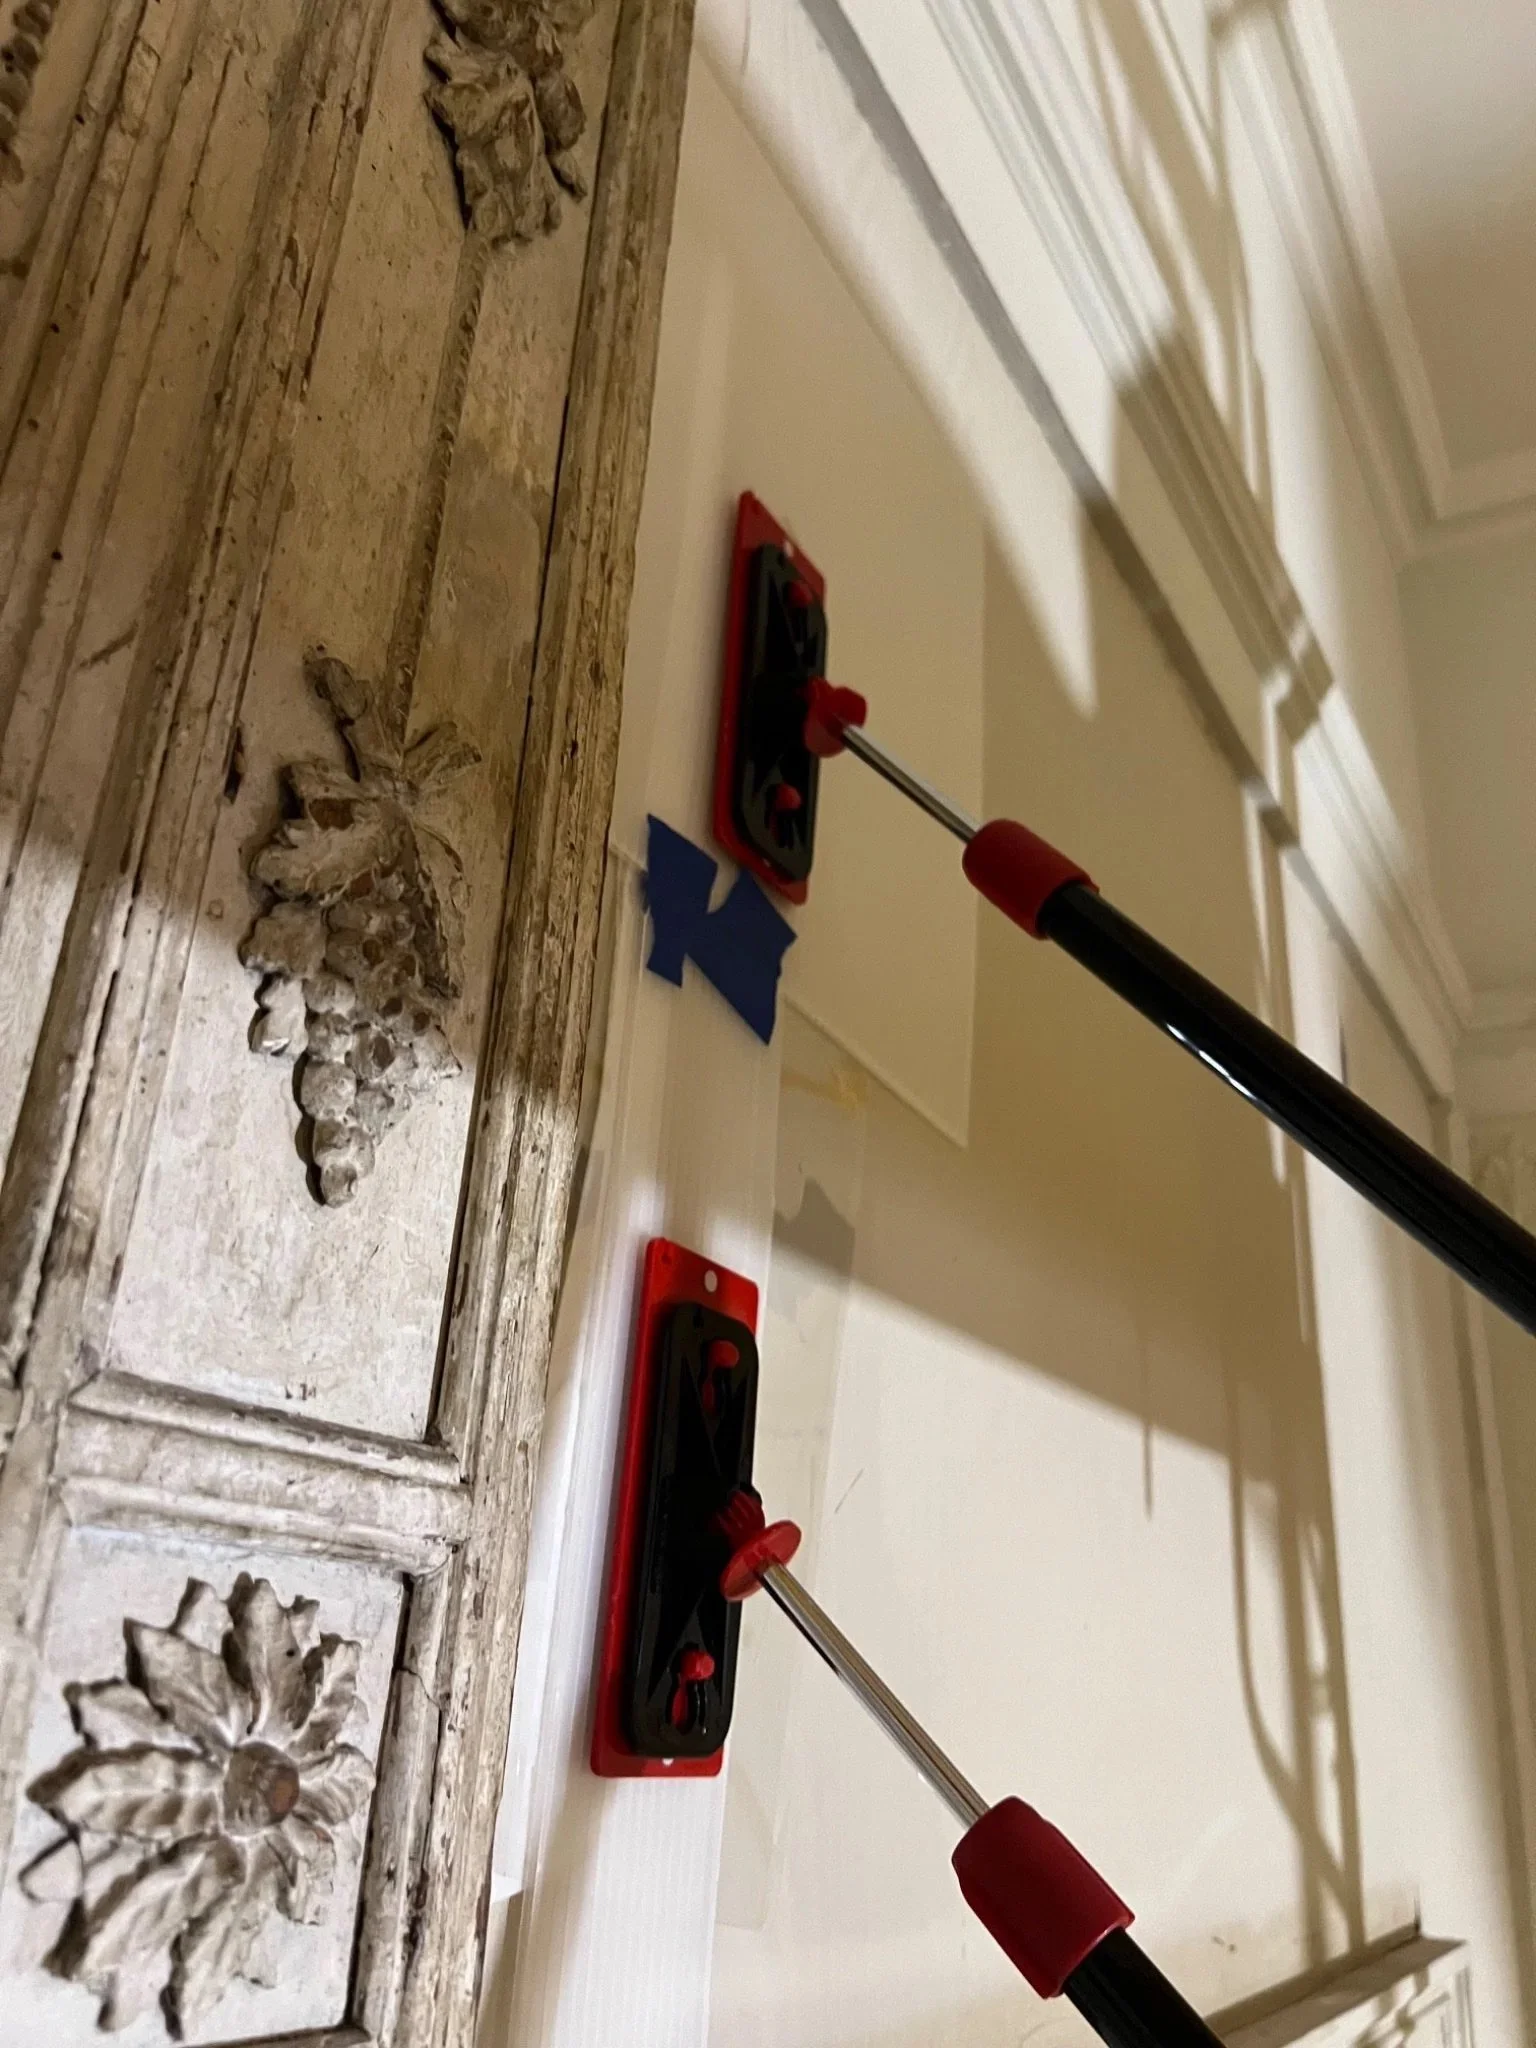
1. Inserting a humidification package (Mylar–dampened blotting paper–Hollytex) under the wallpaper, with an additional Mylar sheet placed on top of the wallpaper.
2. Use the hydraulic press with the head attached to a white plastic sheet to press the humidification packages and the wallpaper flat to the wall.
3. Remove the humidification packages. Press flat again with the hydraulic press and wait for a few hours or overnight.
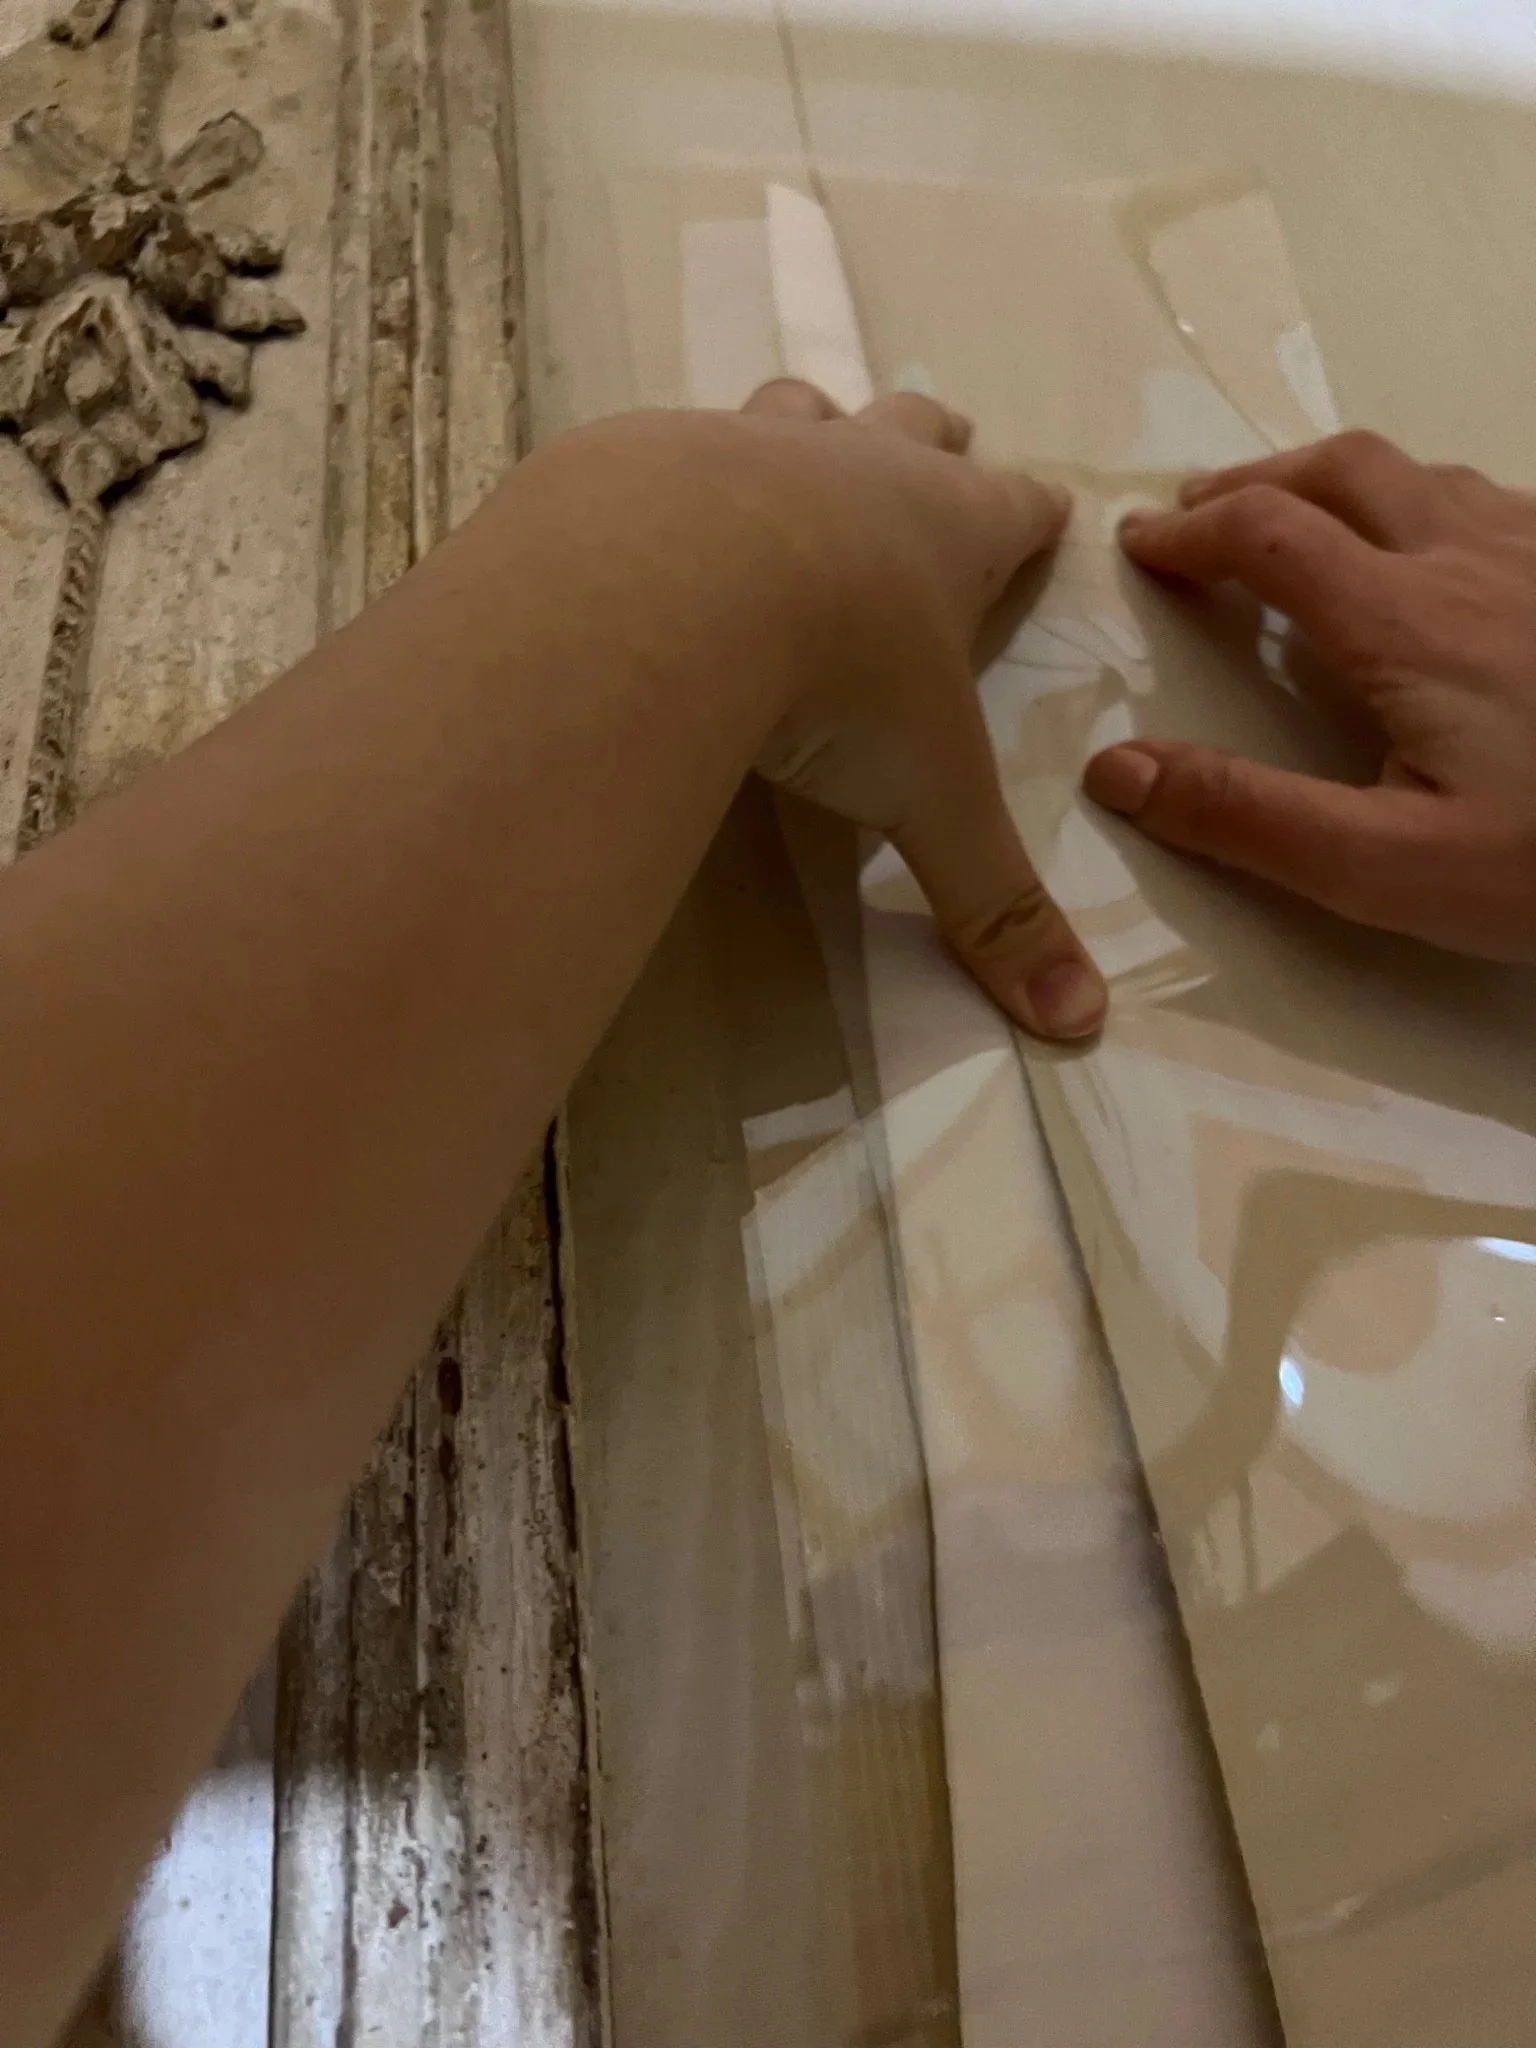
4. A mixture of Lascaux 498 HV + 360 HV adhesive applied between wallpaper and wall with brush/micro-syringe.
5. Area covered with Mylar and pressed under the hydraulic press. -
1. Mylar sheets
2. Blotting paper
3. Hollytex
4. Distilled water
5. Fine mist spray bottle
6. Lascaux 498 HV Acrylic Adhesive
7. Lascaux 360 HV Acrylic Adhesive
8. Fine brushes / micro-syringes
9. Hydraulic press with white plastic sheet
10. Sandbag weights
11. Scaffolding
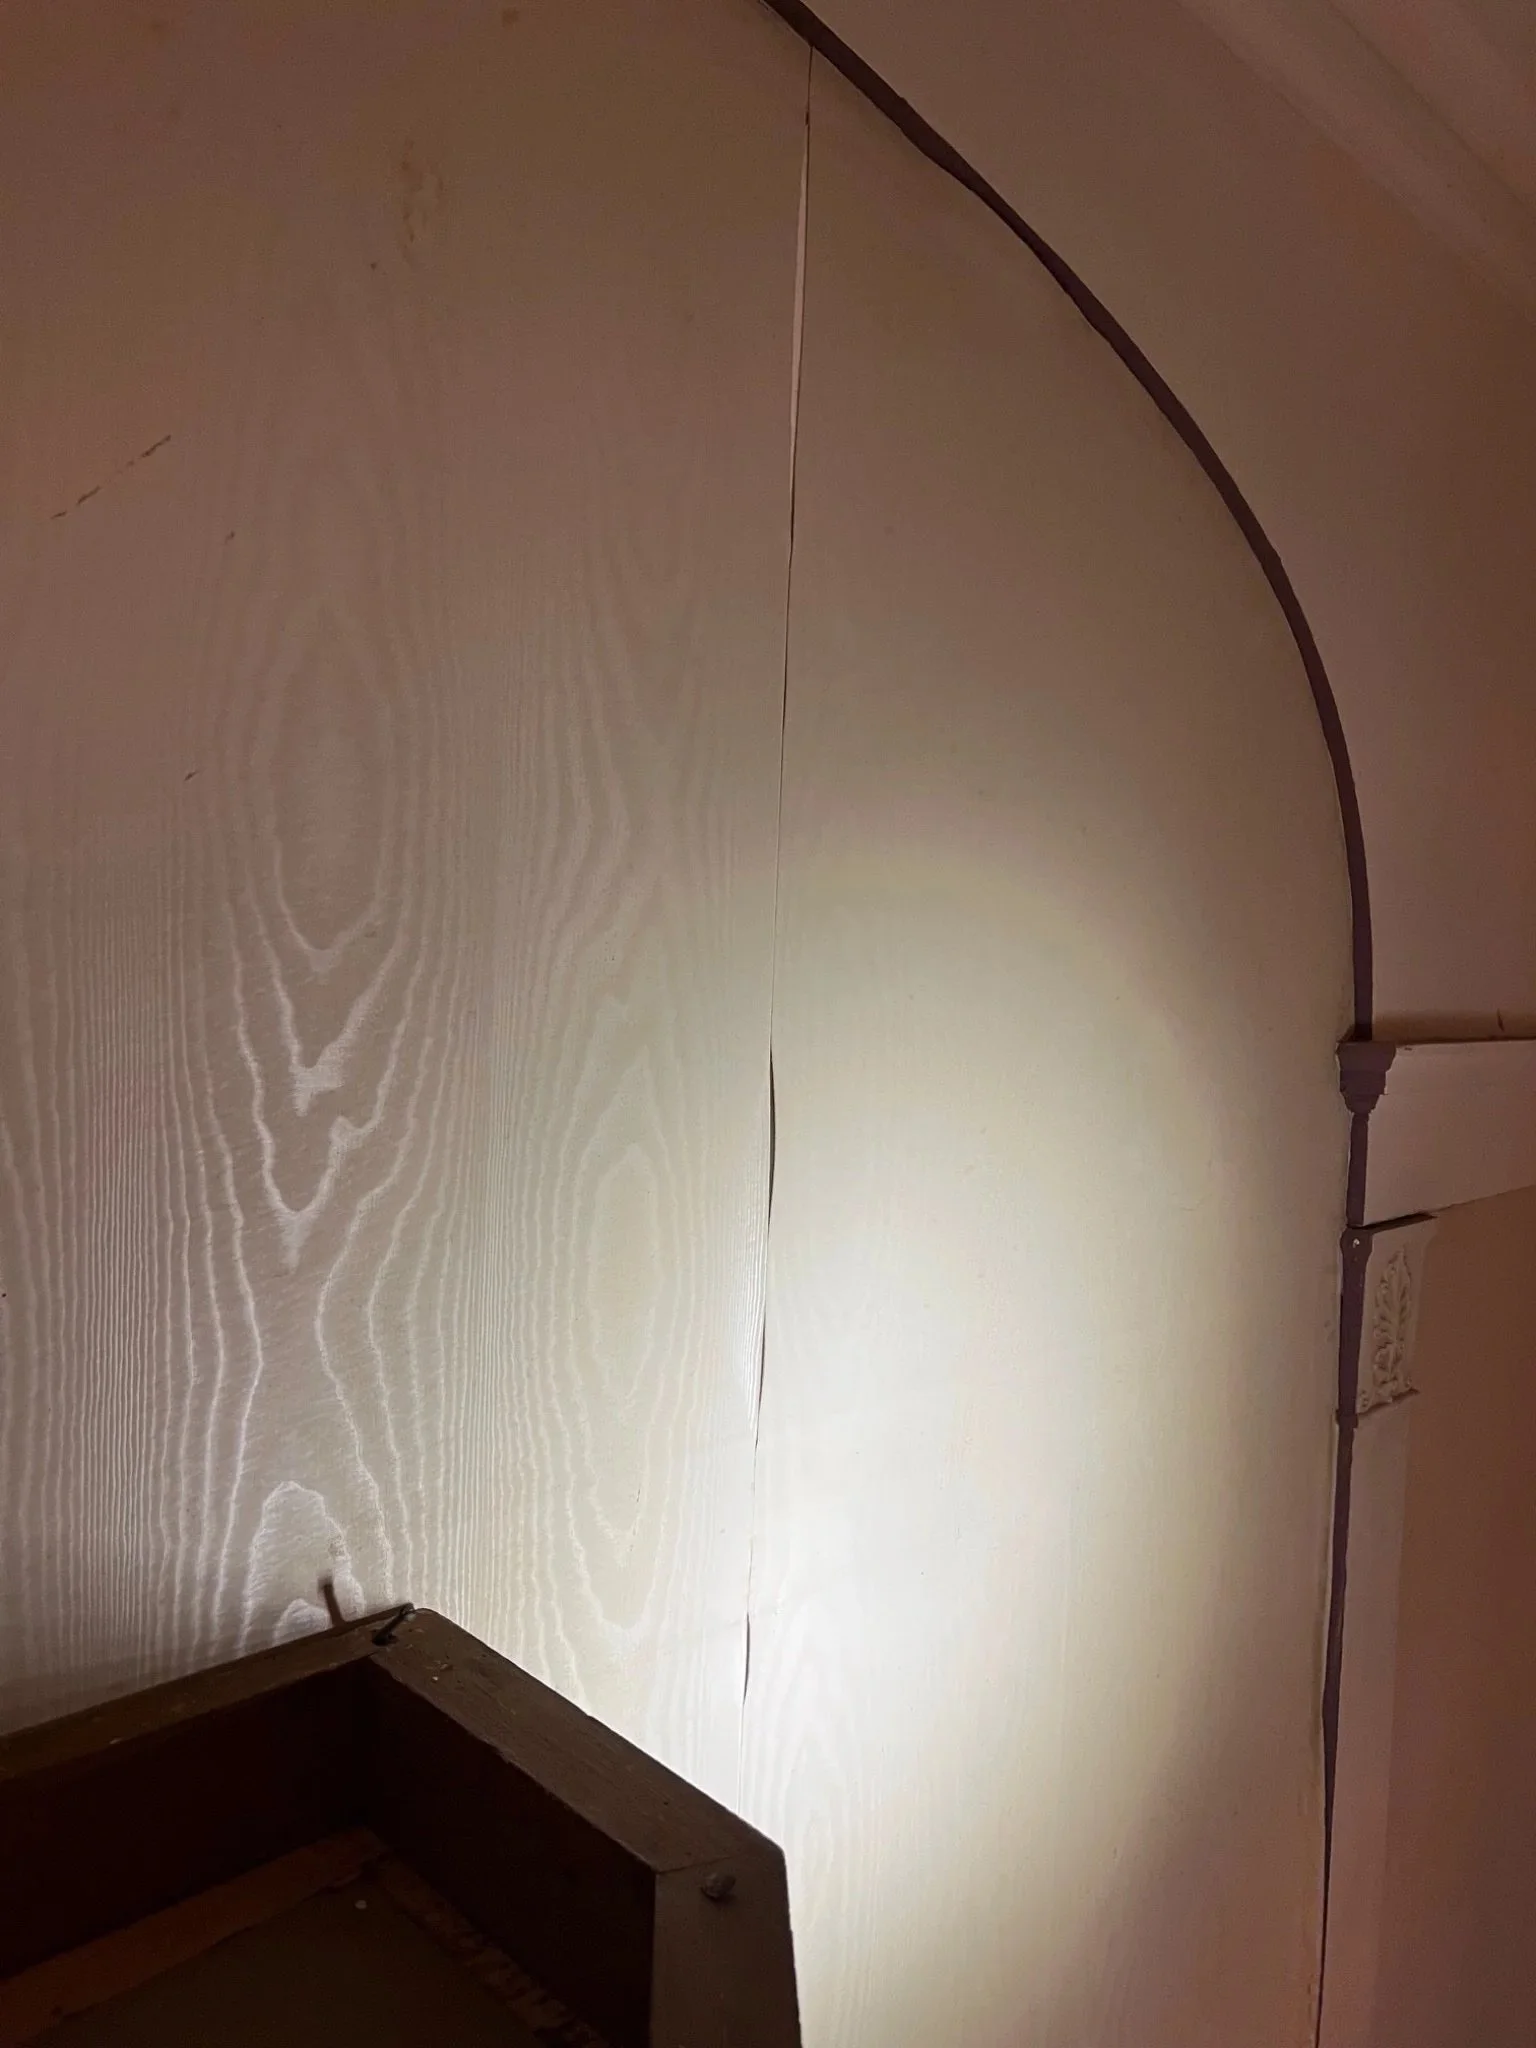
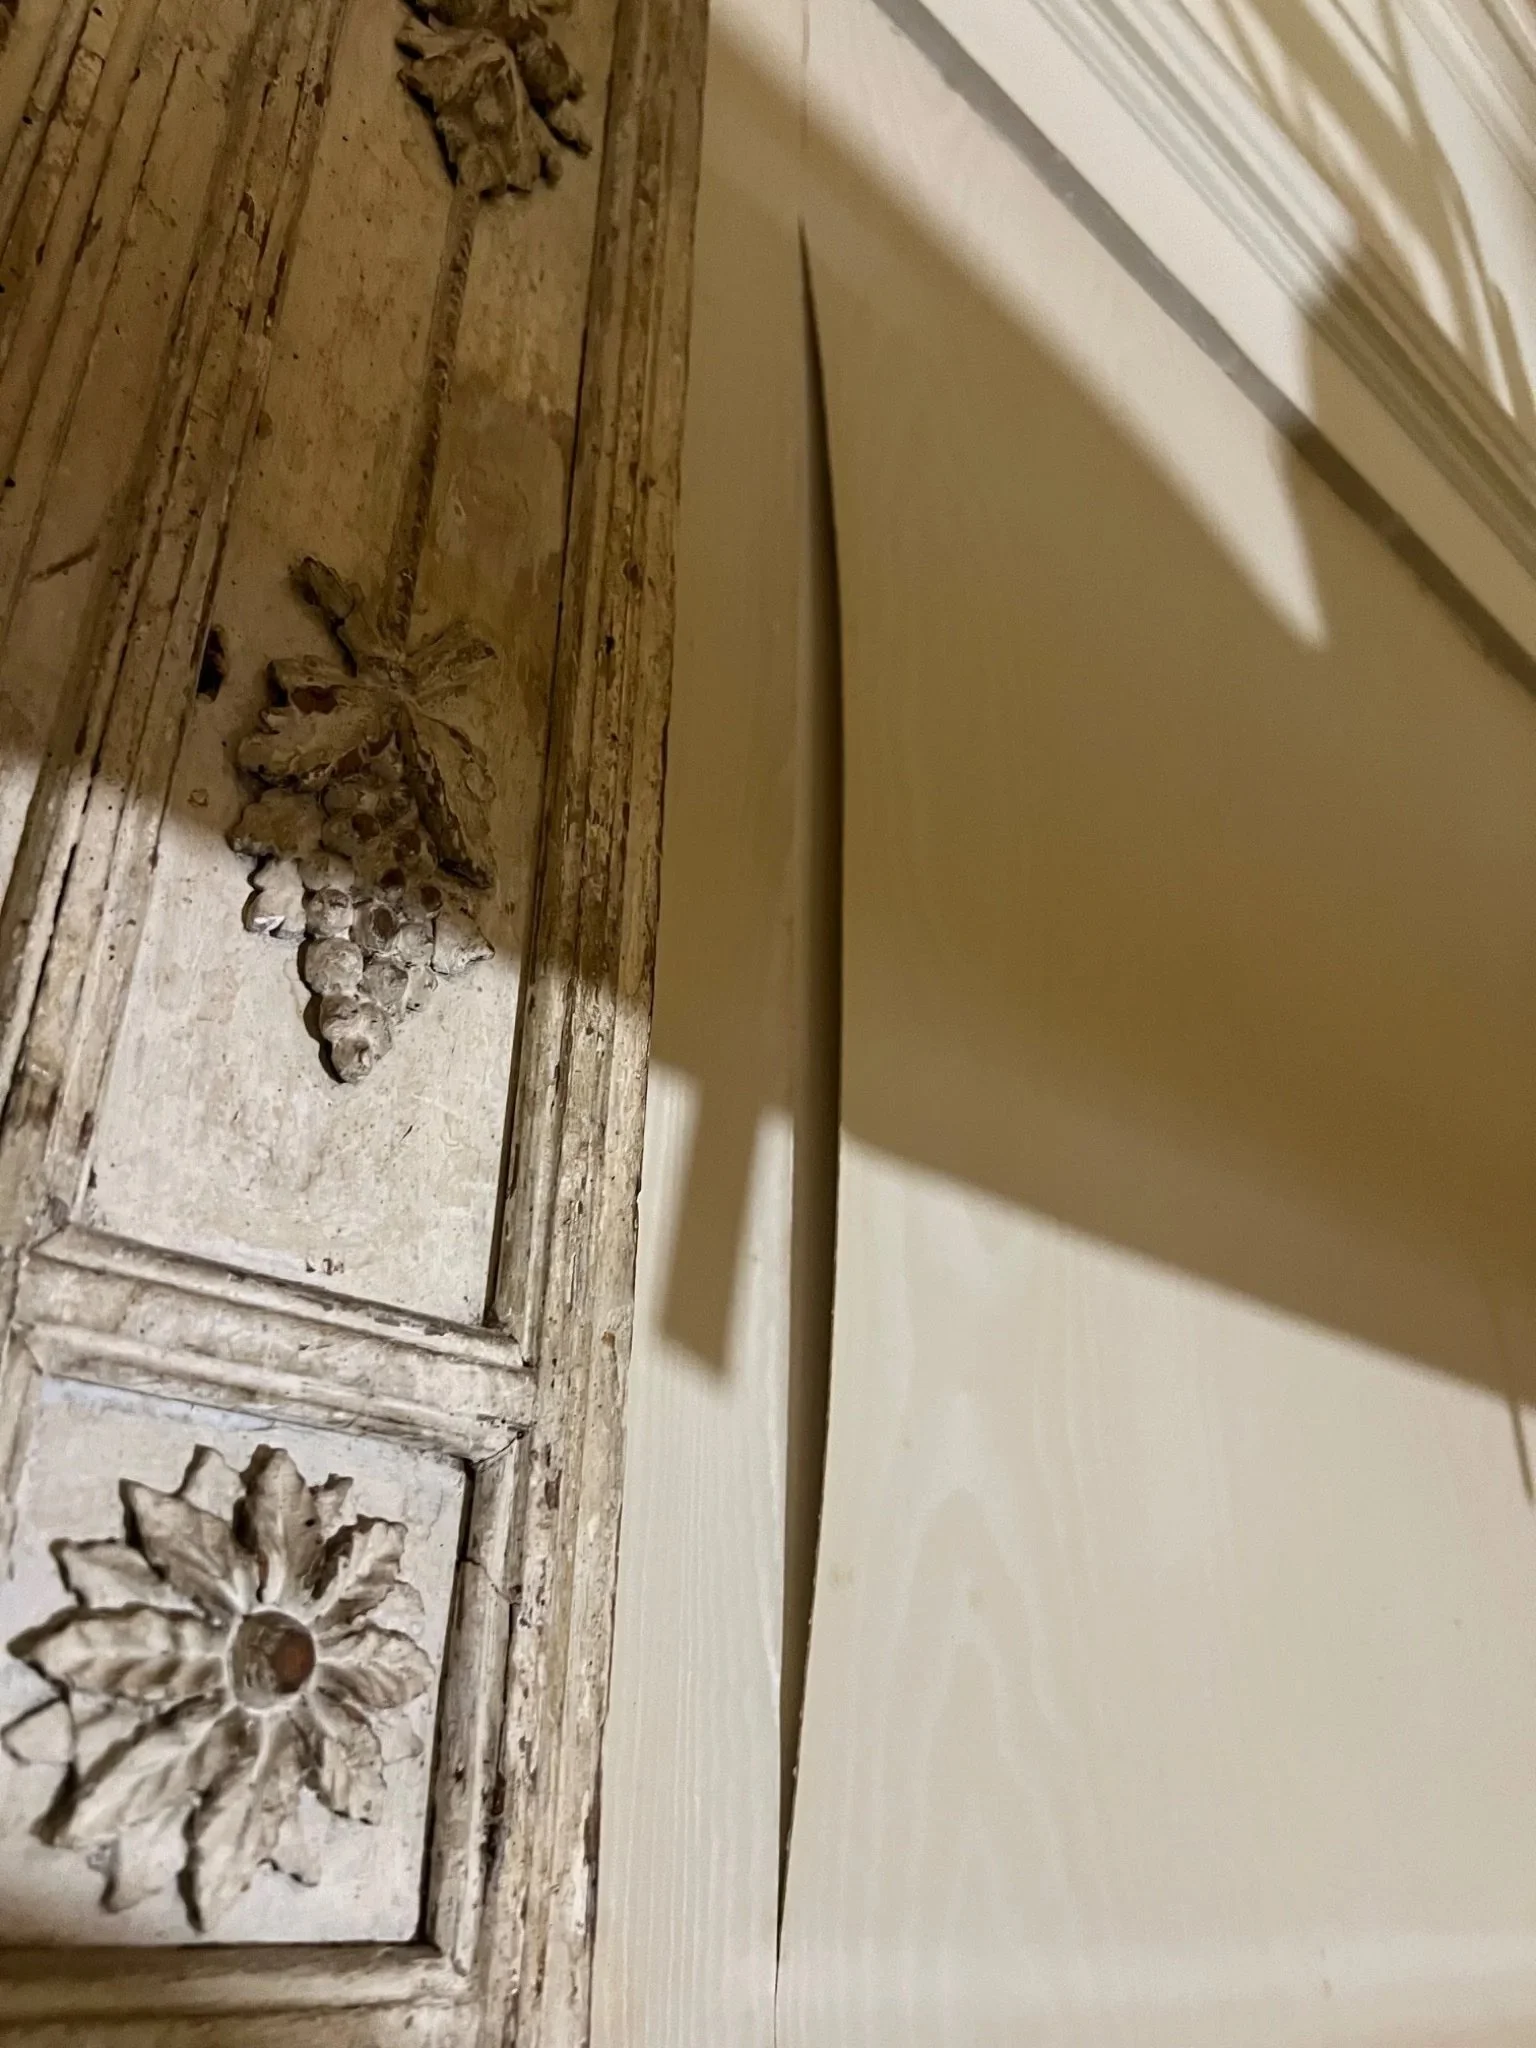
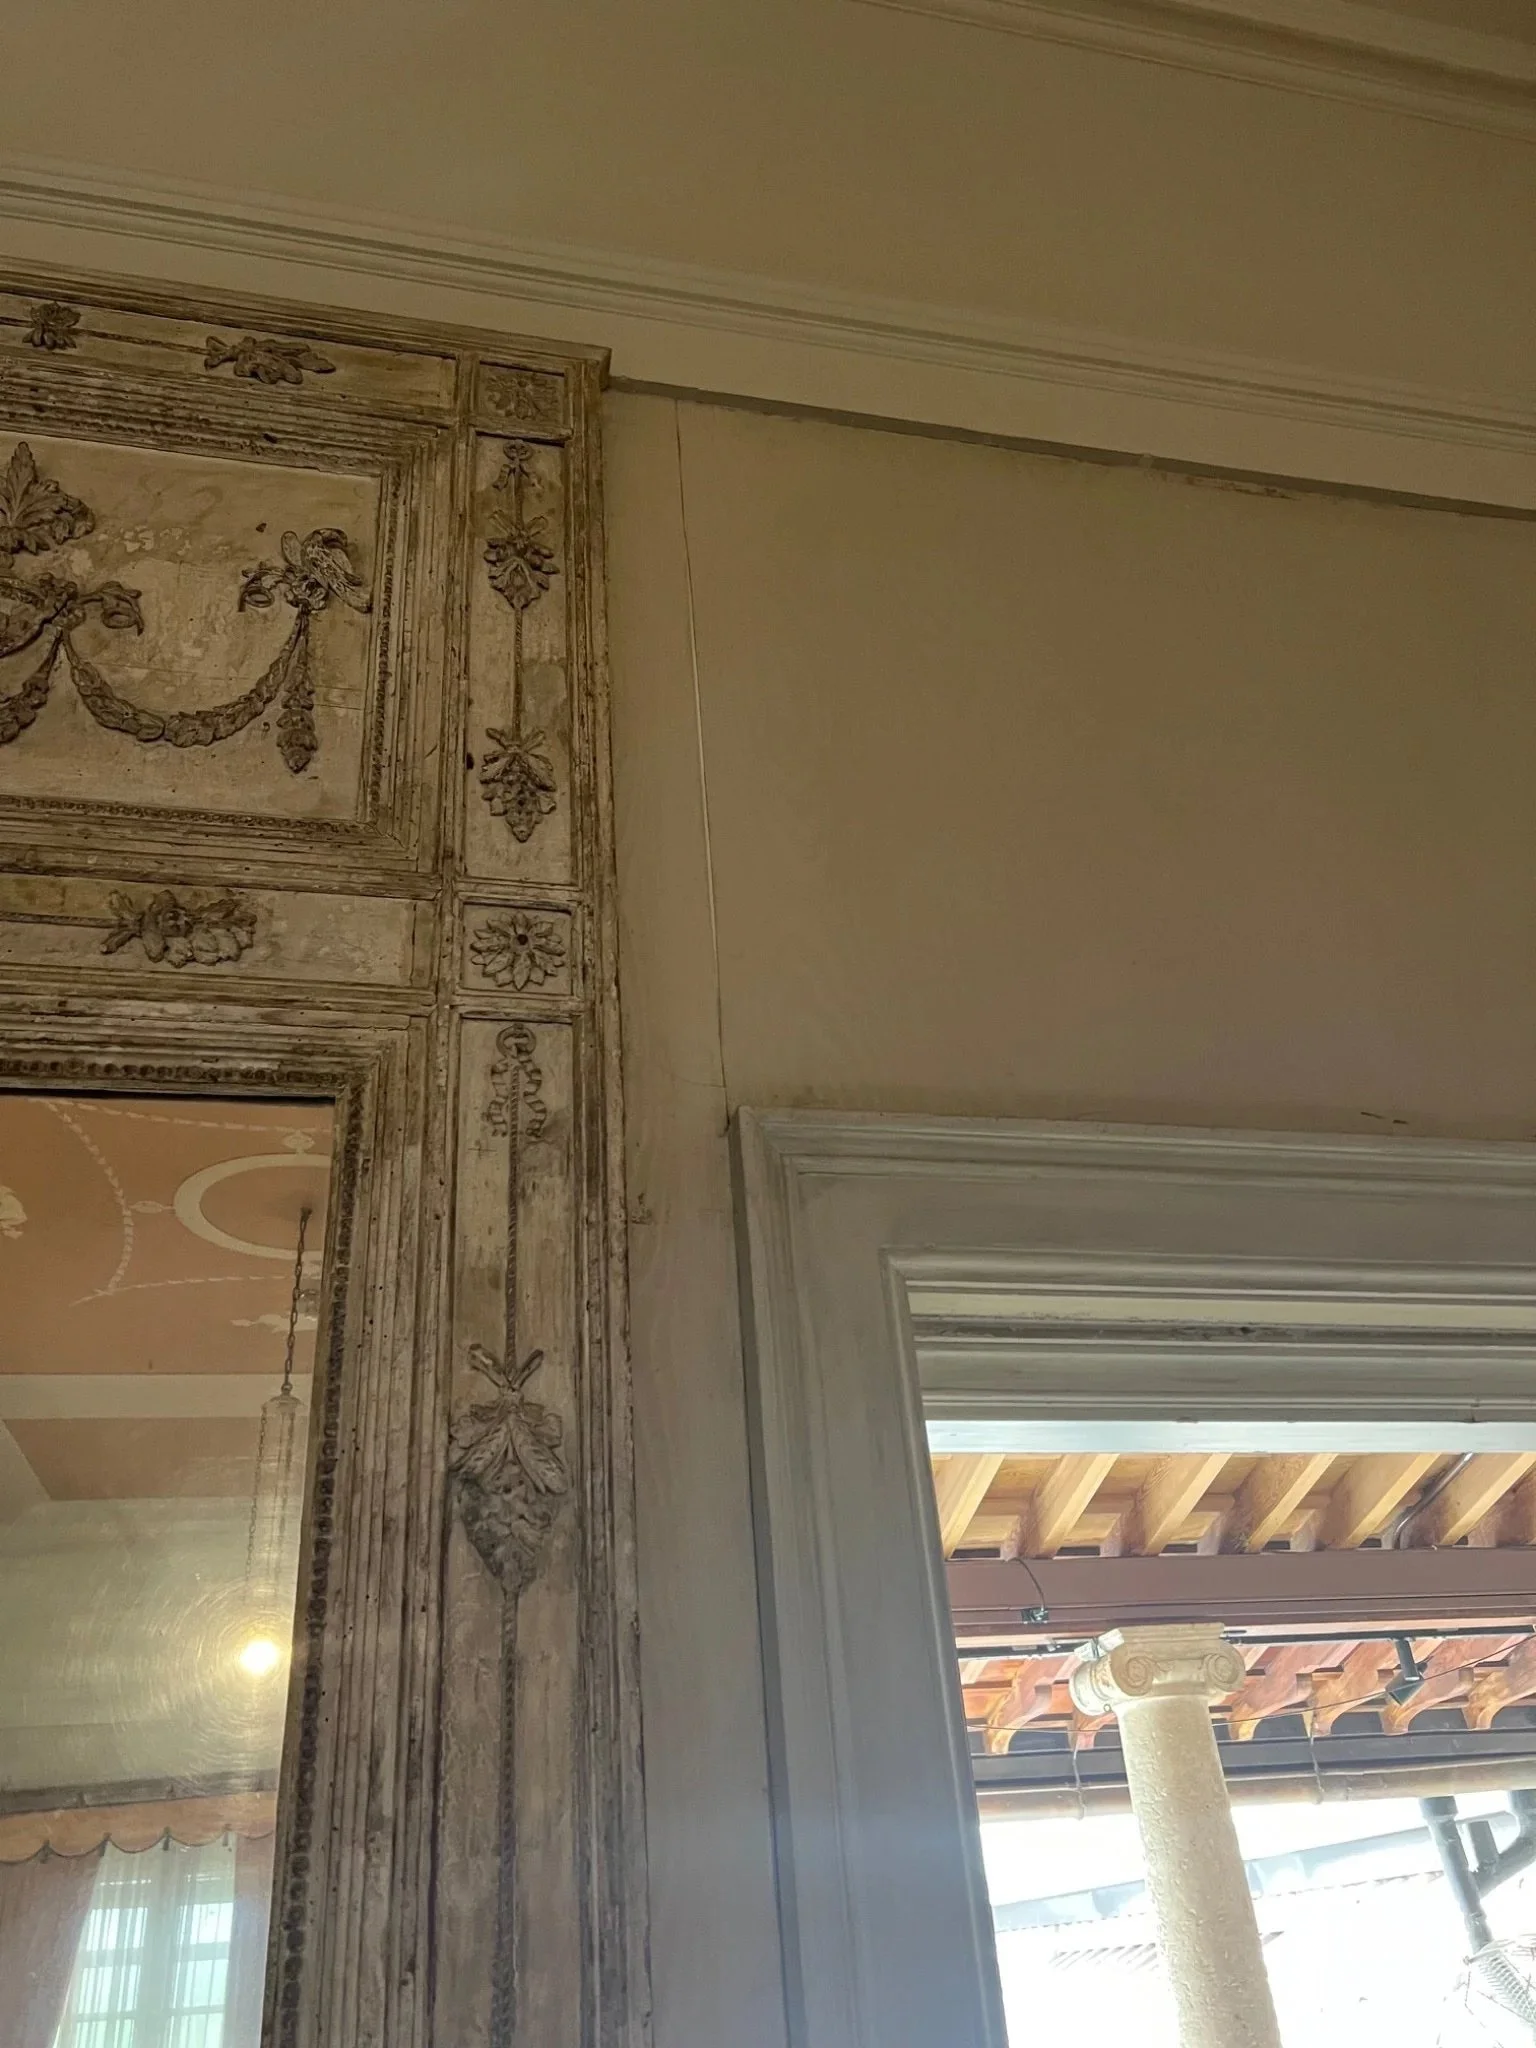
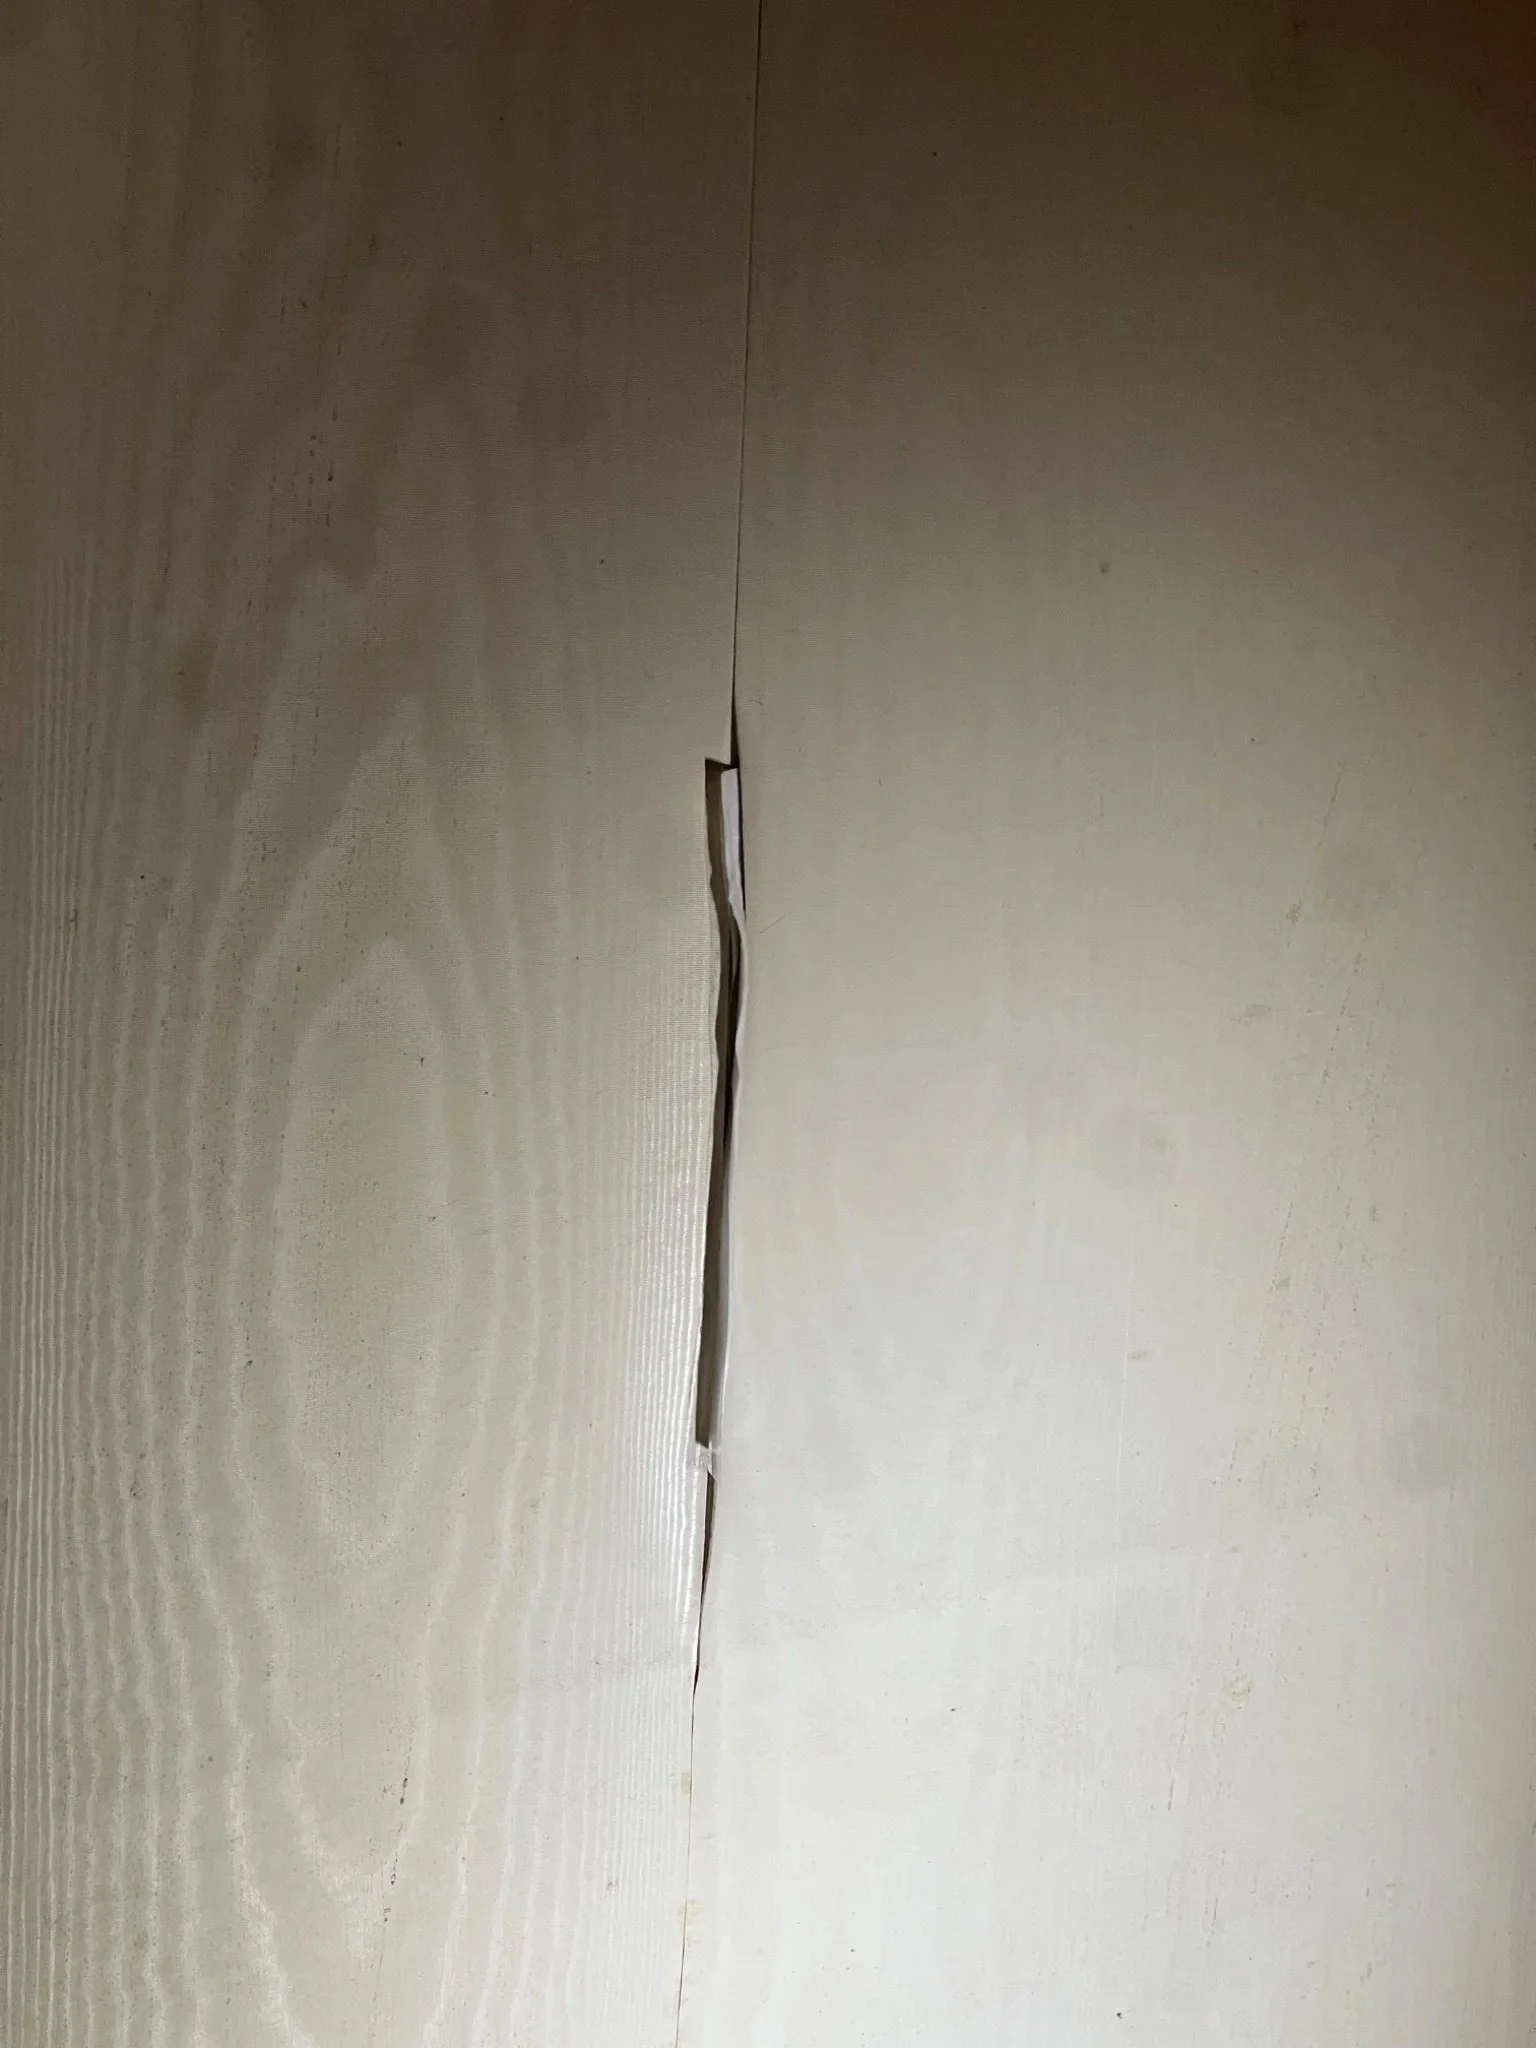
The wallpaper is mainly in stable condition, structure-wise. Localized issues are present along several edges, where the wallpaper shows curling and partial to complete detachment from the wall. These conditions suggest weakening of the adhesive, likely related to environmental factors (humidity and temperature fluctuations) or insufficient original bonding. In some detached areas, fragments of plaster are now adhered to the reverse of the wallpaper. The detached sections have also undergone shrinkage. Along some edges near room corners, active white mold is present in continuous strips, making the printed pattern noticeably faded and visually disrupted. Several areas of wallpaper in the room went under treatment. This portfolio demonstrates 2 examples.
I assisted conservator Ella Andrews in this treatment.
Wallpaper Conservation
Before & After Photos
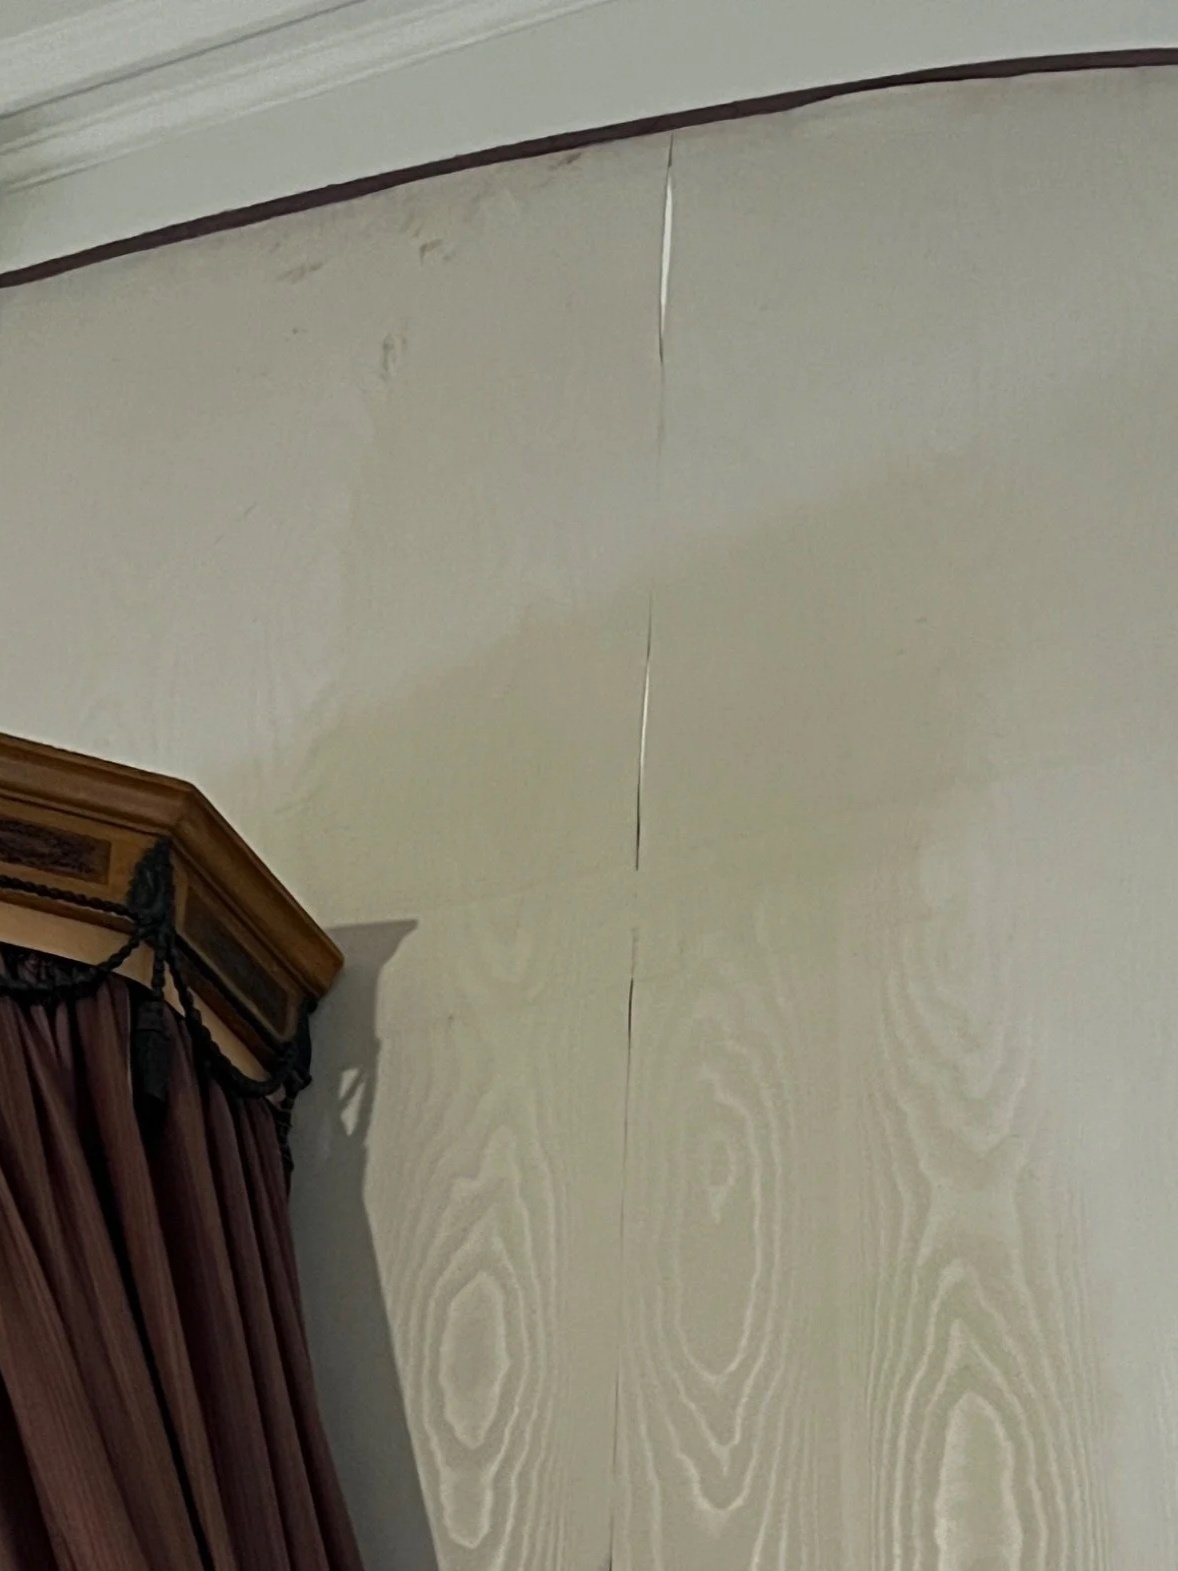
Treatment A - Above the canopy: Before
(Photo taken on 08/20/2025)
Treatment A - Above the canopy: After
(Photo taken on 09/18/2025)
Treatment B - Above the main door: Before
(Photo taken on 08/27/2025)
Treatment B - Above the main door: After
(Photo taken on 09/18/2025)
During Treatment
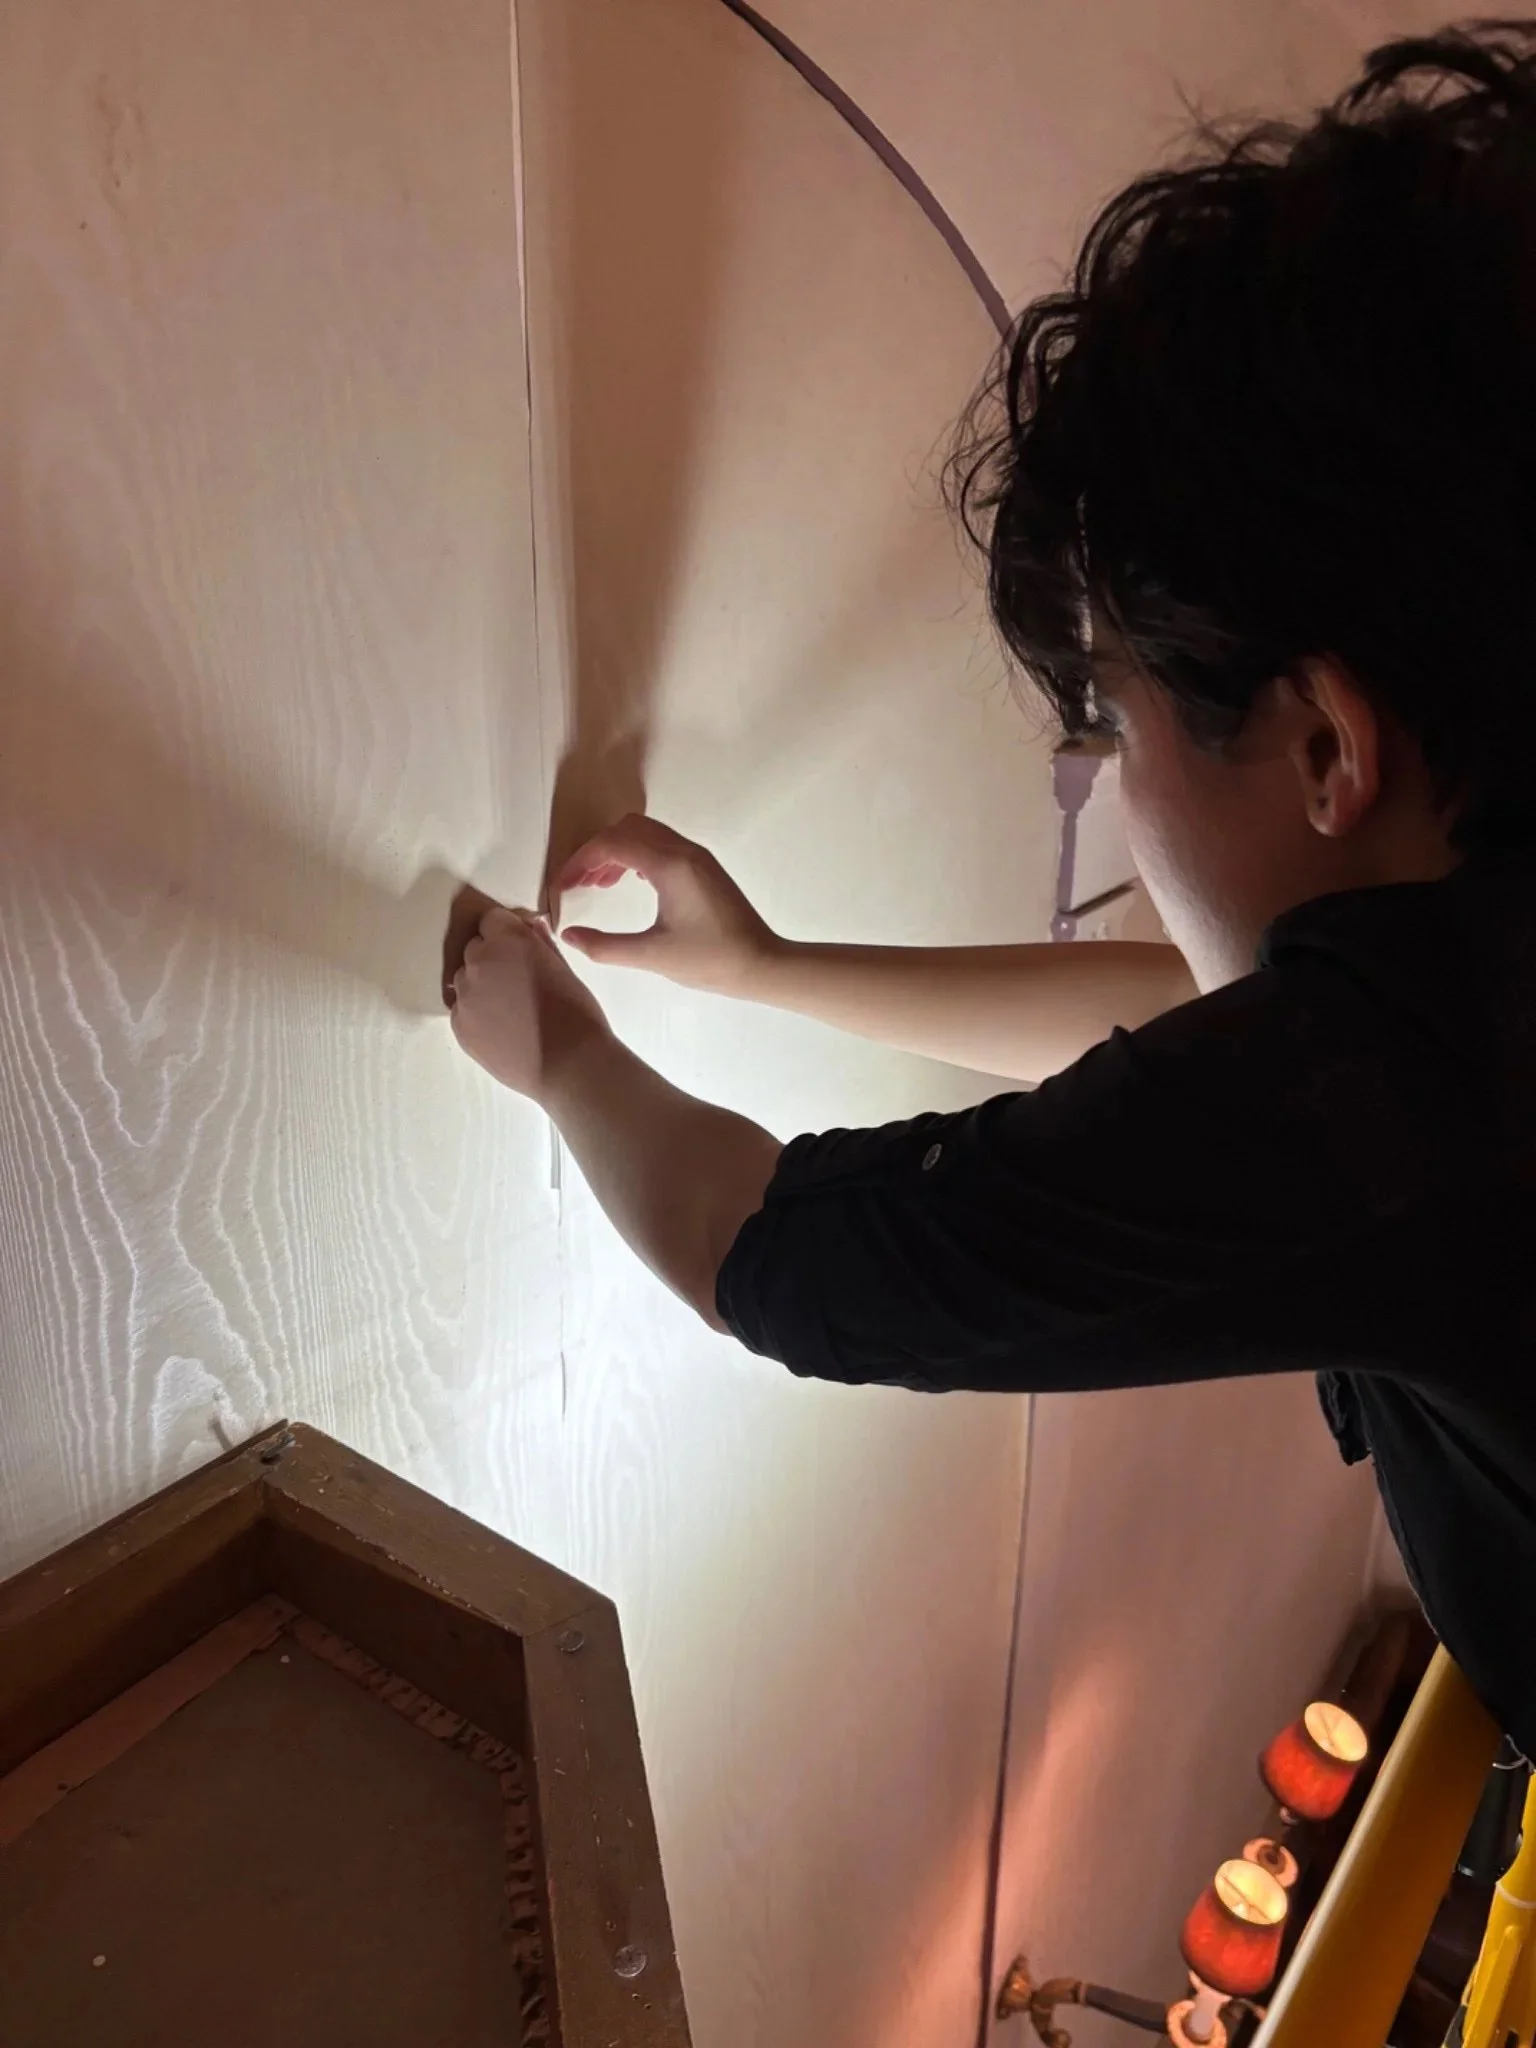
Treatment A - Customize humidification package (Photo taken on 08/20/2025)

Treatment A - Insert humidification package (Photo taken on 08/20/2025 by Stephania Marino)

Treatment A - Hydraulic press (Photo taken on 08/20/2025)
Treatment A - Apply adhesive (Photo taken on 08/20/2025 by Ella Andrews)
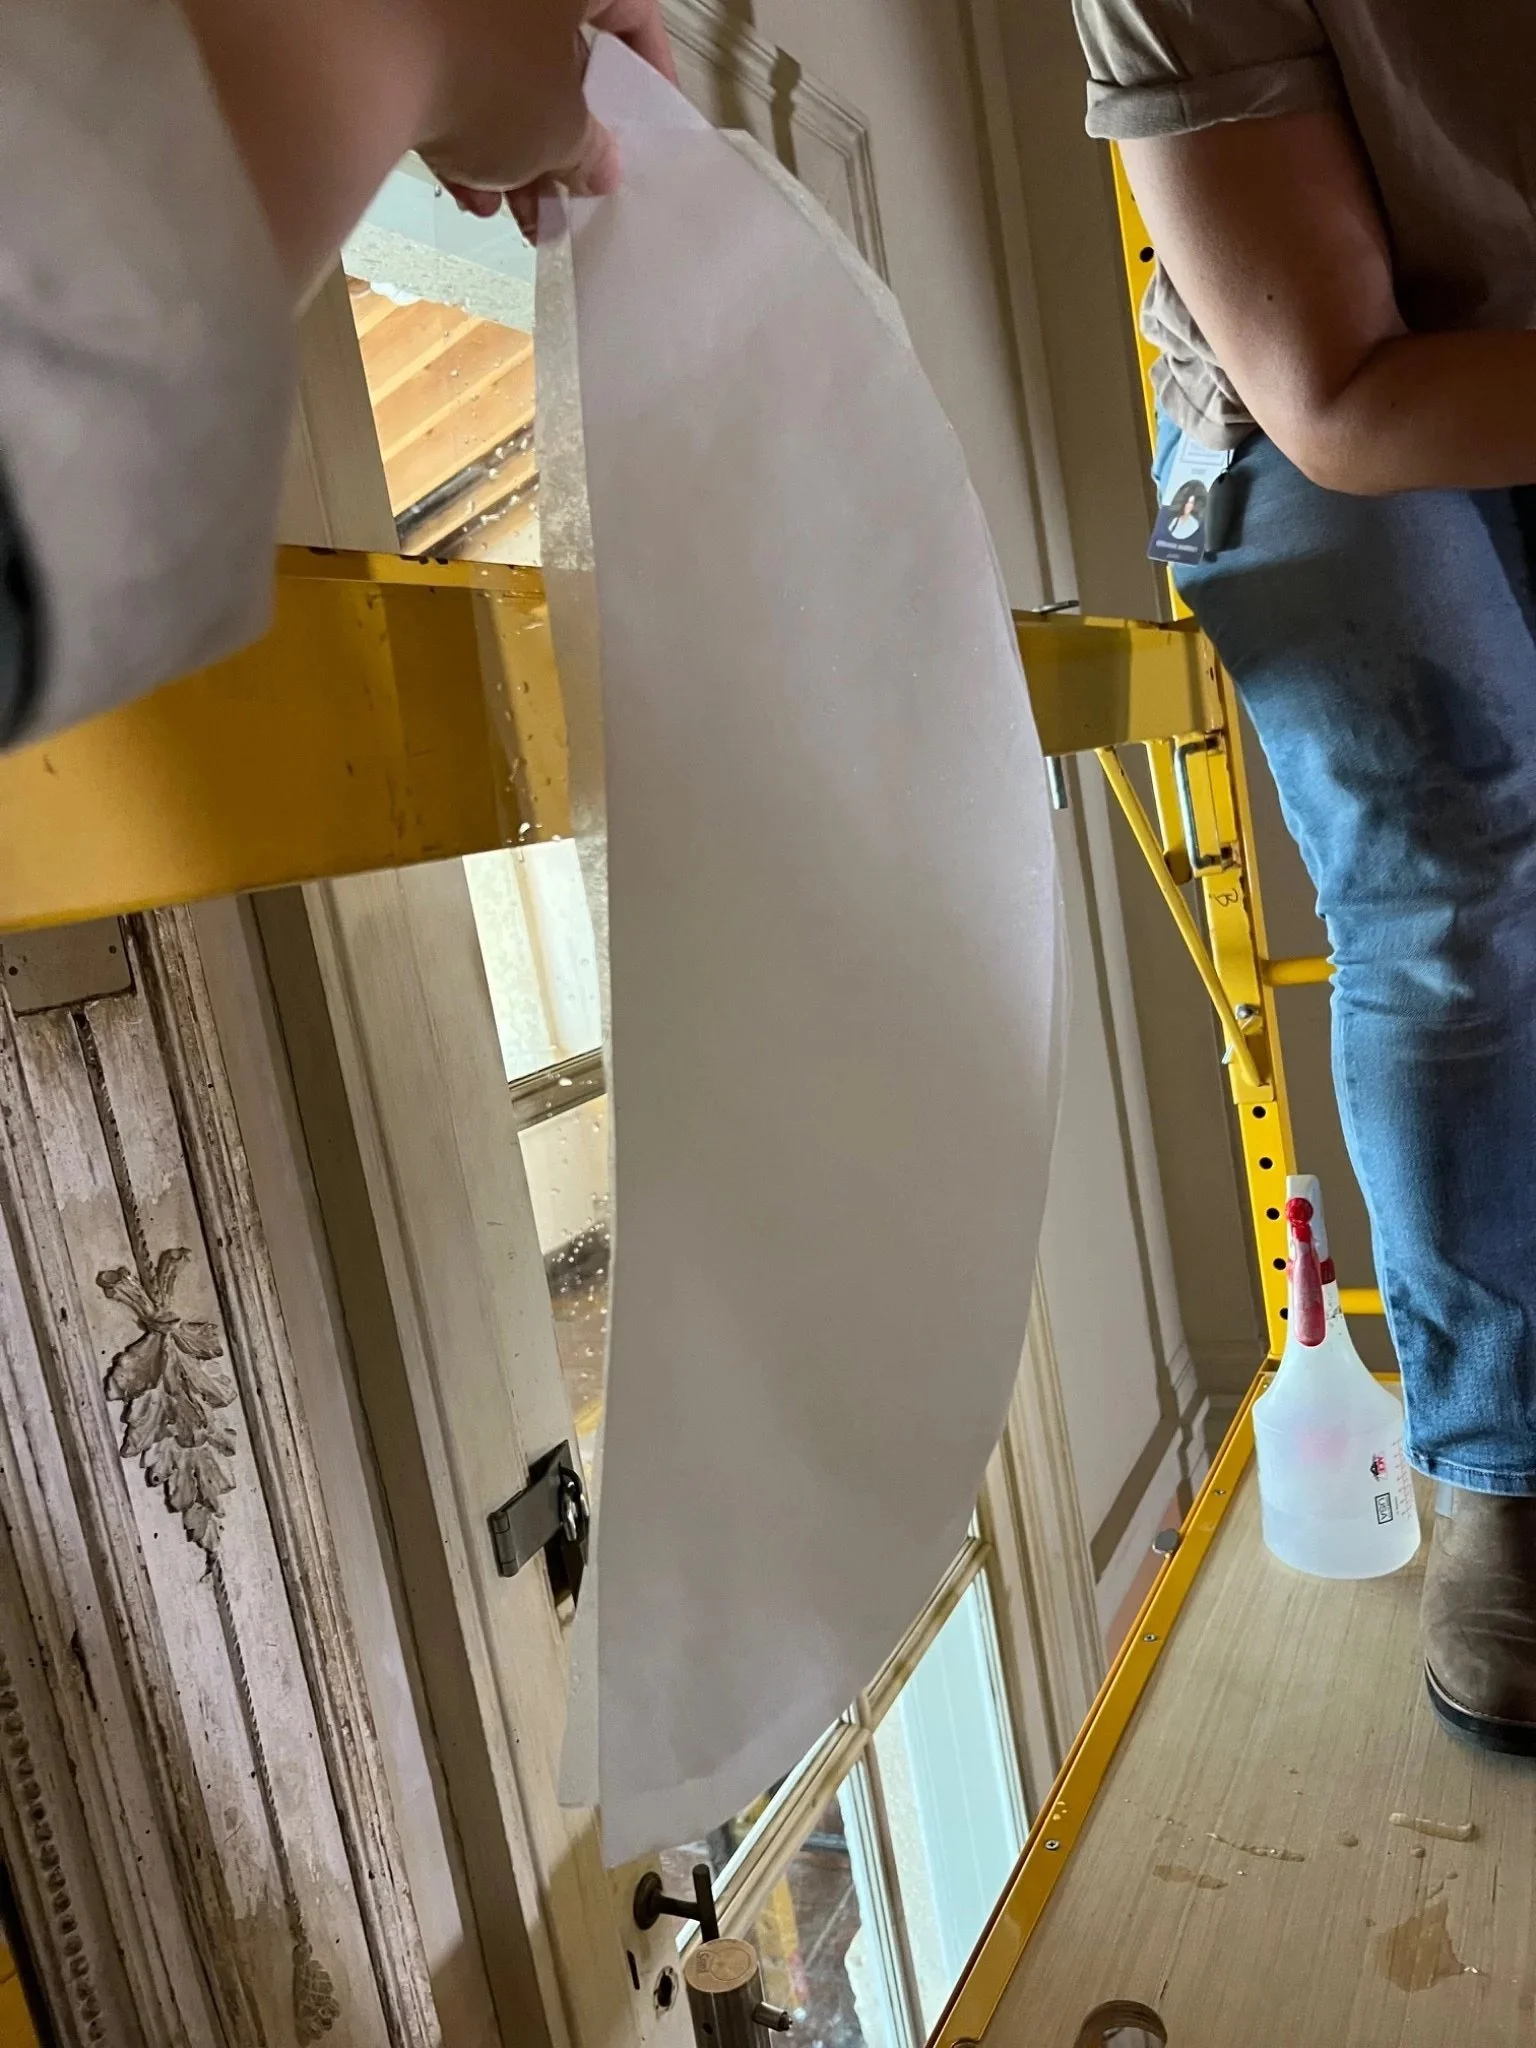
Treatment B - Customize humidification package (Photo taken on 08/27/2025)
Treatment B - Insert humidification package (Photo taken on 08/27/2025 by Stefania Marino)
Treatment B - Hydraulic press (Photo taken on 08/27/2025)
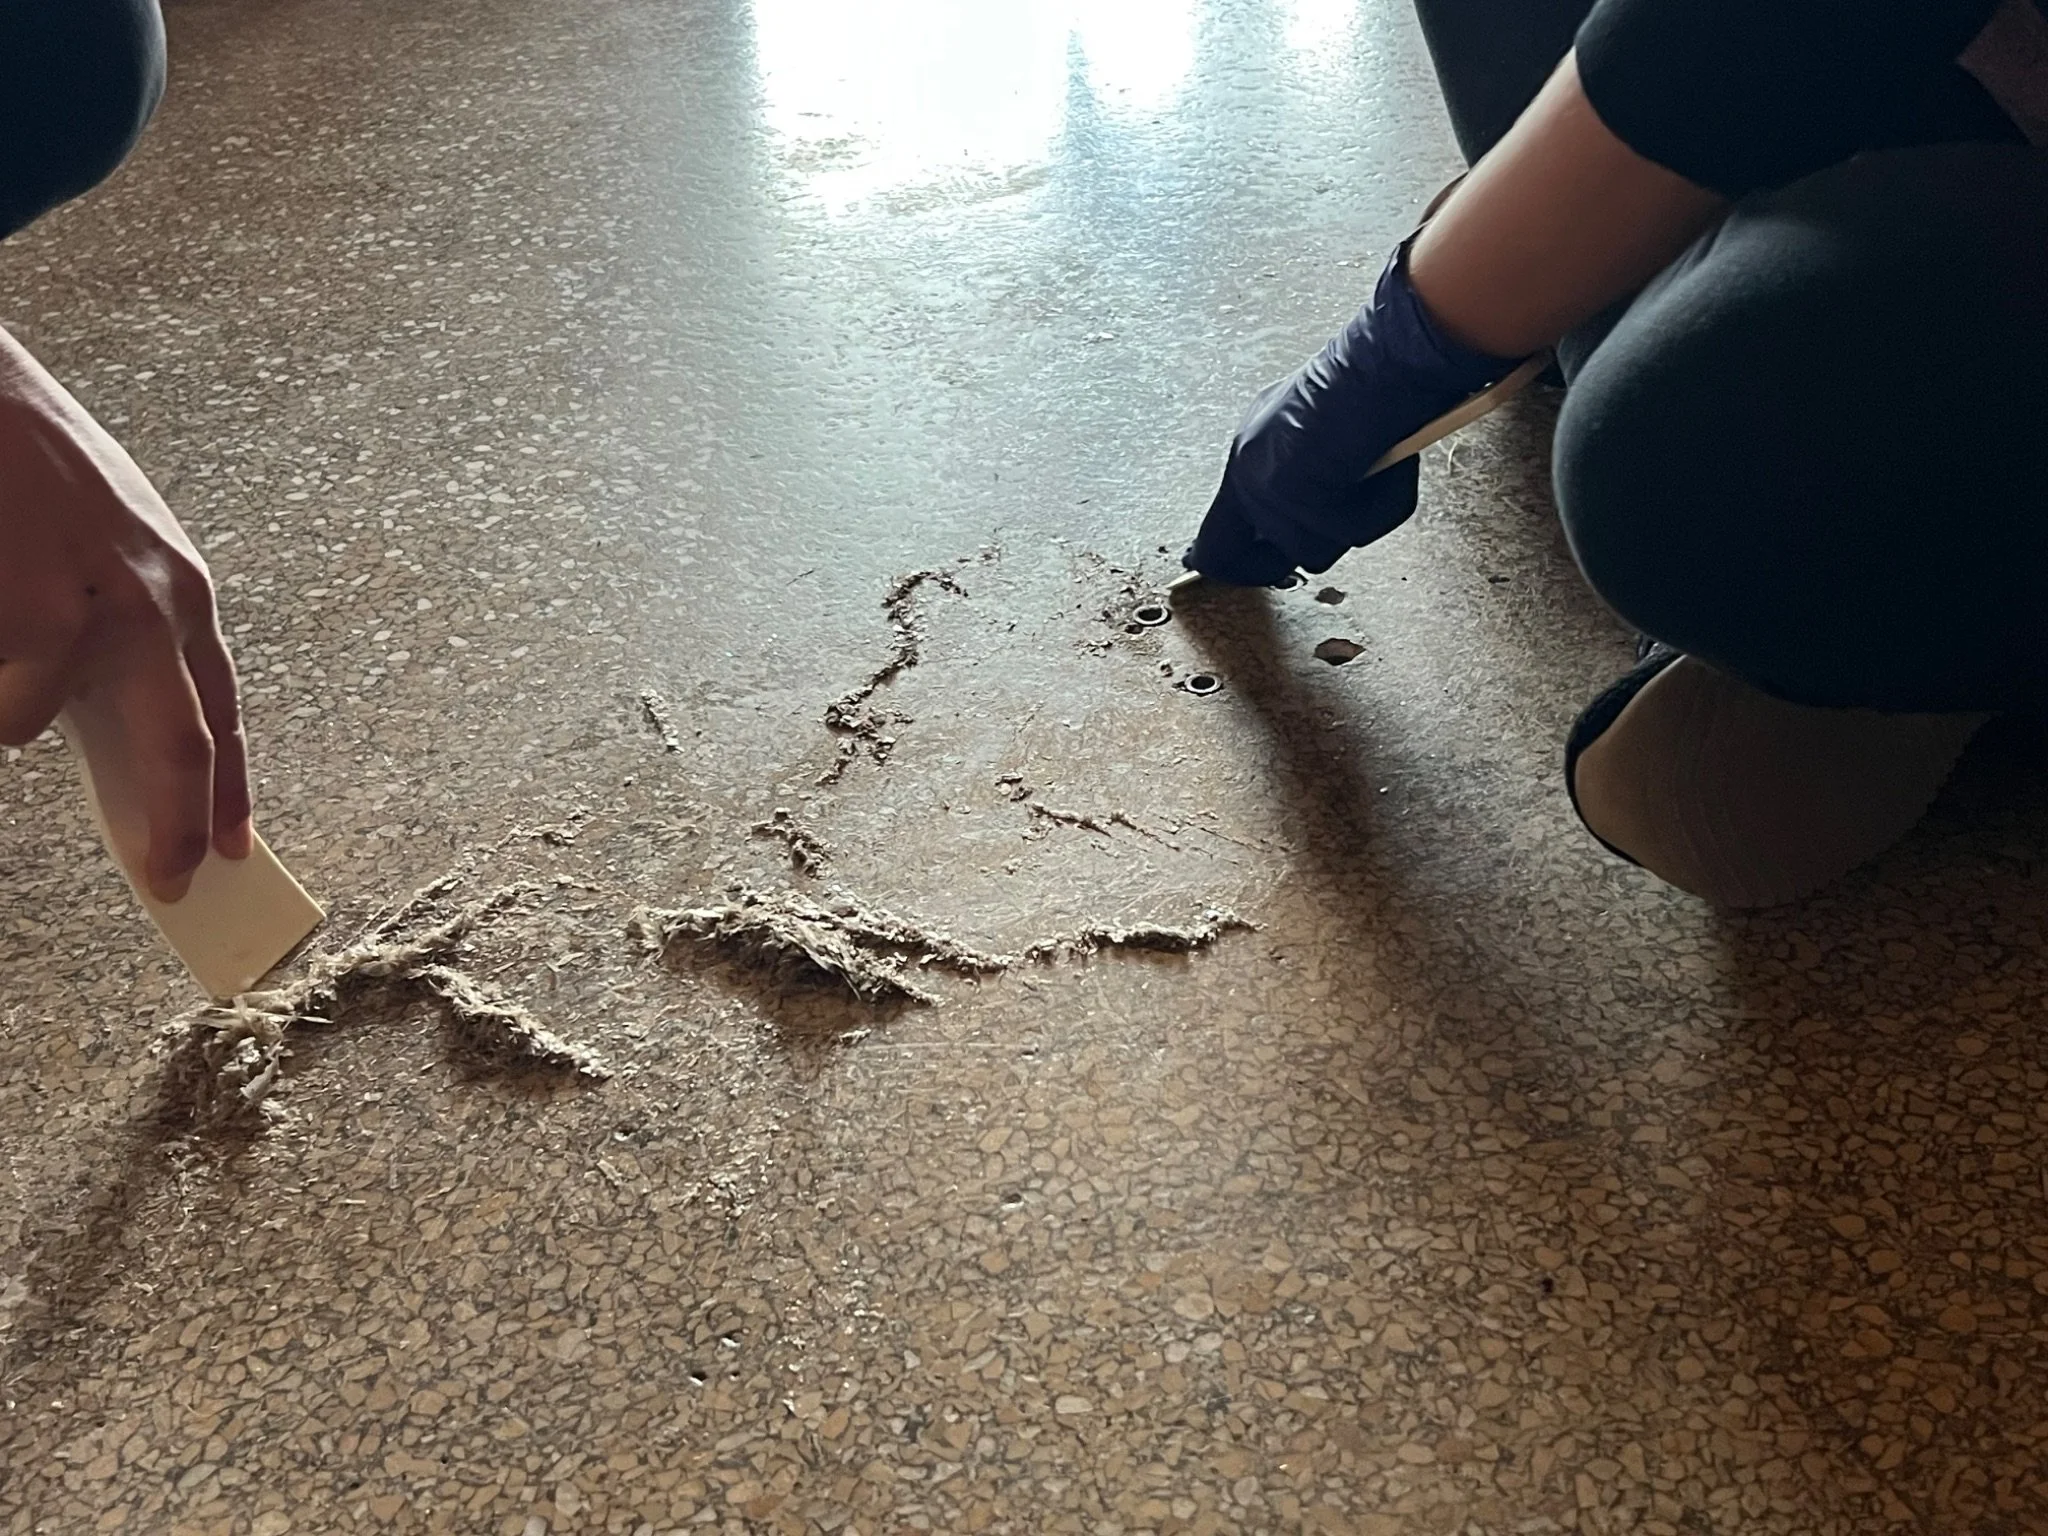
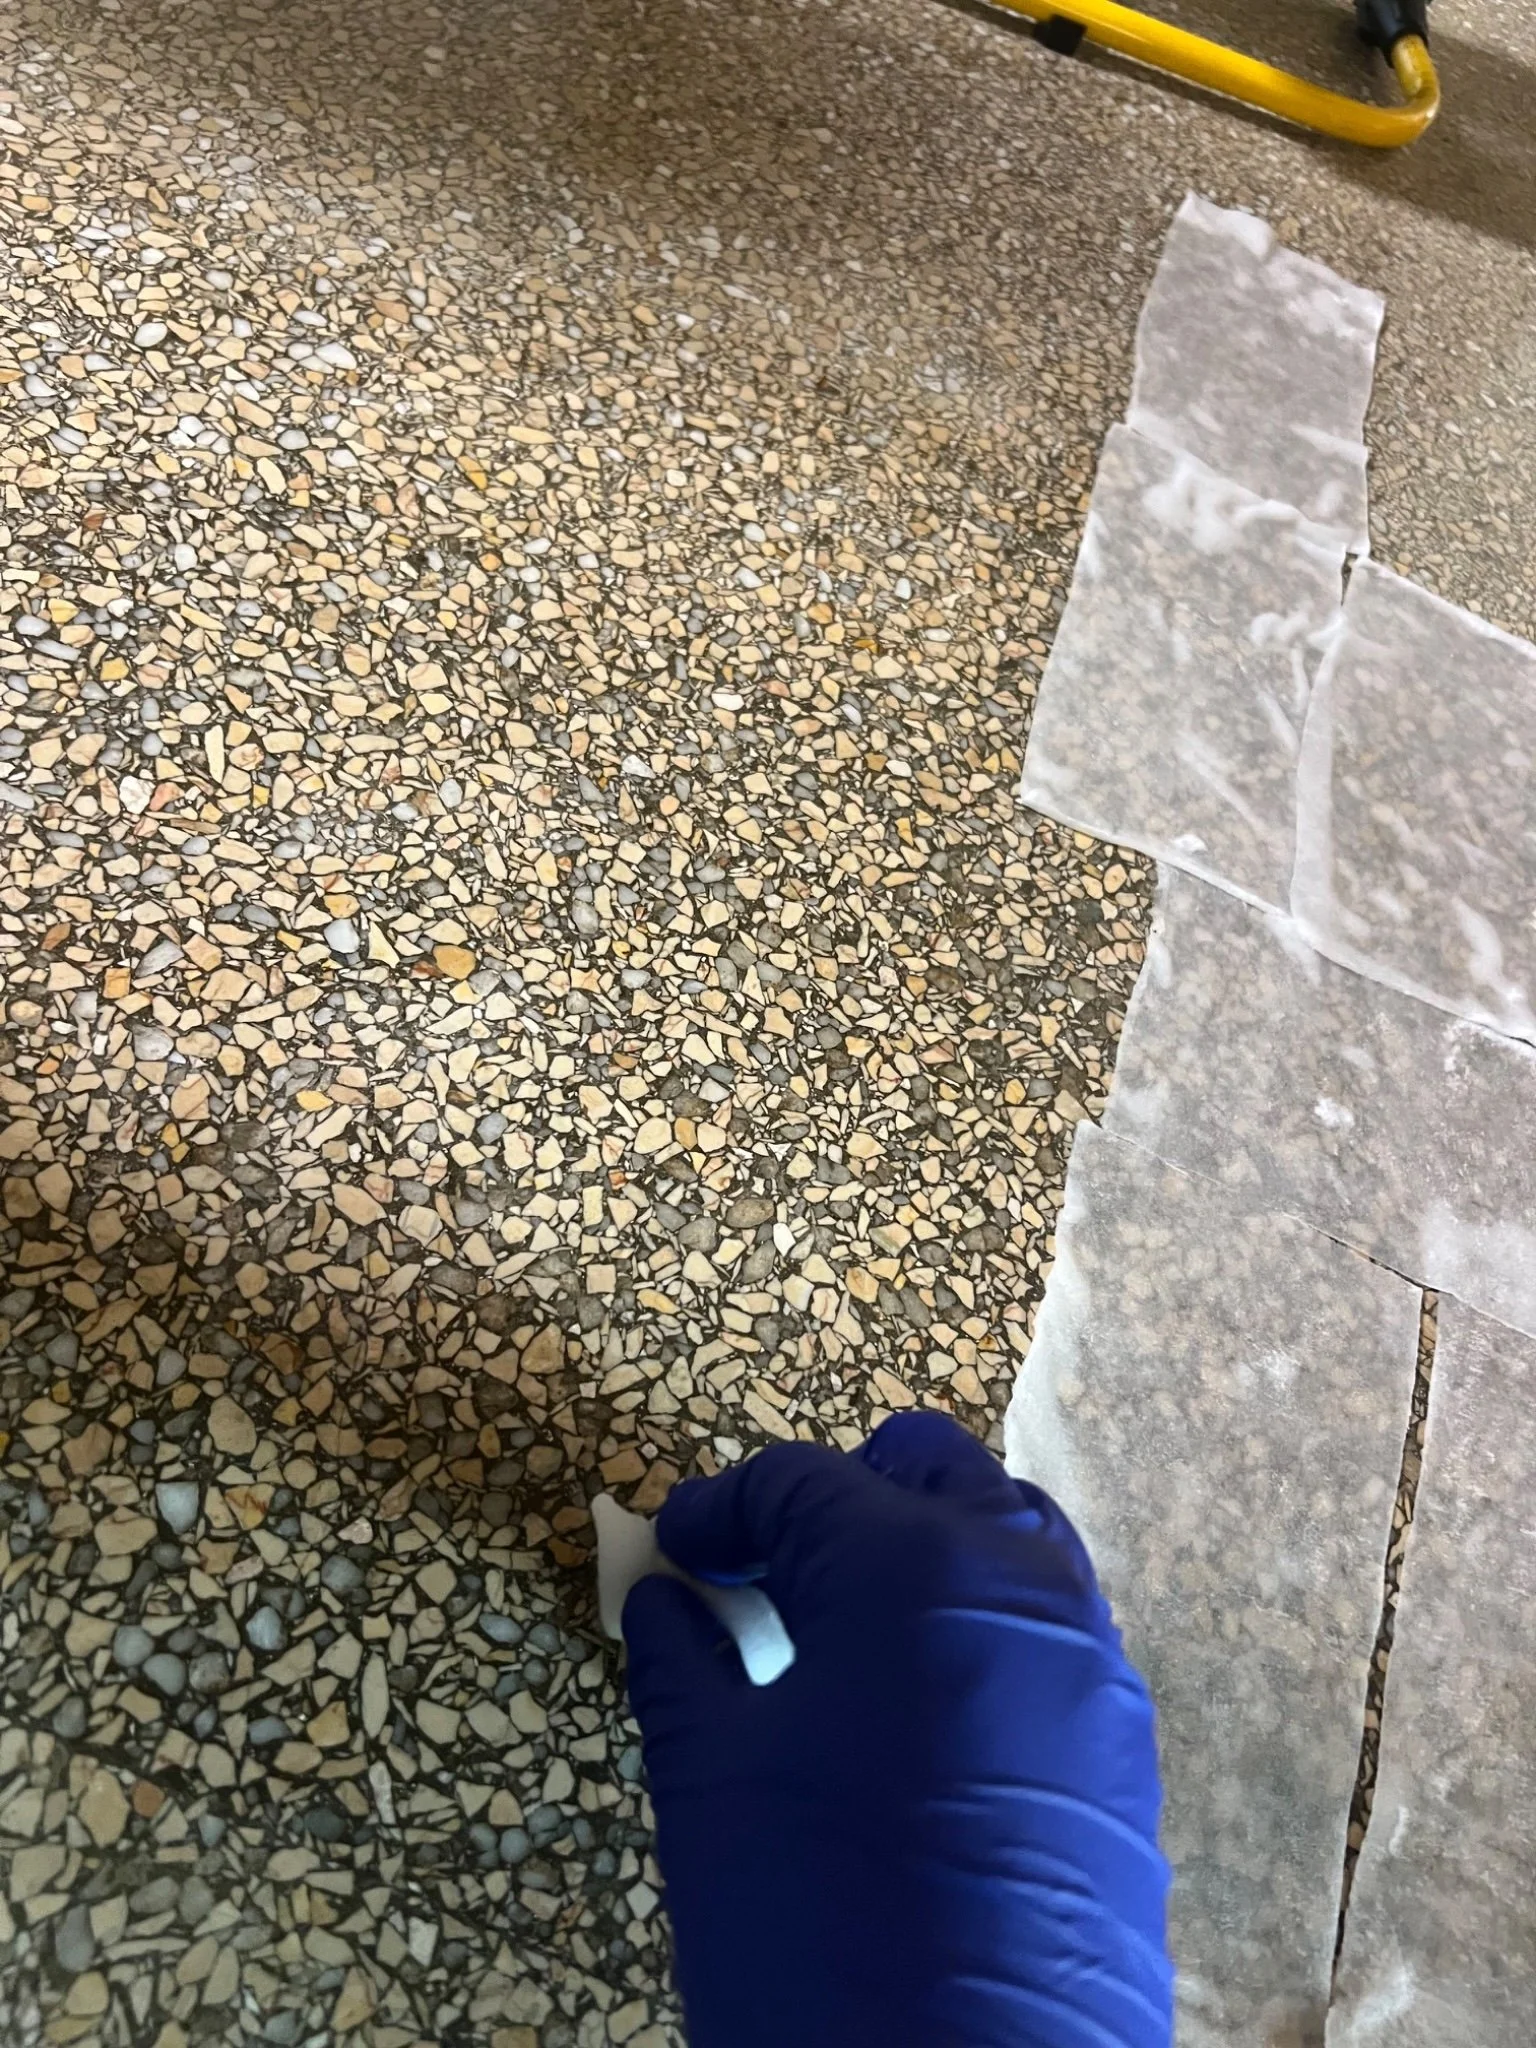
The surface was heavily soiled, with a dense accumulation of dust and particulate matter. Coconut fibers, originating from floor mats, were observed. The floor appeared darkened, consistent with oxidized floor wax that had discolored over time.
Along the perimeter adjacent to the visitor traffic zone, the wax layer exhibited clear evidence of mechanical impact from foot traffic. Repeated abrasion caused the wax to migrate and build up, forming a distinct darkened boundary line that marked the division between trafficked and less-trafficked areas.
Floor Dewaxing
Treatment B - Apply adhesive (Photo taken on 08/27/2025)
-
1. Vacuumed the entire area to remove loose dust and debris.
2. Used wooden popsicle sticks to scrape and remove areas of heavily oxidized and hardened floor wax. This was necessary where the wax layer had accumulated into thick, compact deposits.
3. Solvent application: For areas of persistent, darkened build-up, poultices of cotton soaked in mineral spirits were applied for approximately 5-10 minutes to soften the material.
4. After softening, deposits were further reduced with popsicle sticks and wiped with cotton pads moistened with mineral spirits to remove residual wax and restore surface uniformity.
5. After an overall wet cleaning, the floor will be waxed again. -
1. Nilfisk vacuums
2. Popsicle sticks
3. Cotton pads/balls
4. Mineral spirits
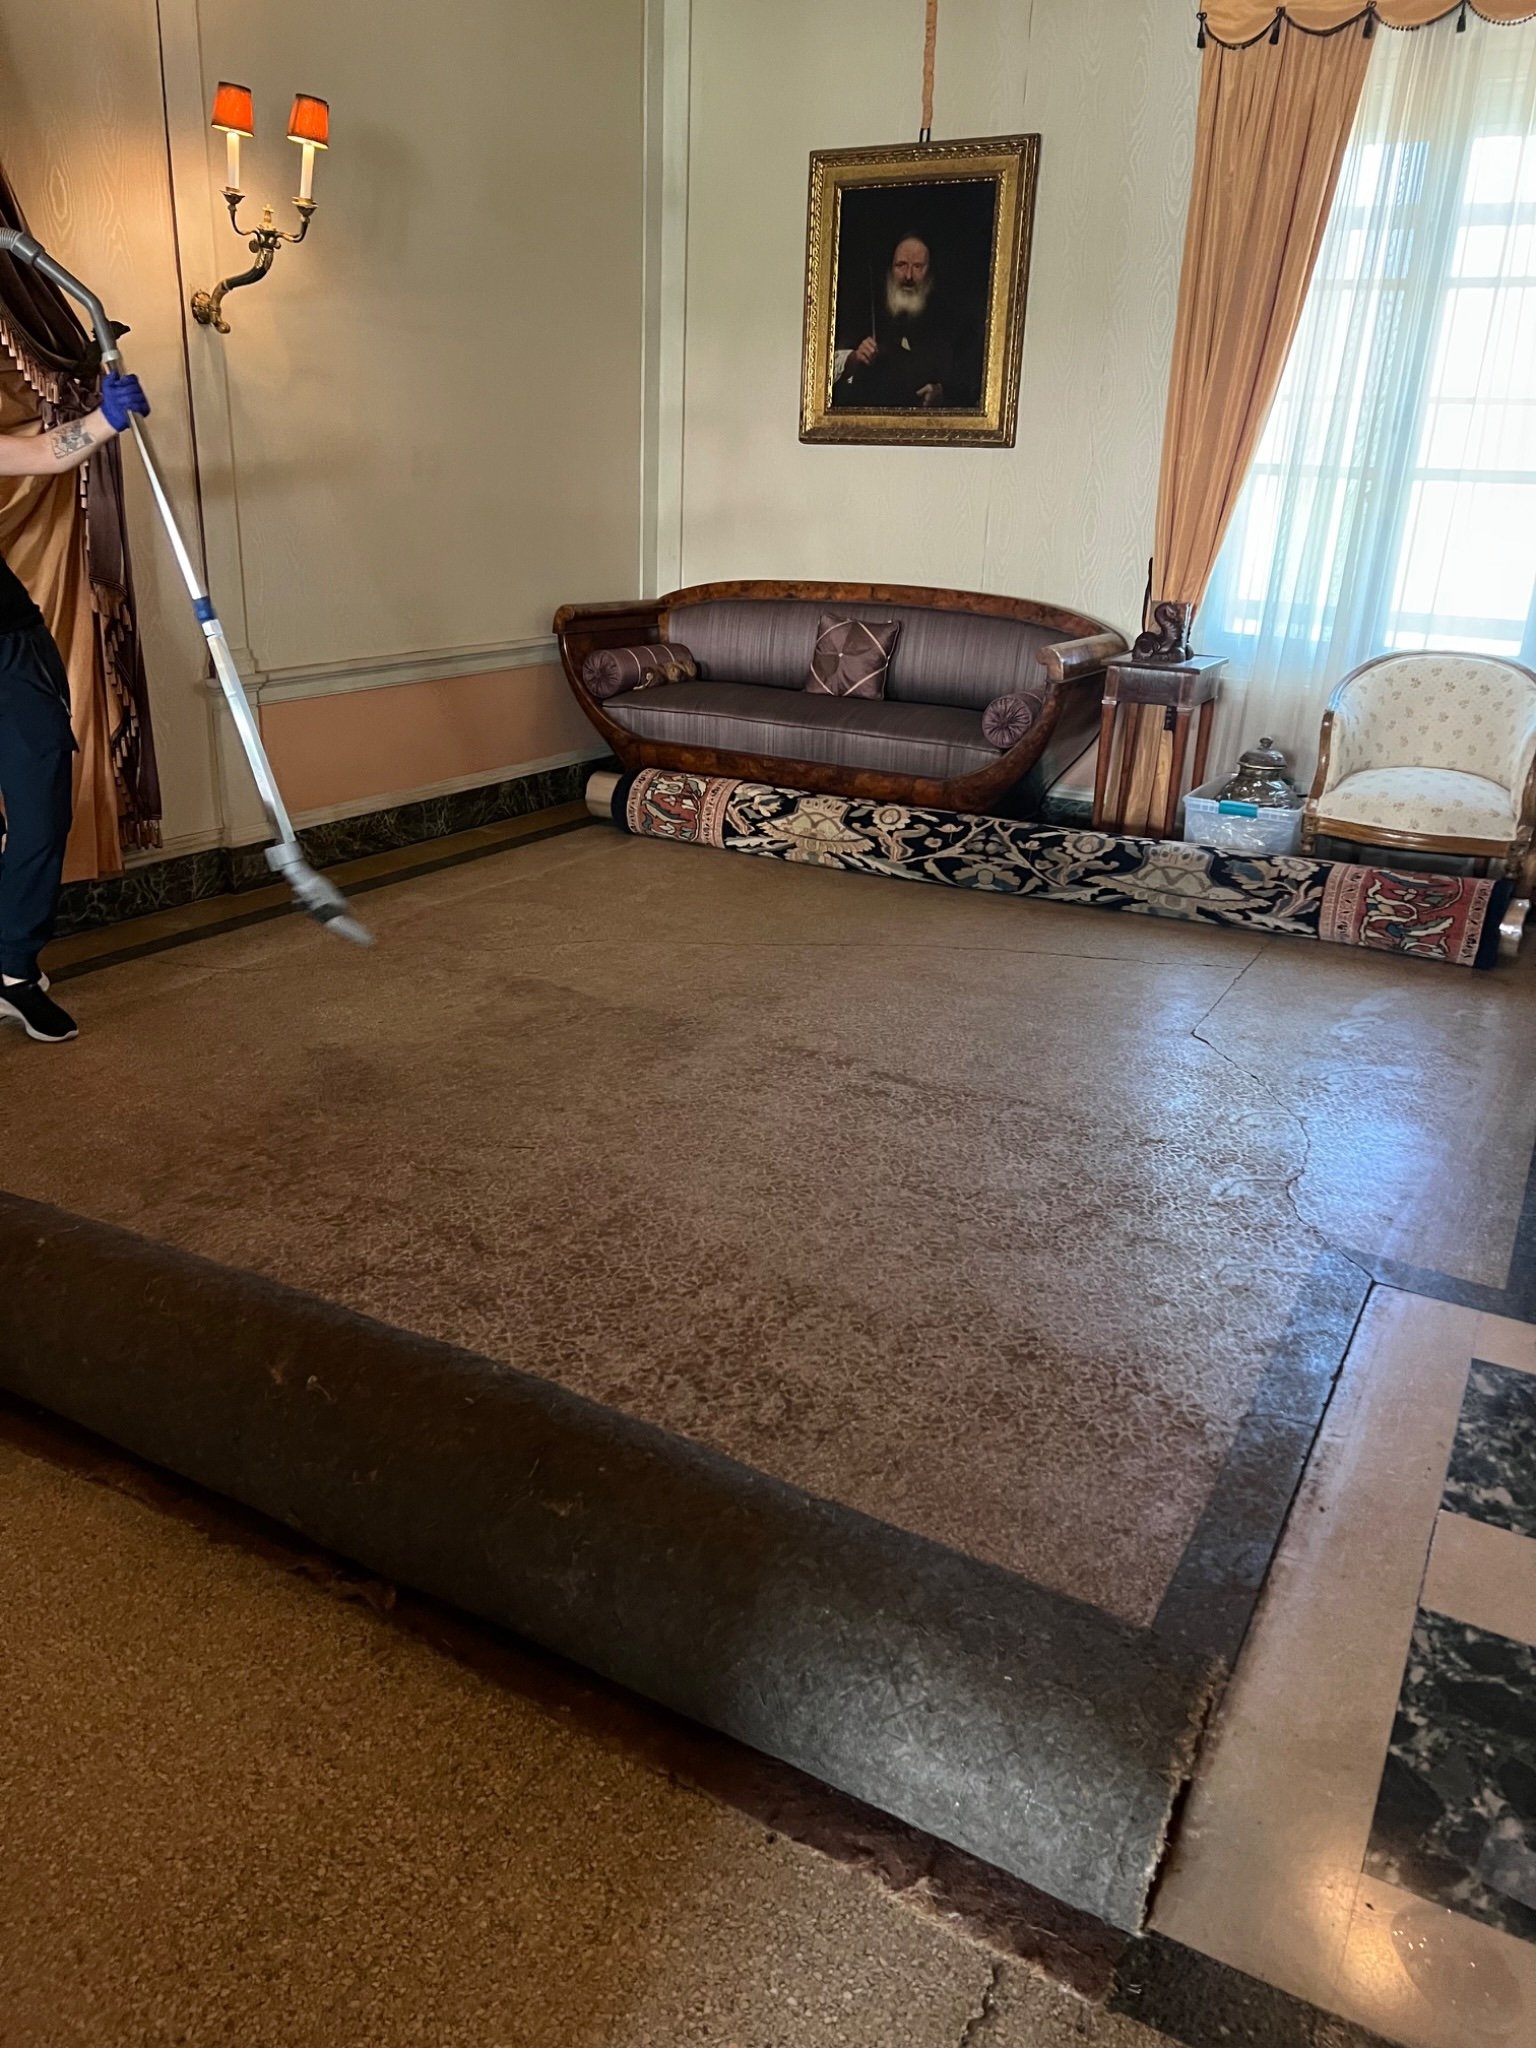
Carpet before removing for floor treatment
(Photo taken on 07/10/2025)
Floor before treatment
(Photo taken on 07/10/2025)
Scraping off the floor wax
(Photo taken on 07/16/2025)
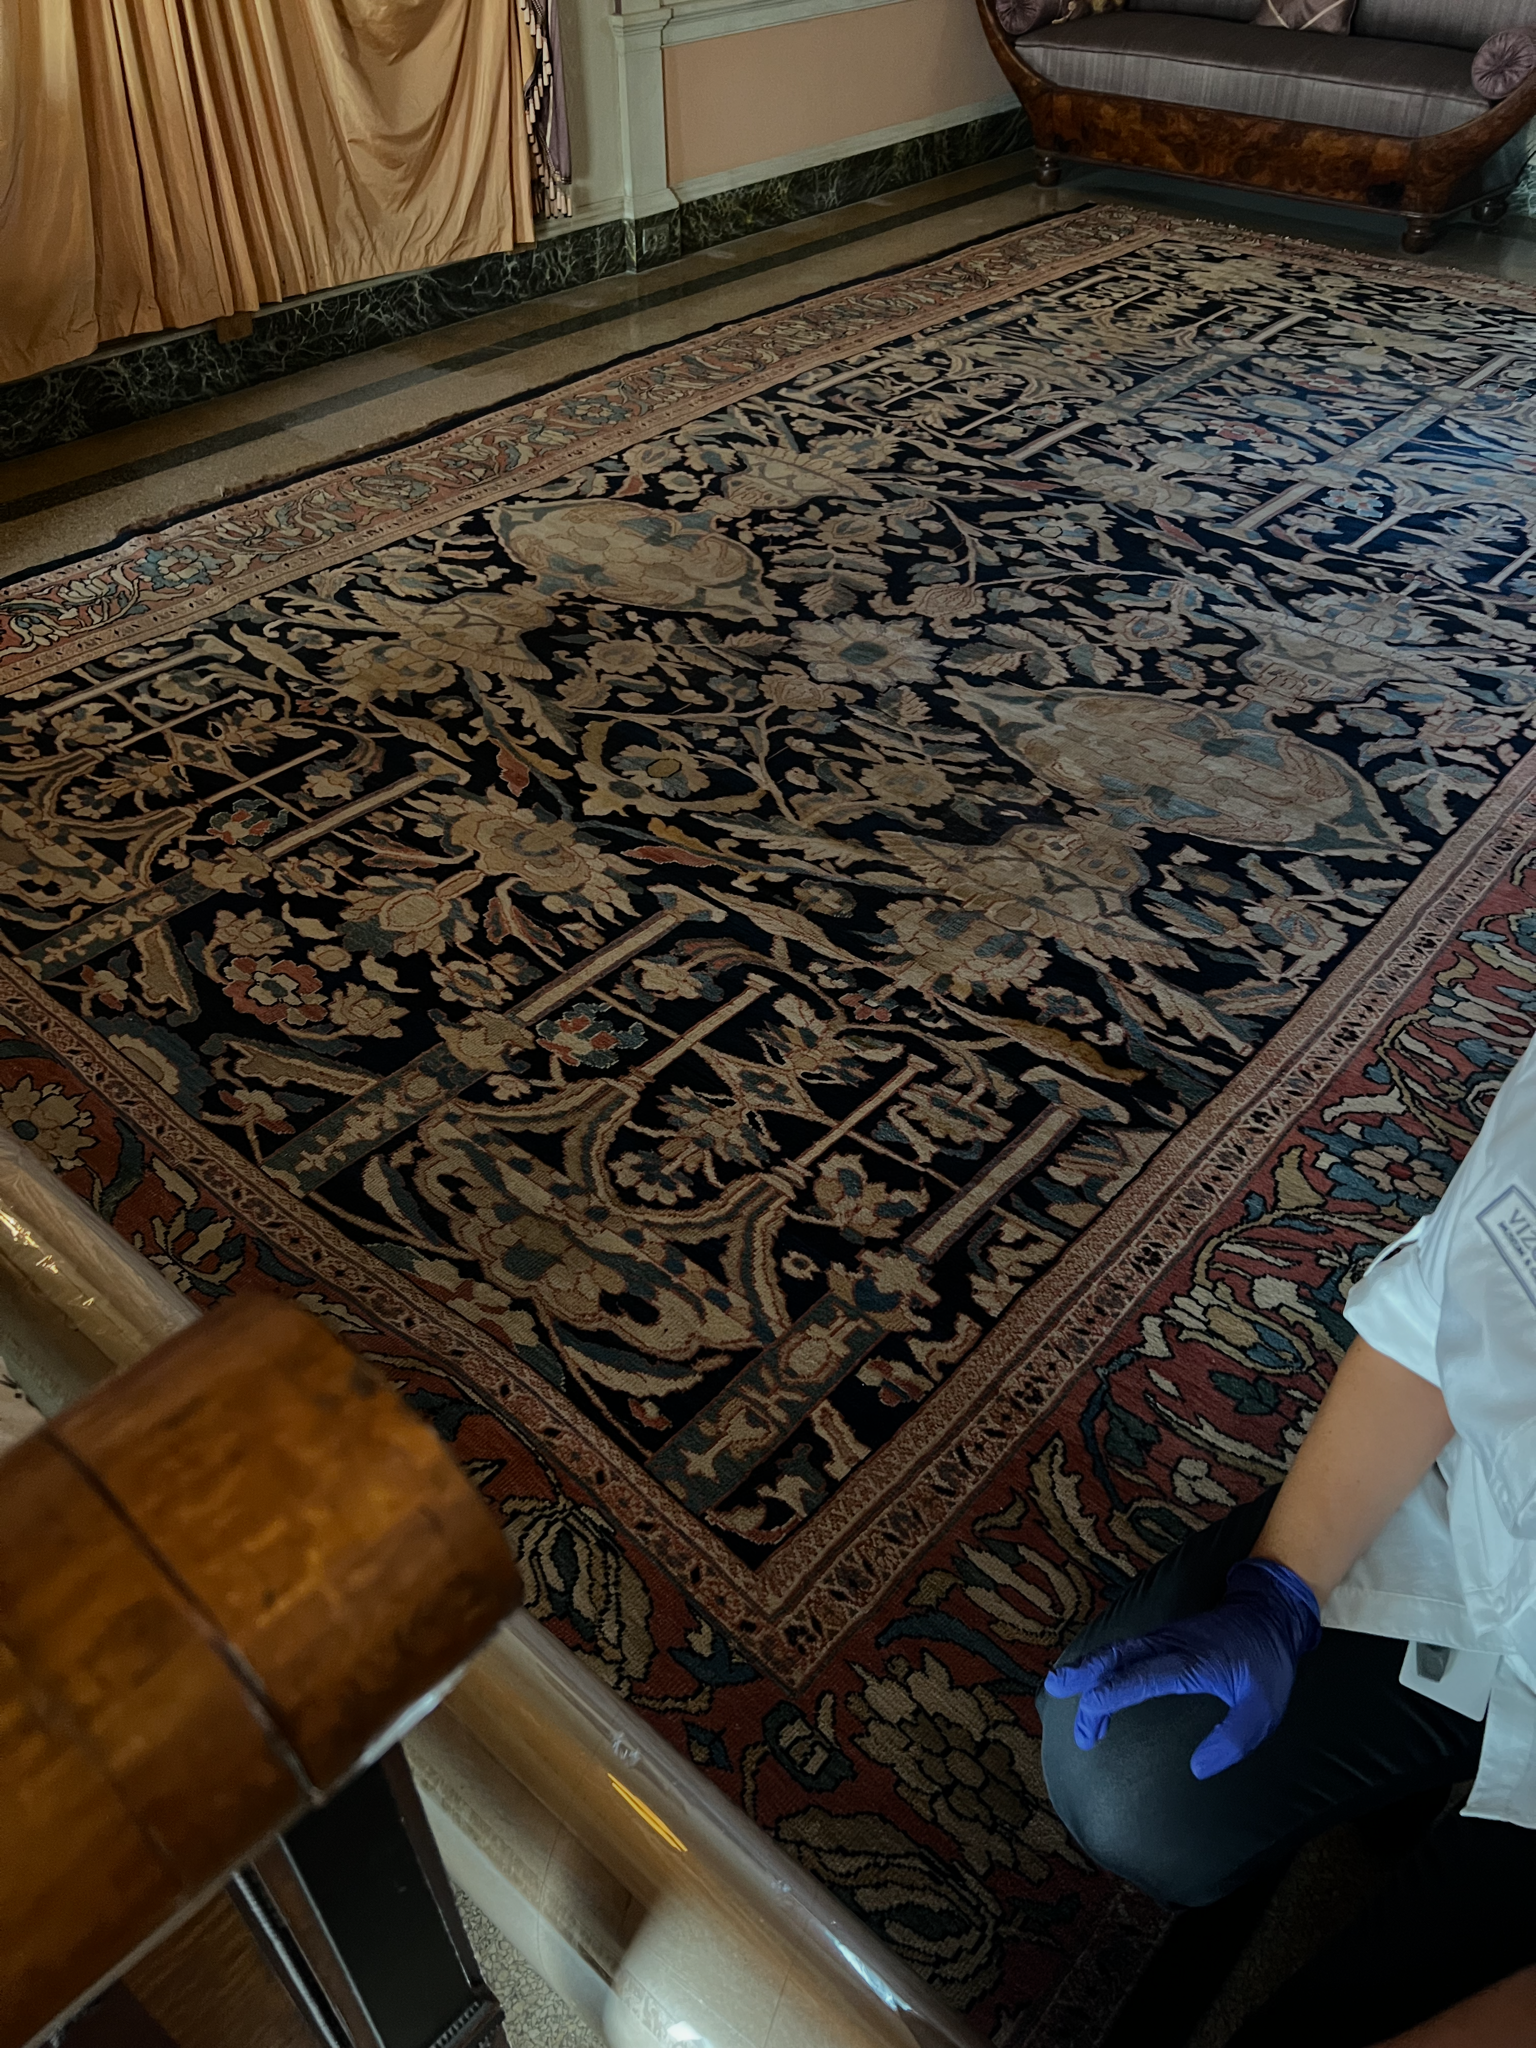
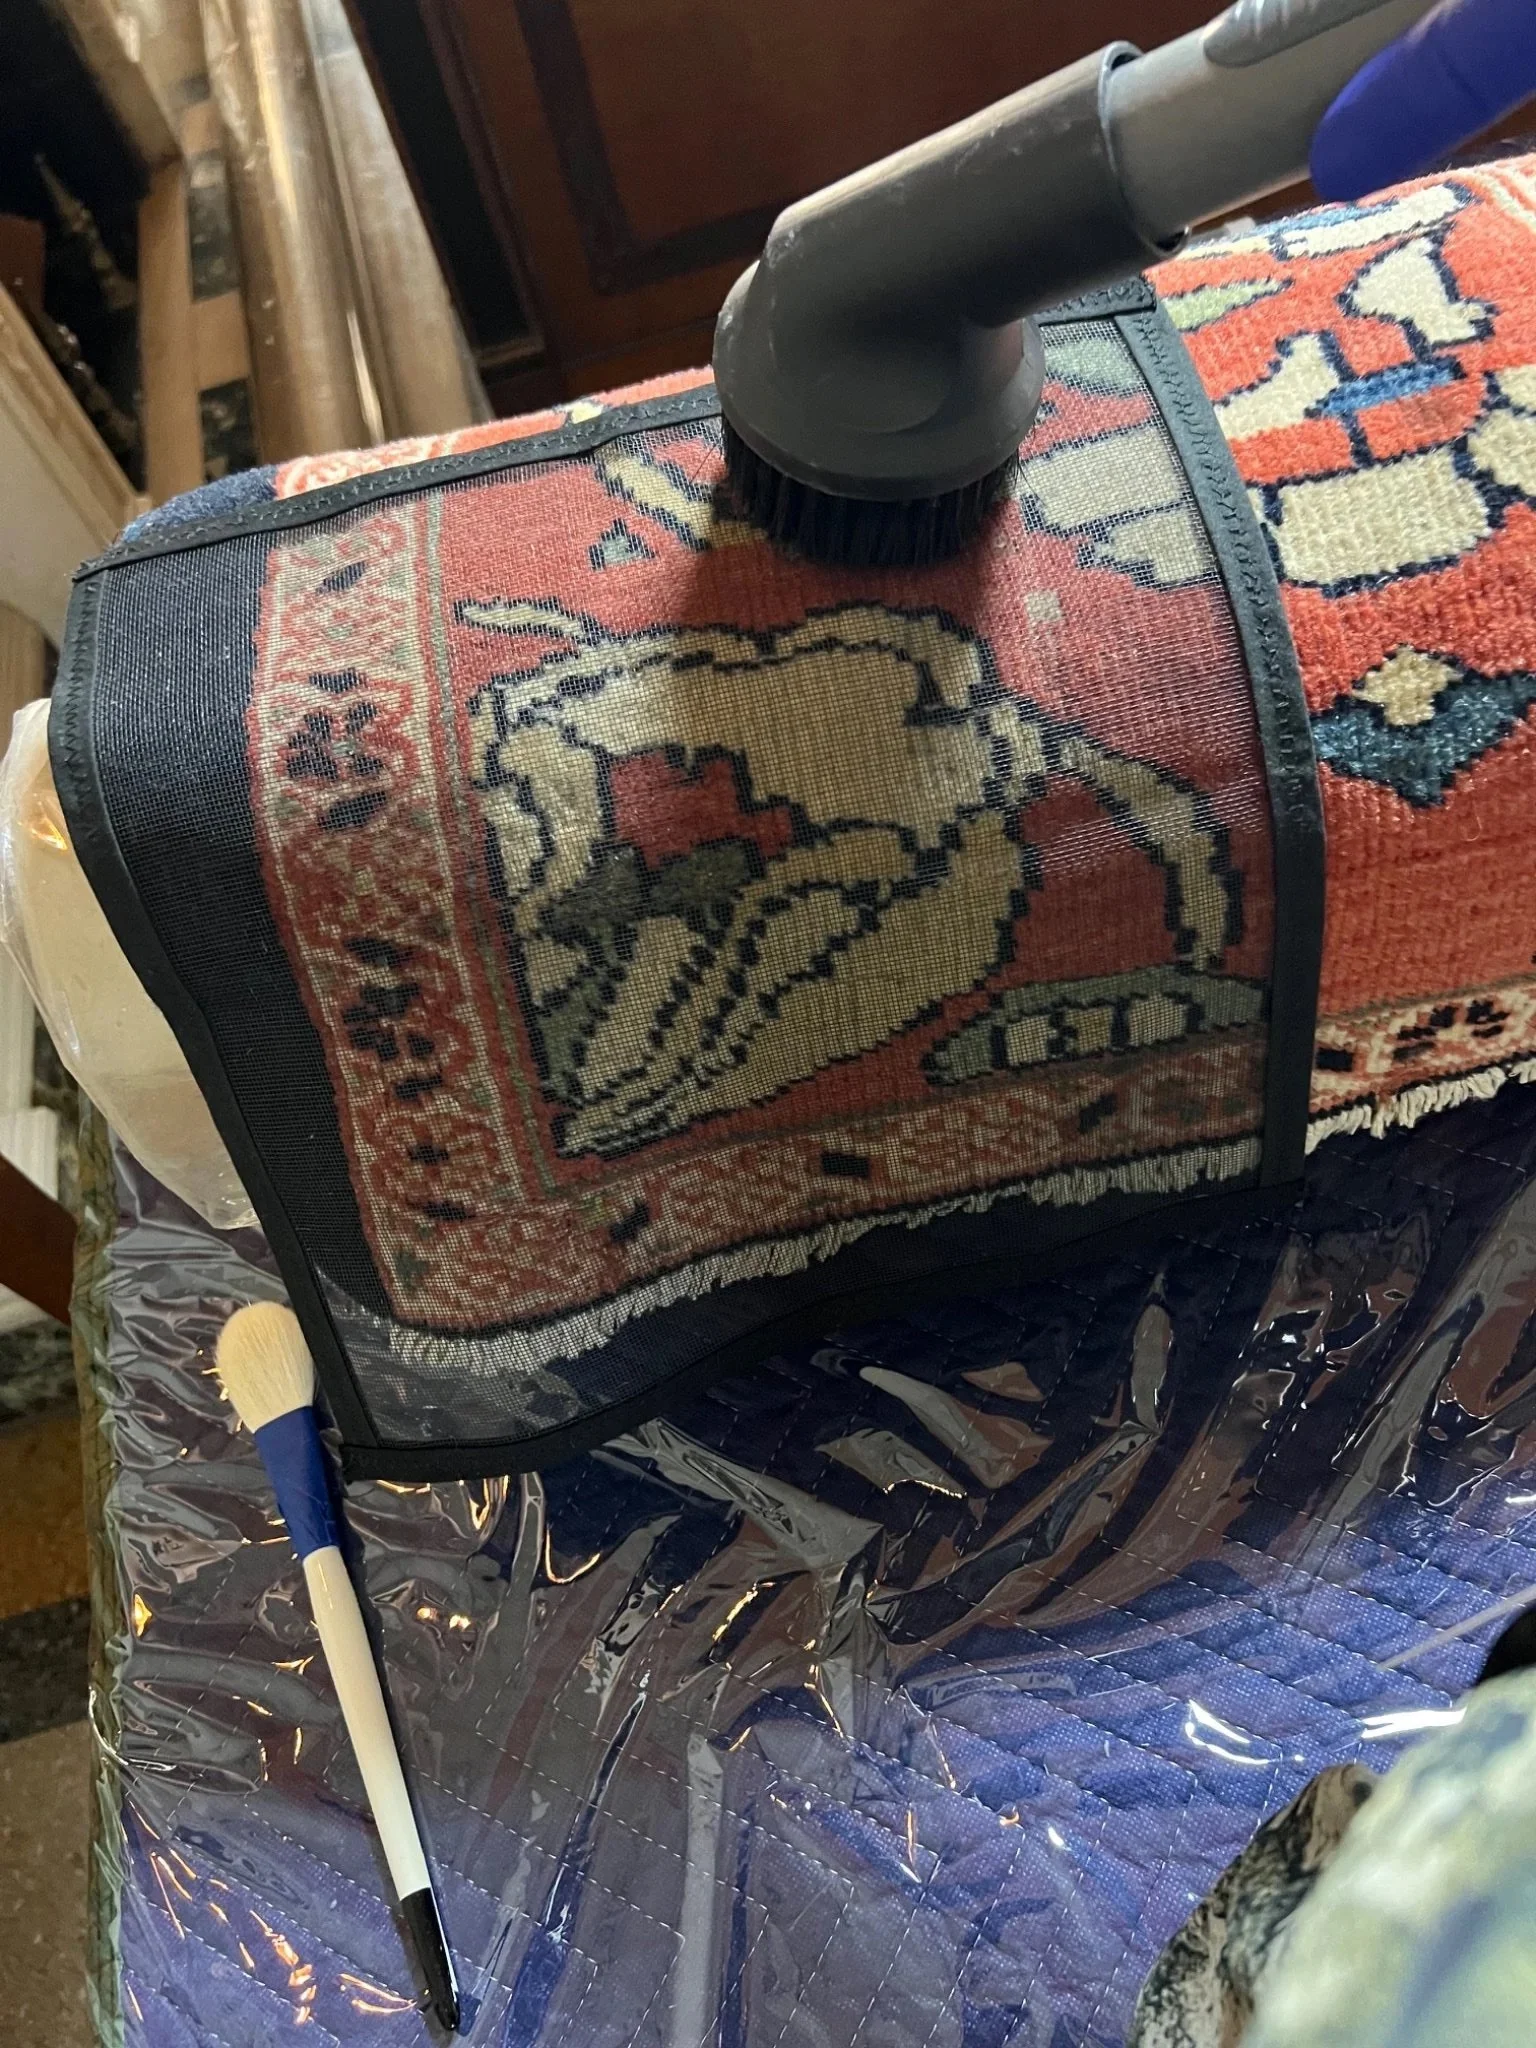
CARPET VACUUMING
Cleaning & poulticing with mineral spirits (Photo taken on 07/16/2025)
-
1. Carpet mounted on two support rolls to expose a working section.
2. Protective mesh placed over the carpet surface.
3. Nilfisk vacuum set to low suction with brush attachment; nozzle stamped gently through the mesh in small sections.
4. Simultaneous cleaning performed on both obverse and reverse surfaces by accessing the exposed section.
5. Once one section was completed, the carpet was unrolled to reveal the next portion, and the procedure repeated until the entire length was treated. -
1. Nilfisk vacuum (low suction setting)
2. Vacuum brush attachment
3. Protective mesh screen
4. Soft natural bristle brush
5. Carpet support rolls
This work was done in collaboration with Sophie West. Total time: ~86 hours.
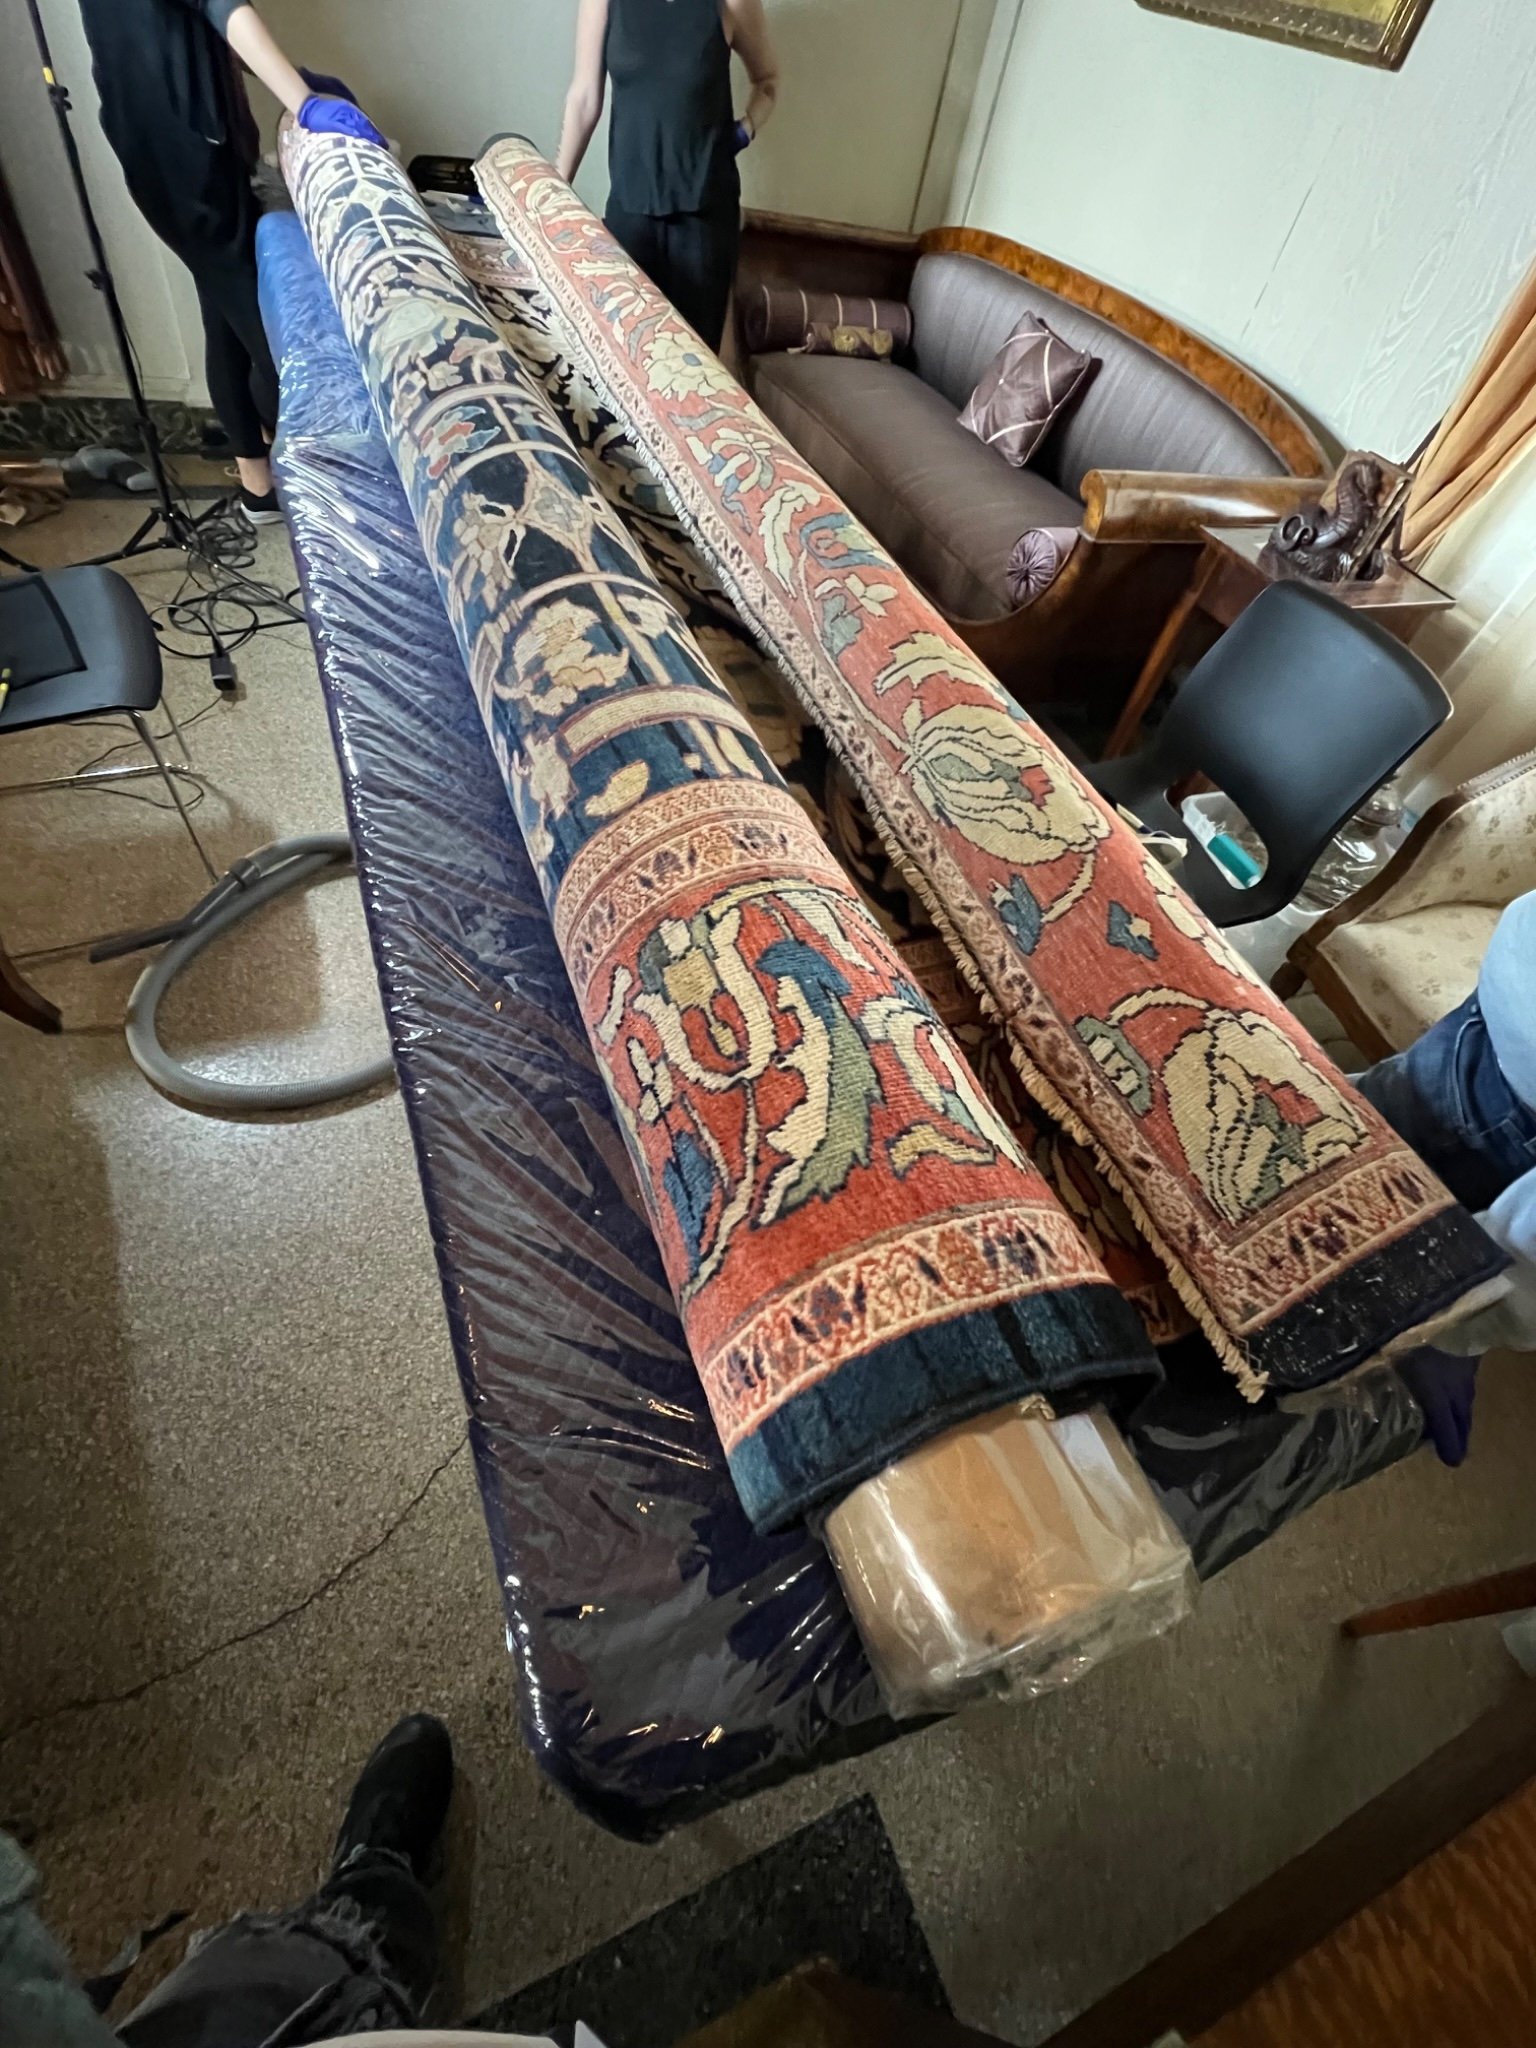
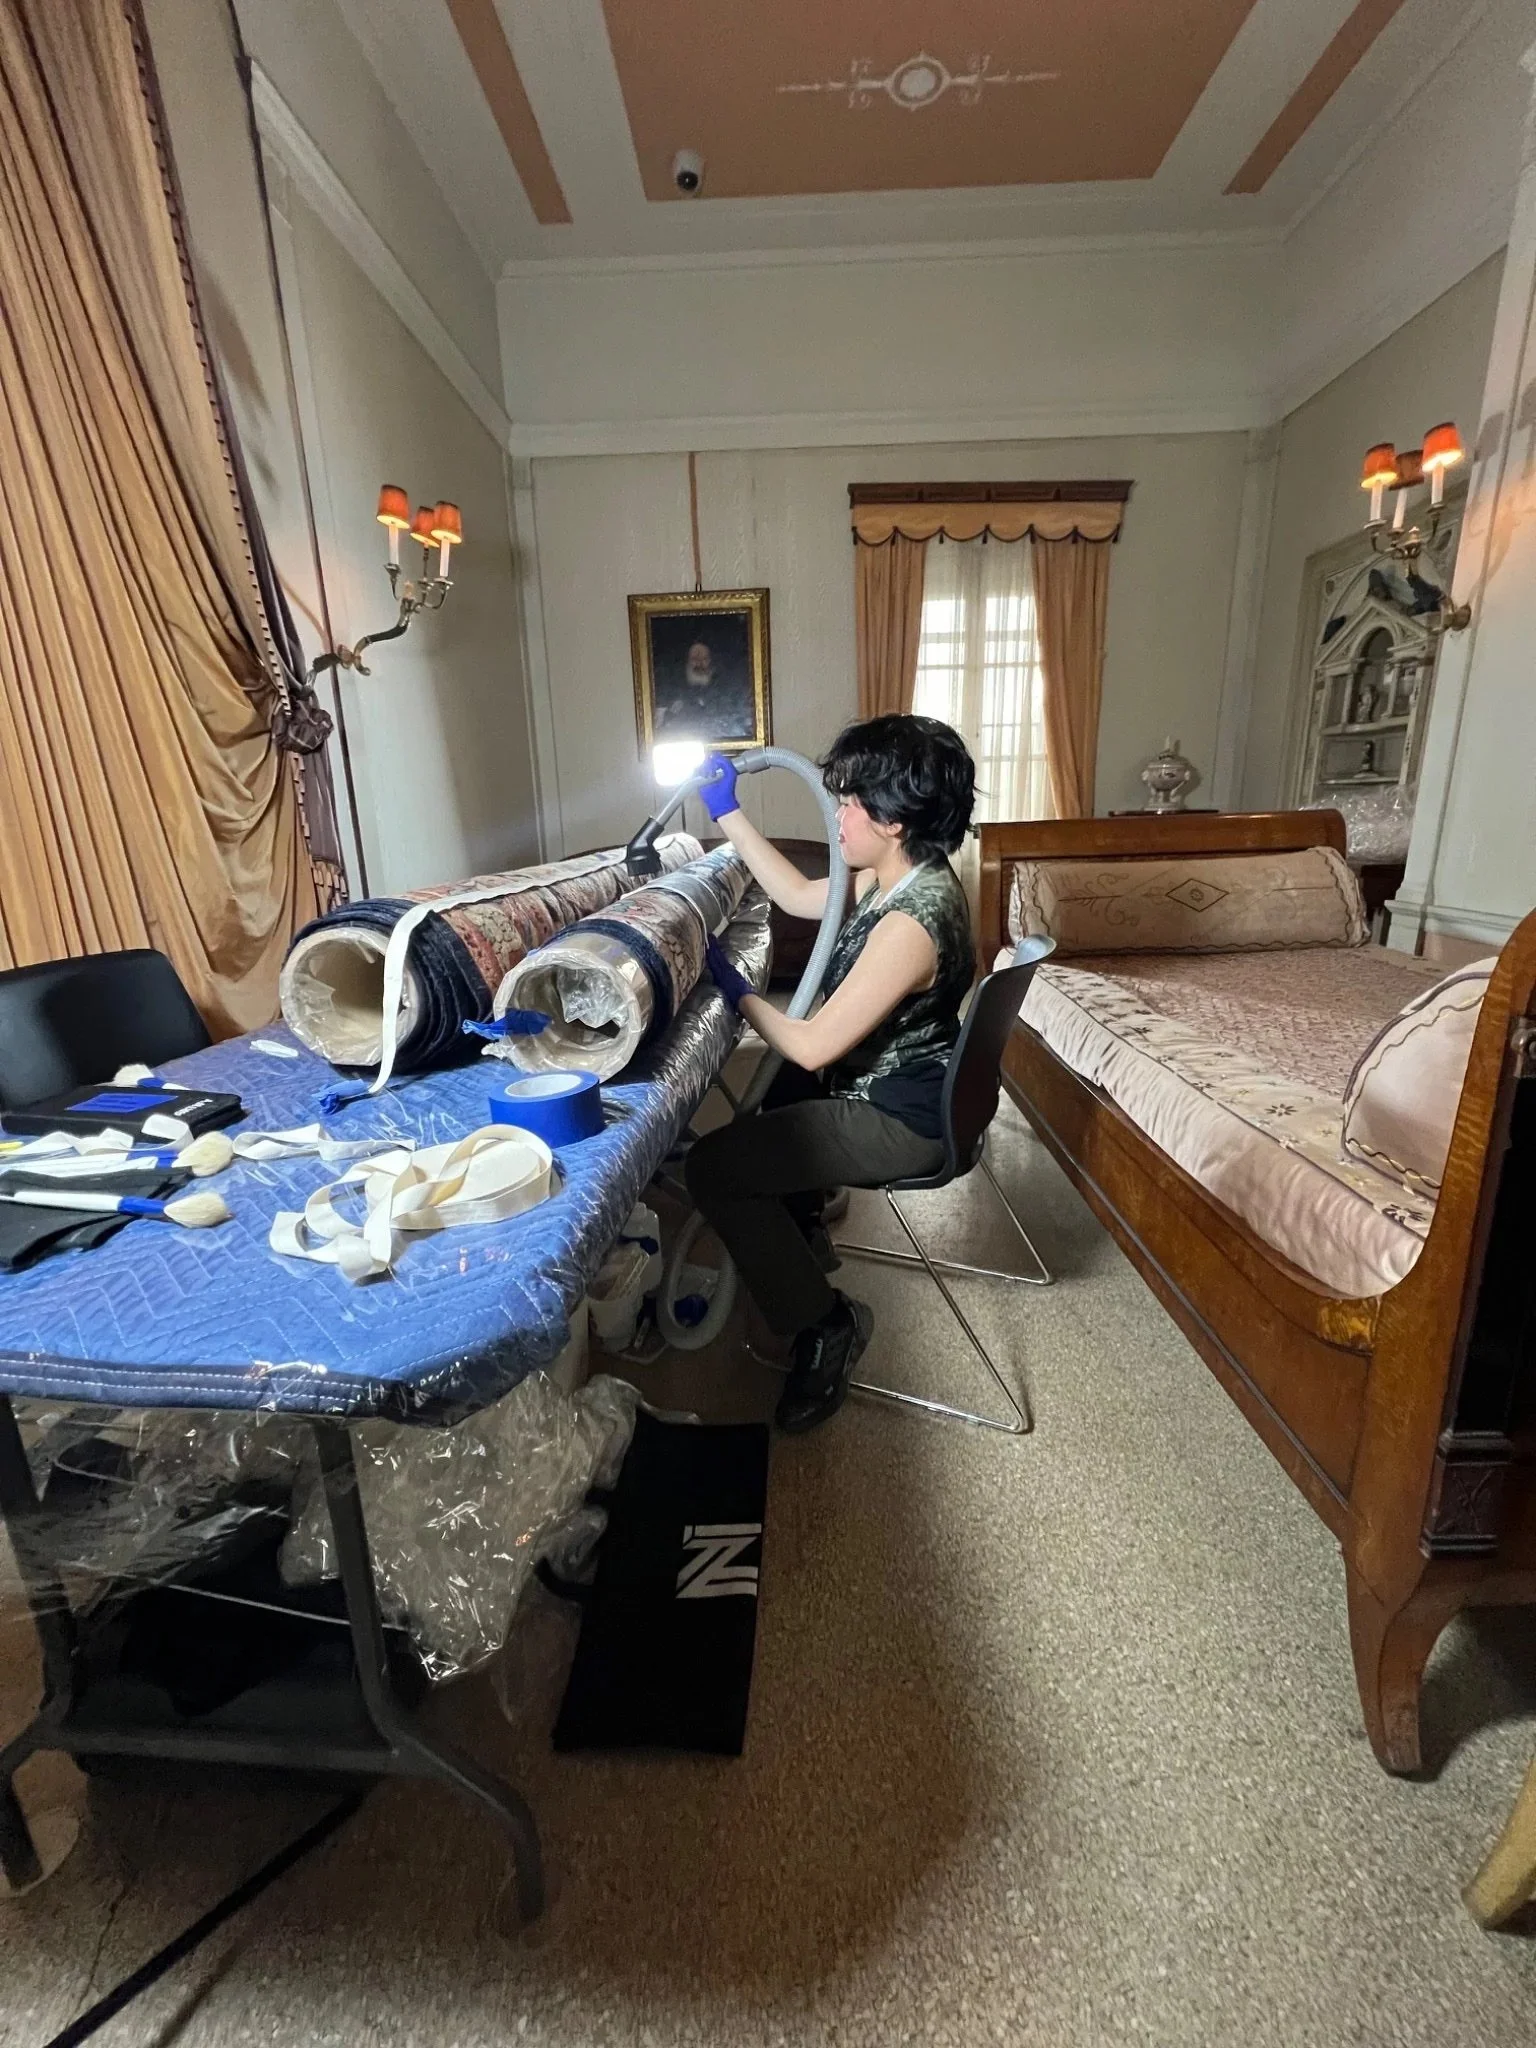
Vacuuming the floor carpet (Photos taken on 08/16/2025 by Sophie West)
3D Photogrammetry
—
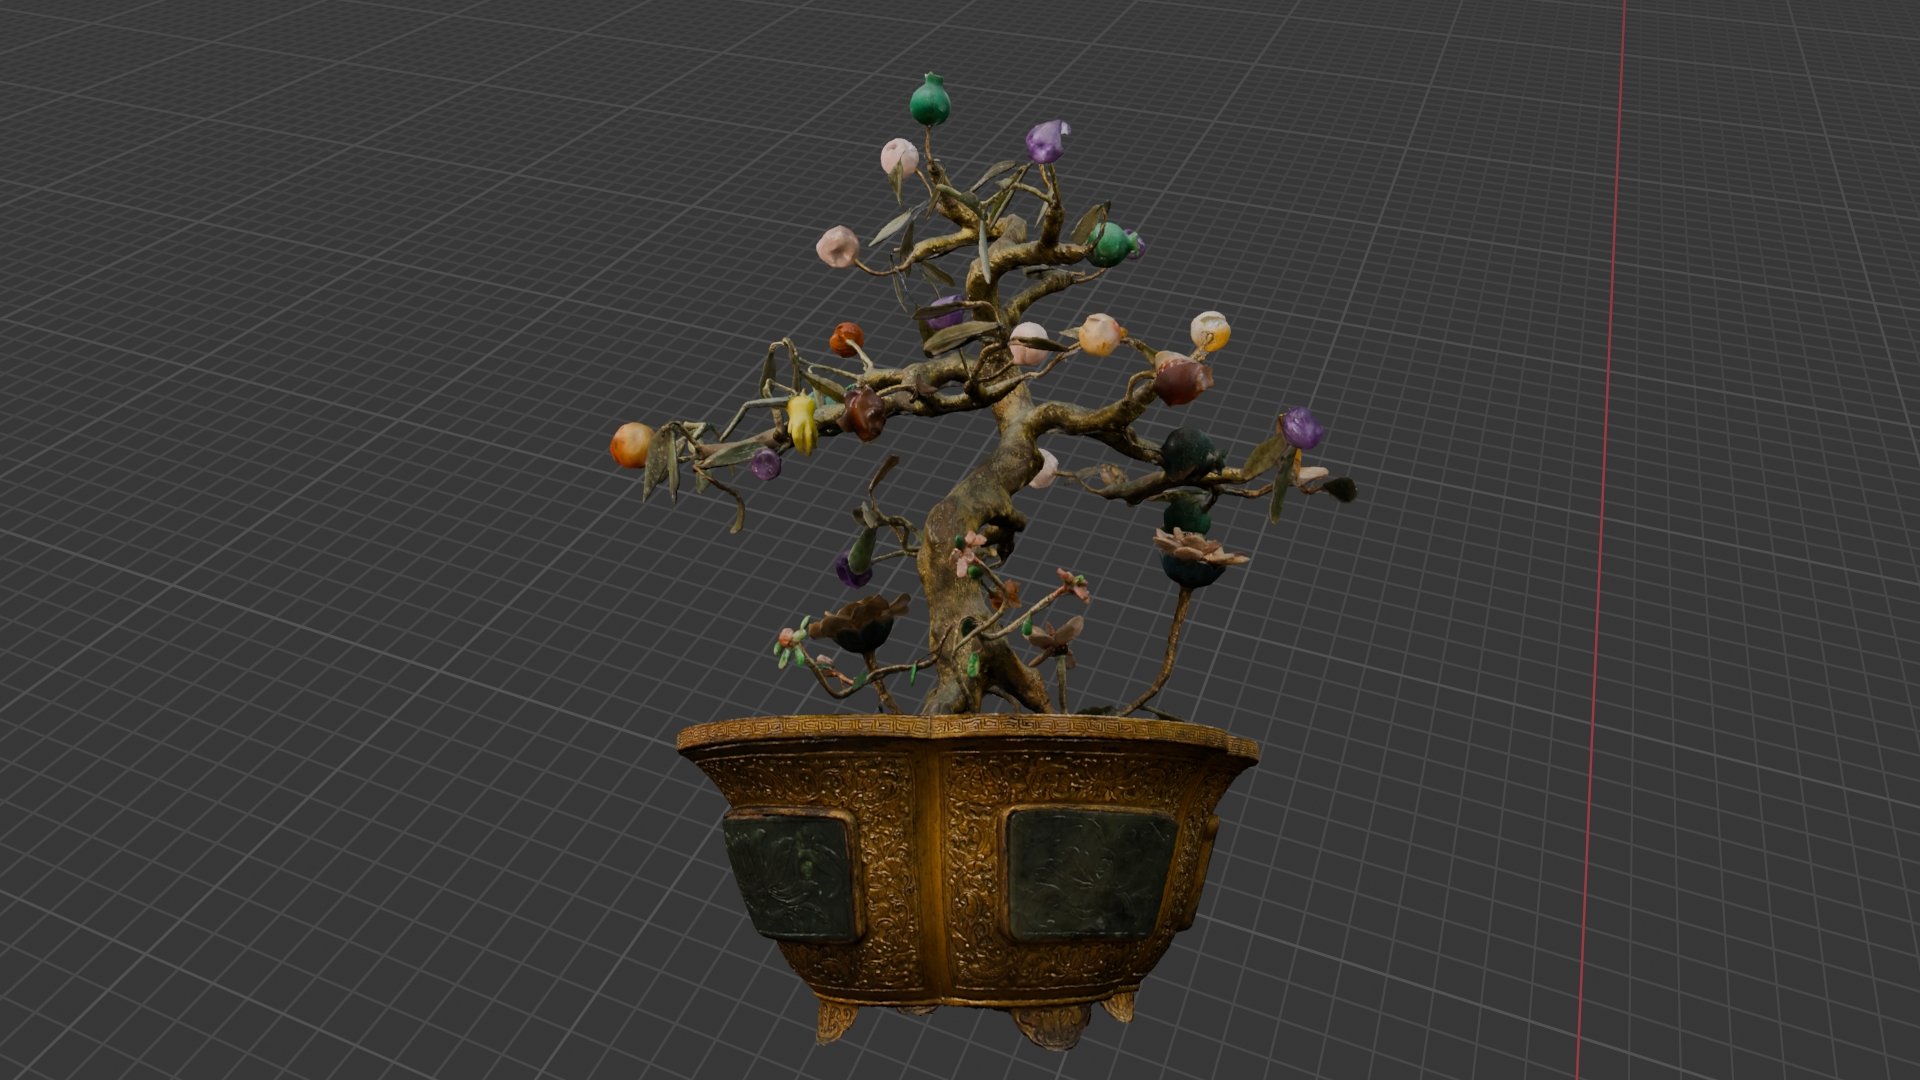
Chinese Jewel Tree
This project applied photogrammetry to document and visualize a Chinese Jewel Tree (A) in the collection of Vizcaya Museum & Gardens (see condition report here). The objectives included high-resolution documentation, accurate metric recording, geometric analysis, and the generation of a 3D reconstruction suitable for research and presentation.
Equipment
Cameras: Canon DS126441 (No. 142033005447, DC 7.4V); iPhone 13 ProMax (RAW capture)
Accessories: Tripods, flash, color checker with integrated scale bar
Computer & Software: MacBook Pro running Agisoft Metashape, Adobe Lightroom/Bridge, Photoshop, and Blender
Obtaining Photographic Sequences
Canon DSLR (primary dataset):
The object was photographed in six rotations (see Table 1), with 70–80% contiguous overlap between images. The camera was mounted on a tripod, and the object rotated manually, with positions marked on the ground using tape. Procedure follows https://culturalheritageimaging.org/Technologies/Photogrammetry/ and https://sparc.cast.uark.edu/assets/webinar/SPARC_Photogrammetry_Draft.pdf
White balance: A3.M1/±0
Calibration: A color checker card with an integrated scale bar was placed beside the object in most images. This allowed accurate color correction and provided reference scaling for dimensional accuracy.
Workflow: Images were tethered to Adobe Lightroom during capture to monitor exposure and consistency. In post-processing, RAW files were adjusted in Camera Raw (exposure and white balance), with mild sharpening applied (Amount: 20; Clarity: 5).
iPhone 13 ProMax (supplementary dataset): 248 RAW images captured handheld, primarily covering angles inaccessible to the DSLR.
Processing
Pre-processing: iPhone images were masked in Photoshop to exclude background noise.
Photogrammetry: Images were aligned in Agisoft Metashape to generate tie points and dense point clouds. Chunks from different focal lengths were aligned and merged.
Model generation: Dense clouds were converted to mesh and textured models.
Editing: Flaws in the mesh were corrected in Blender through surface smoothing, hole closing, and minor geometry cleanup.
Table 1: Camera Rotations (Canon DSLR)
| Rotation | Angle / Position | Focal Length | No. of Photos |
|---|---|---|---|
| 1 | Straight | 55 mm | 52 |
| 2 | Top down 15° | 55 mm | 38 |
| 3 | Bottom up 15° | 55 mm | 38 |
| 4 | Bottom up 15° | 18 mm | 38 |
| 5 | Top down 15° | 18 mm | 38 |
| 6 | Top down vertical | 18 mm | 29 |
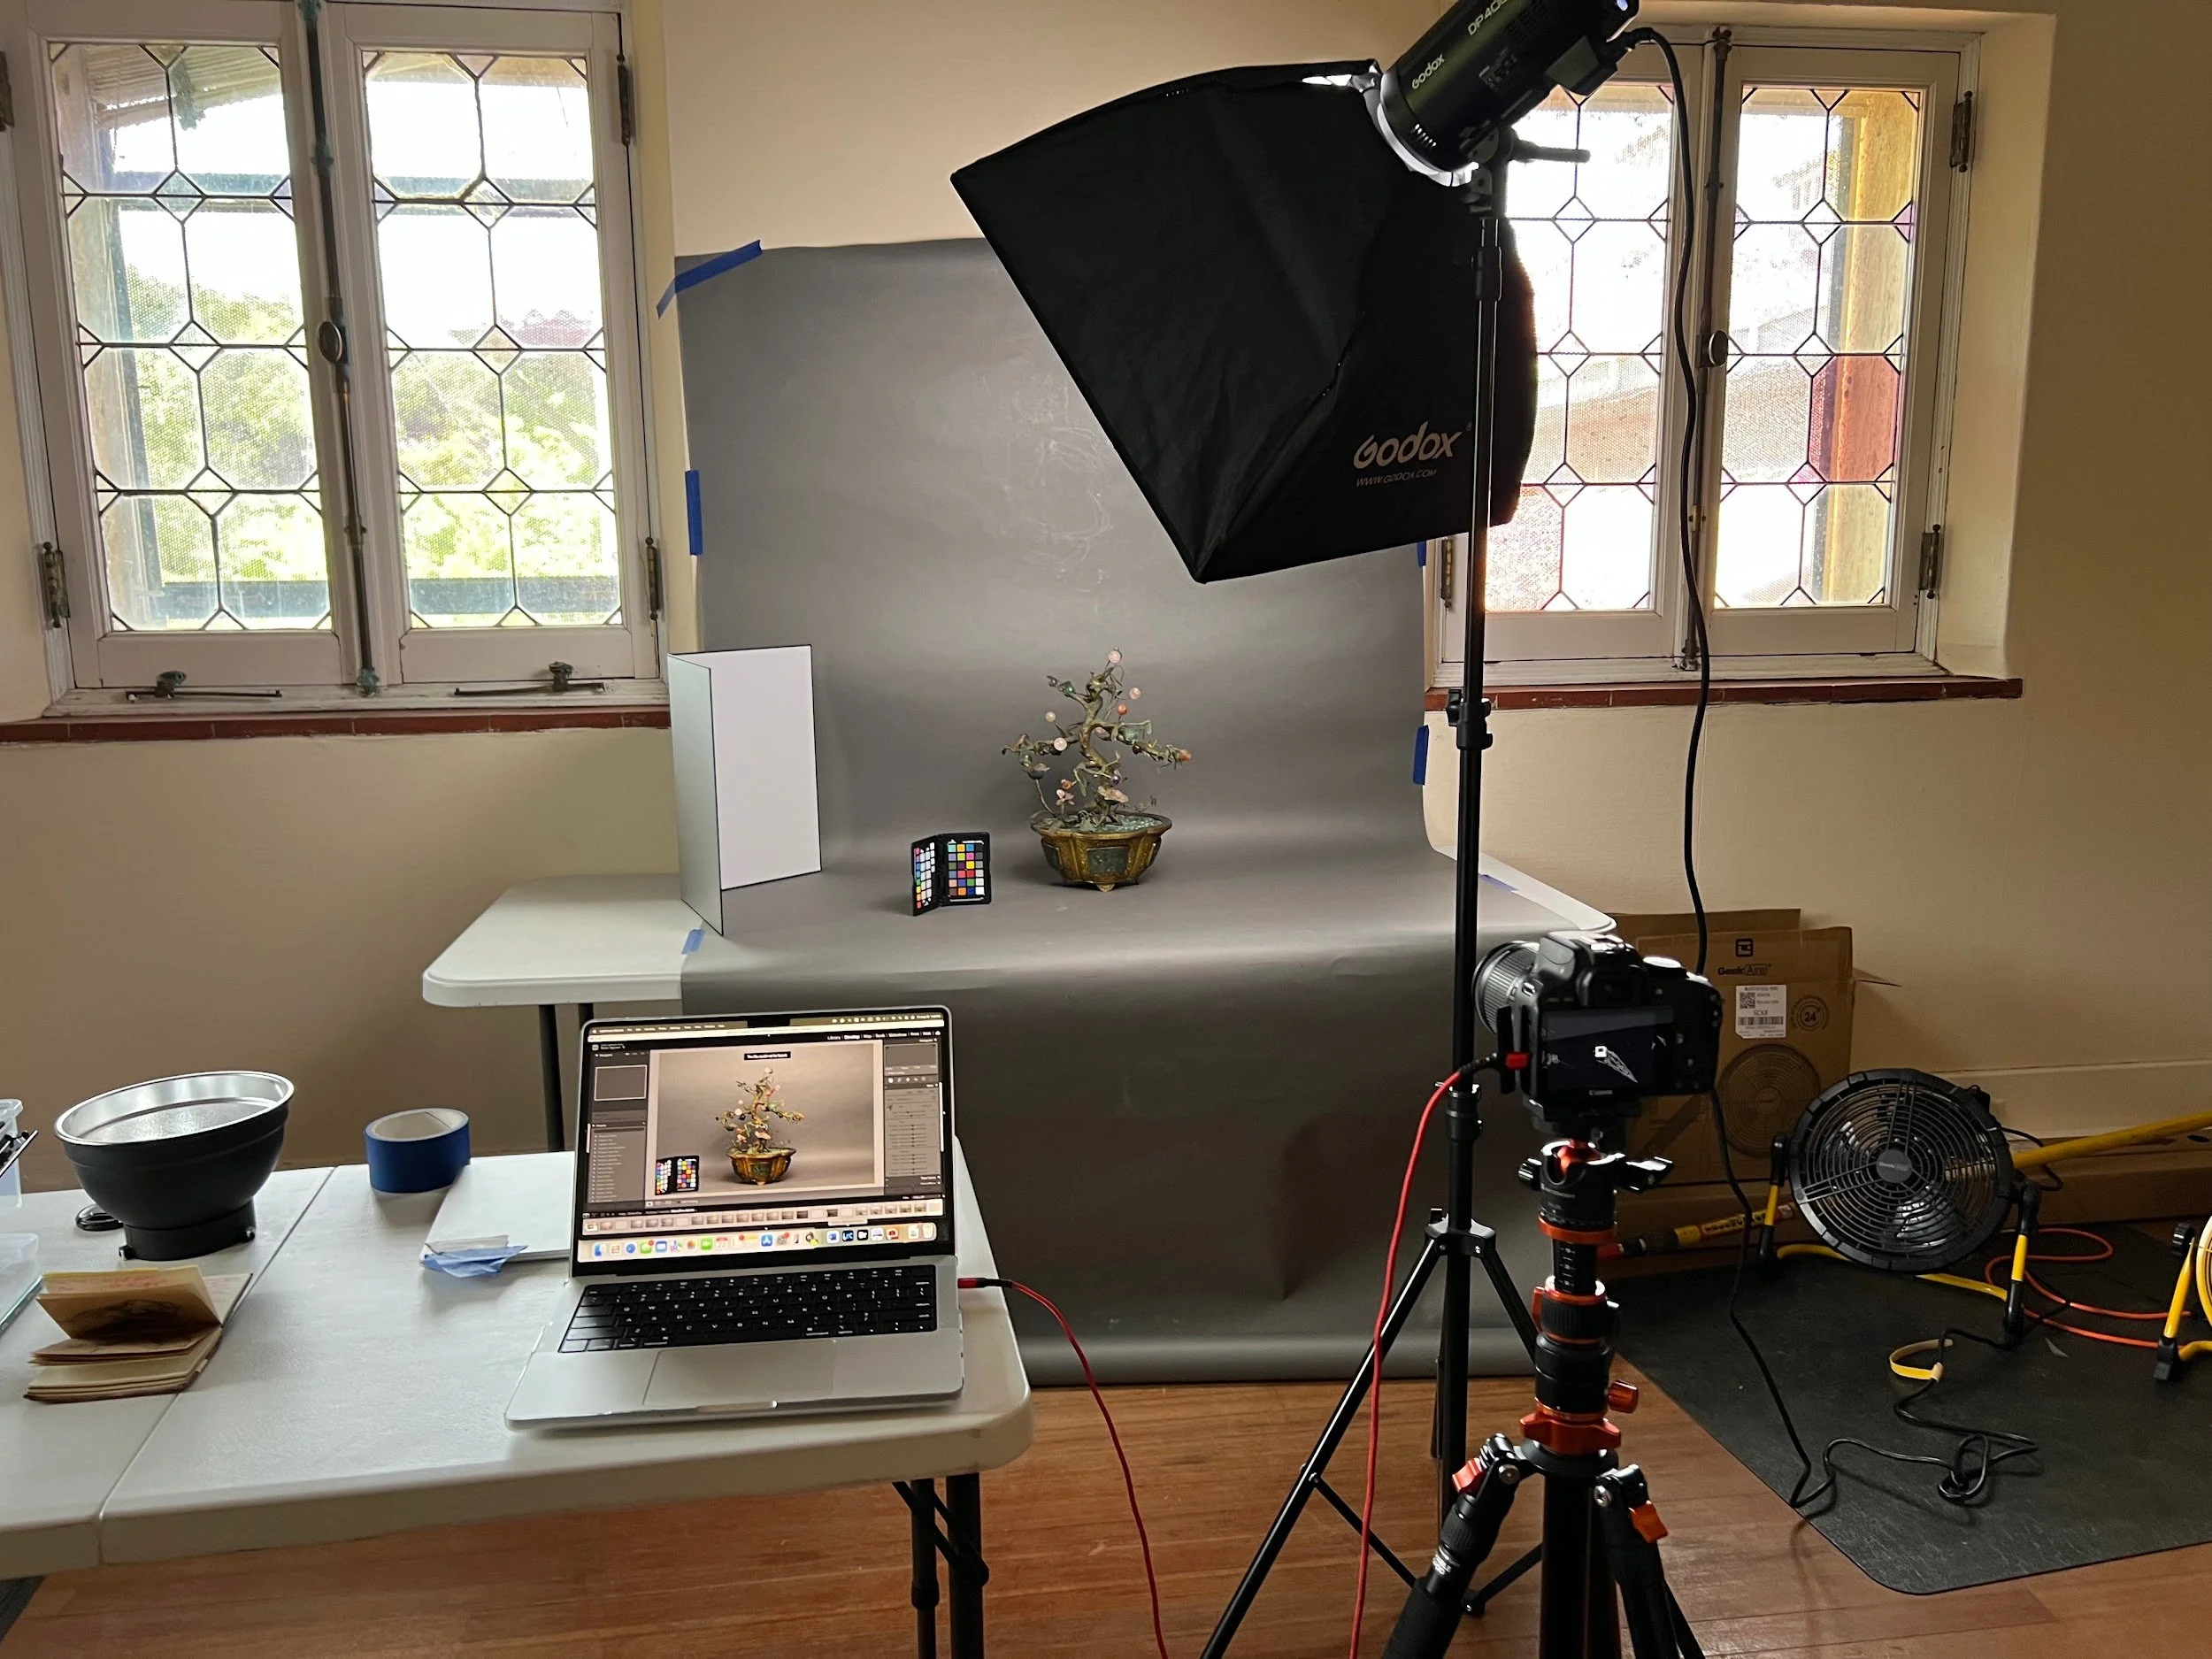
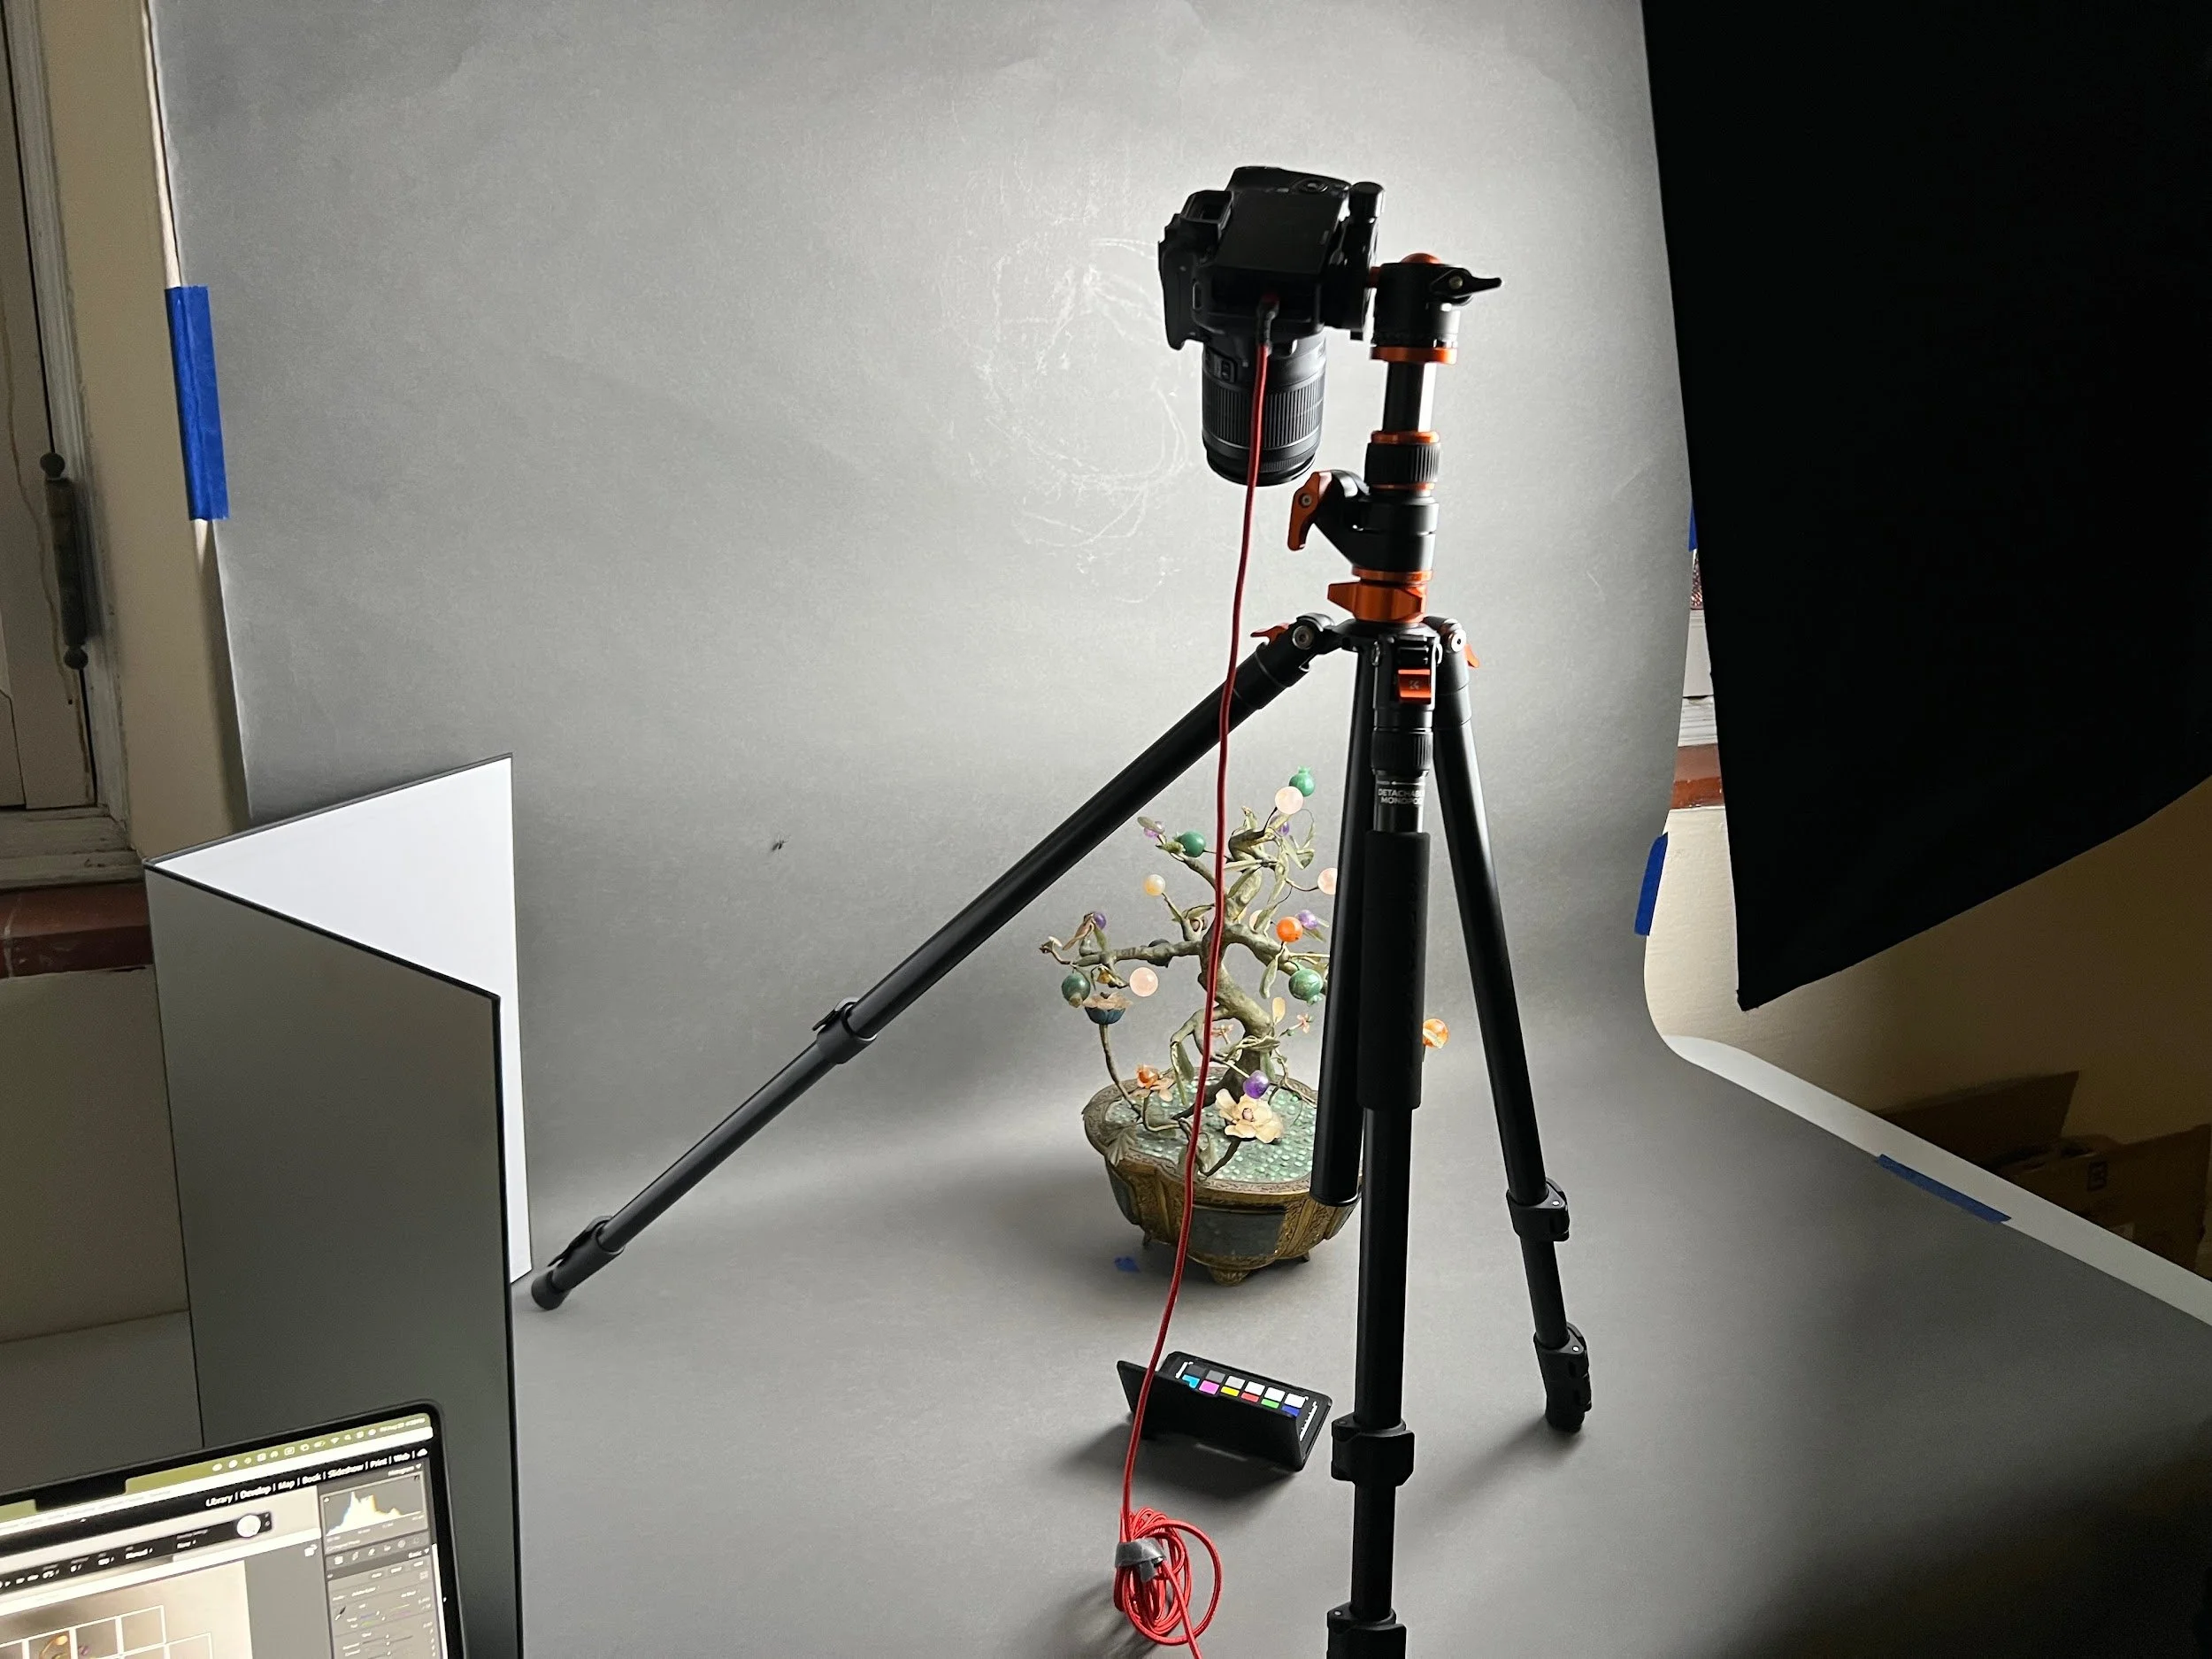
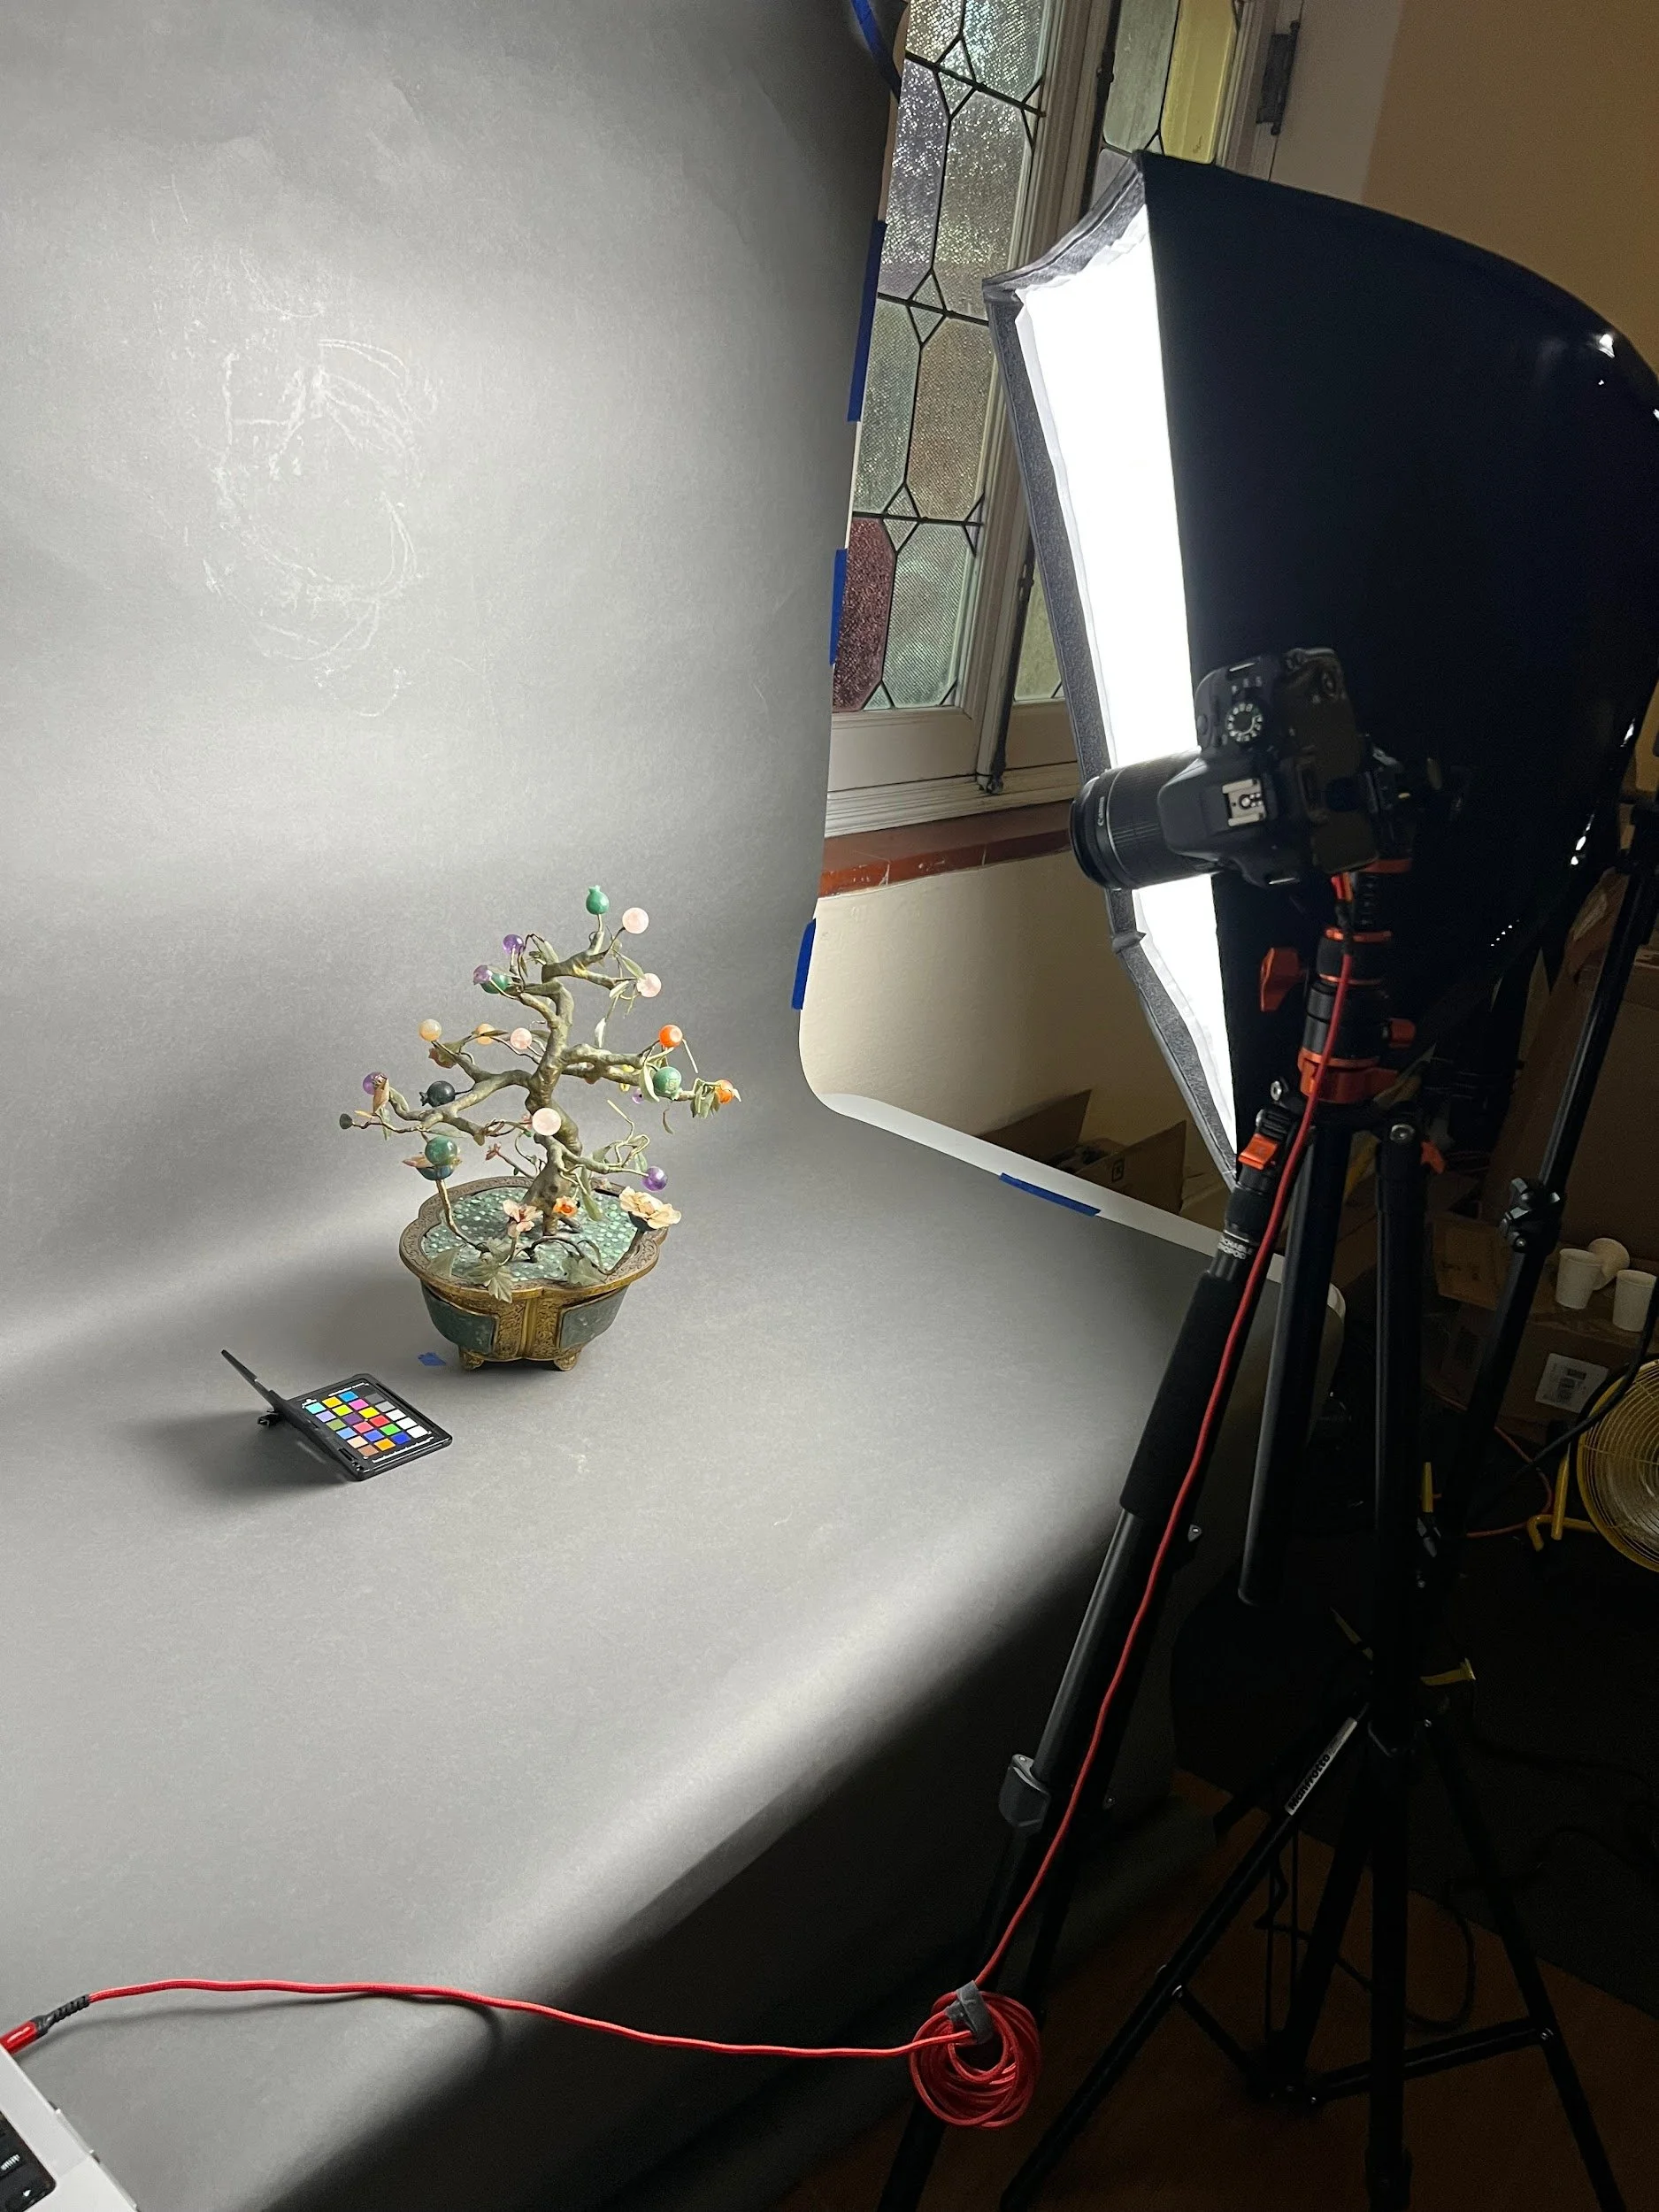
Set up for photoshooting. Blue tape was used to mark the position of the object as it was rotated by hand for each shot.
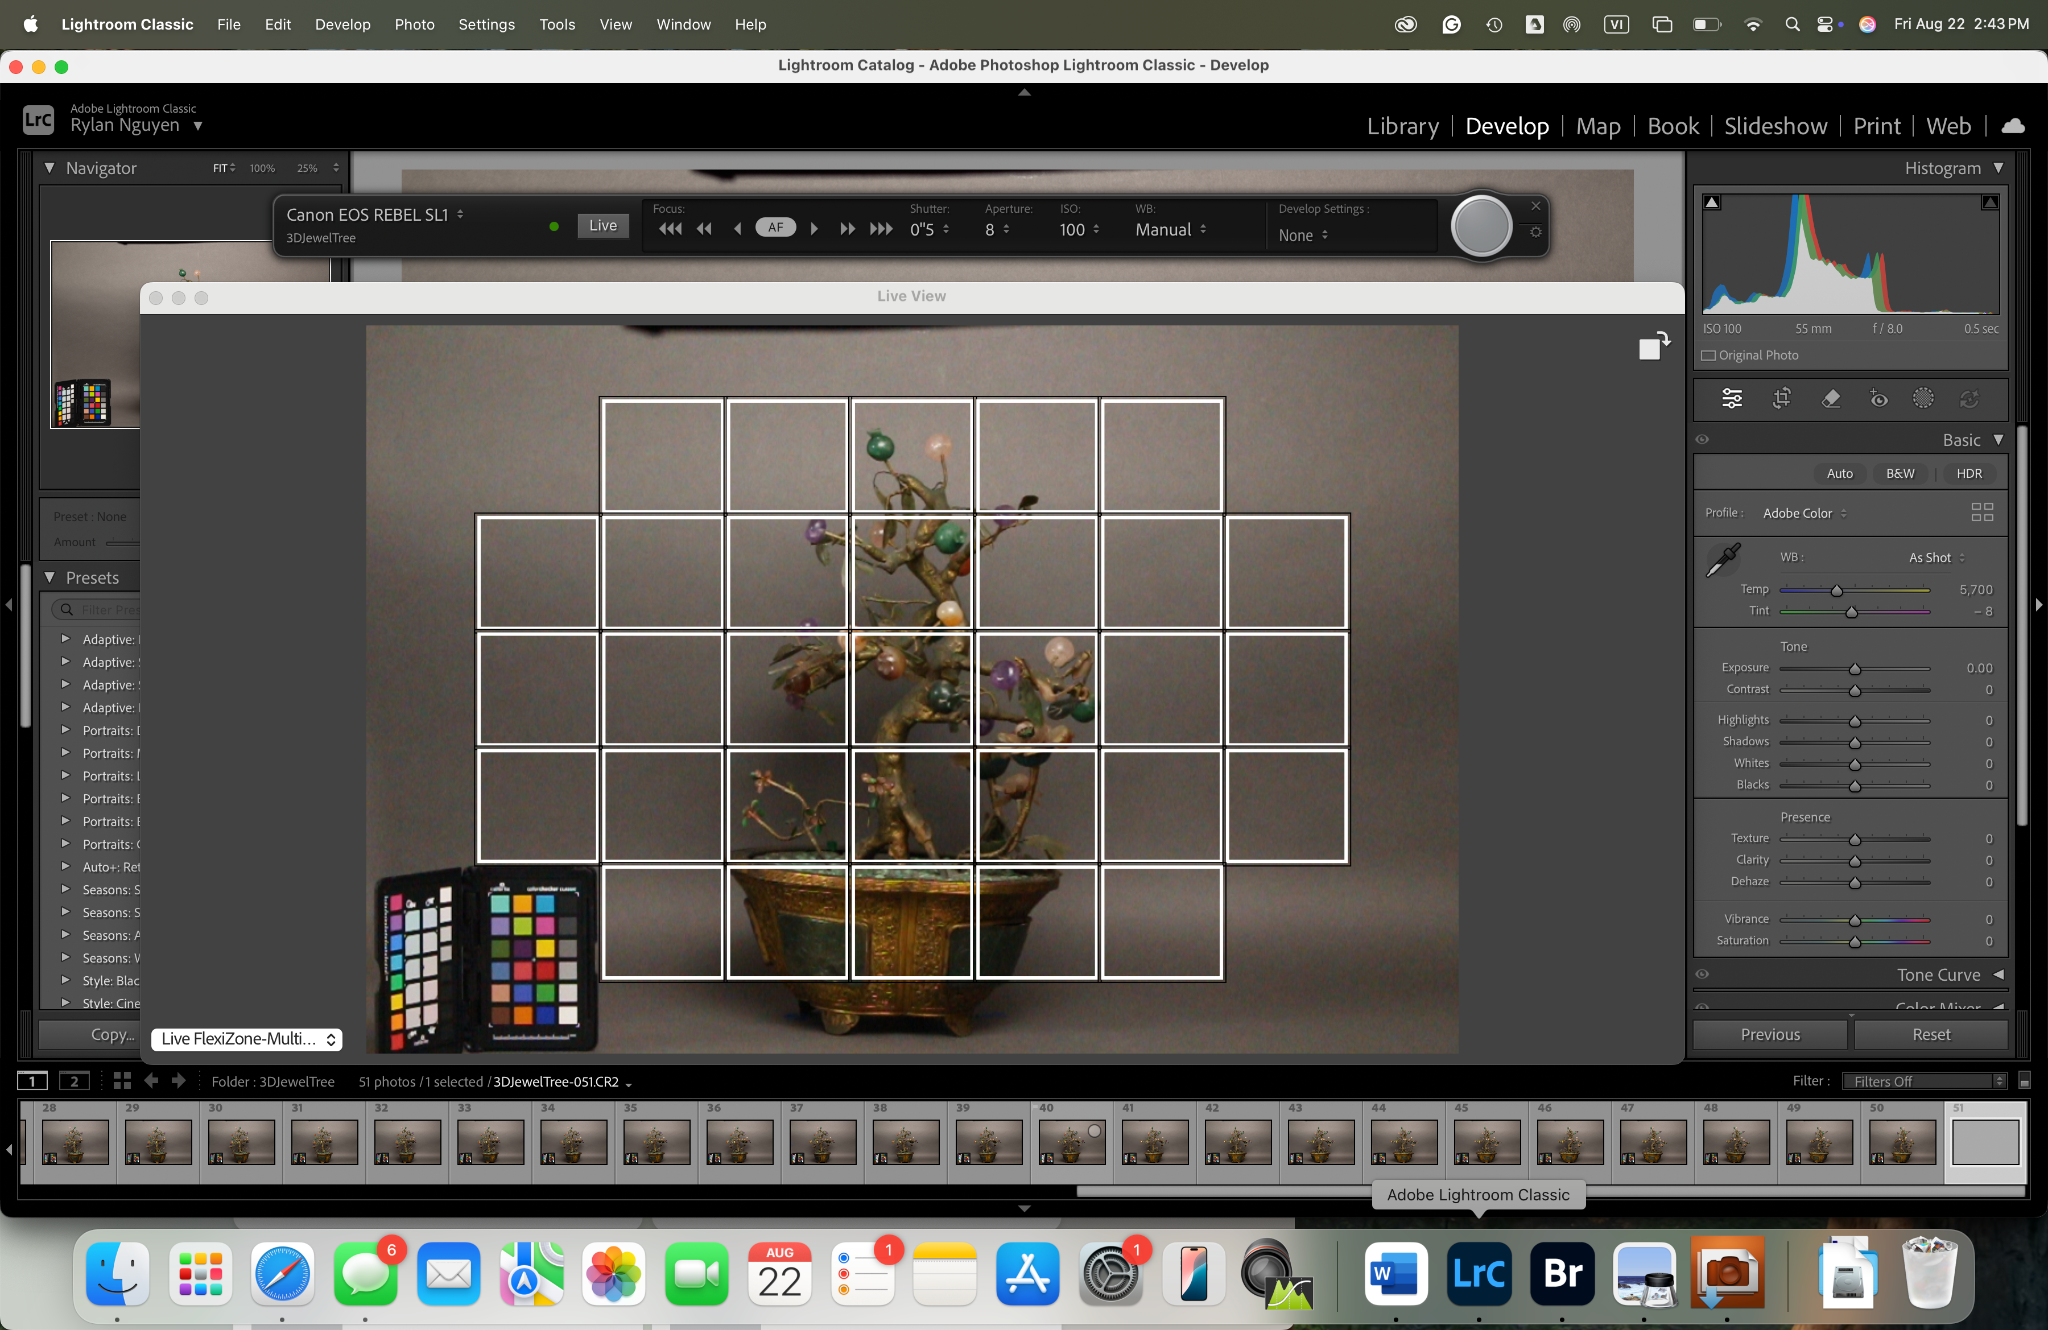
Photos shot and tethered in Adobe Lightroom Classic.
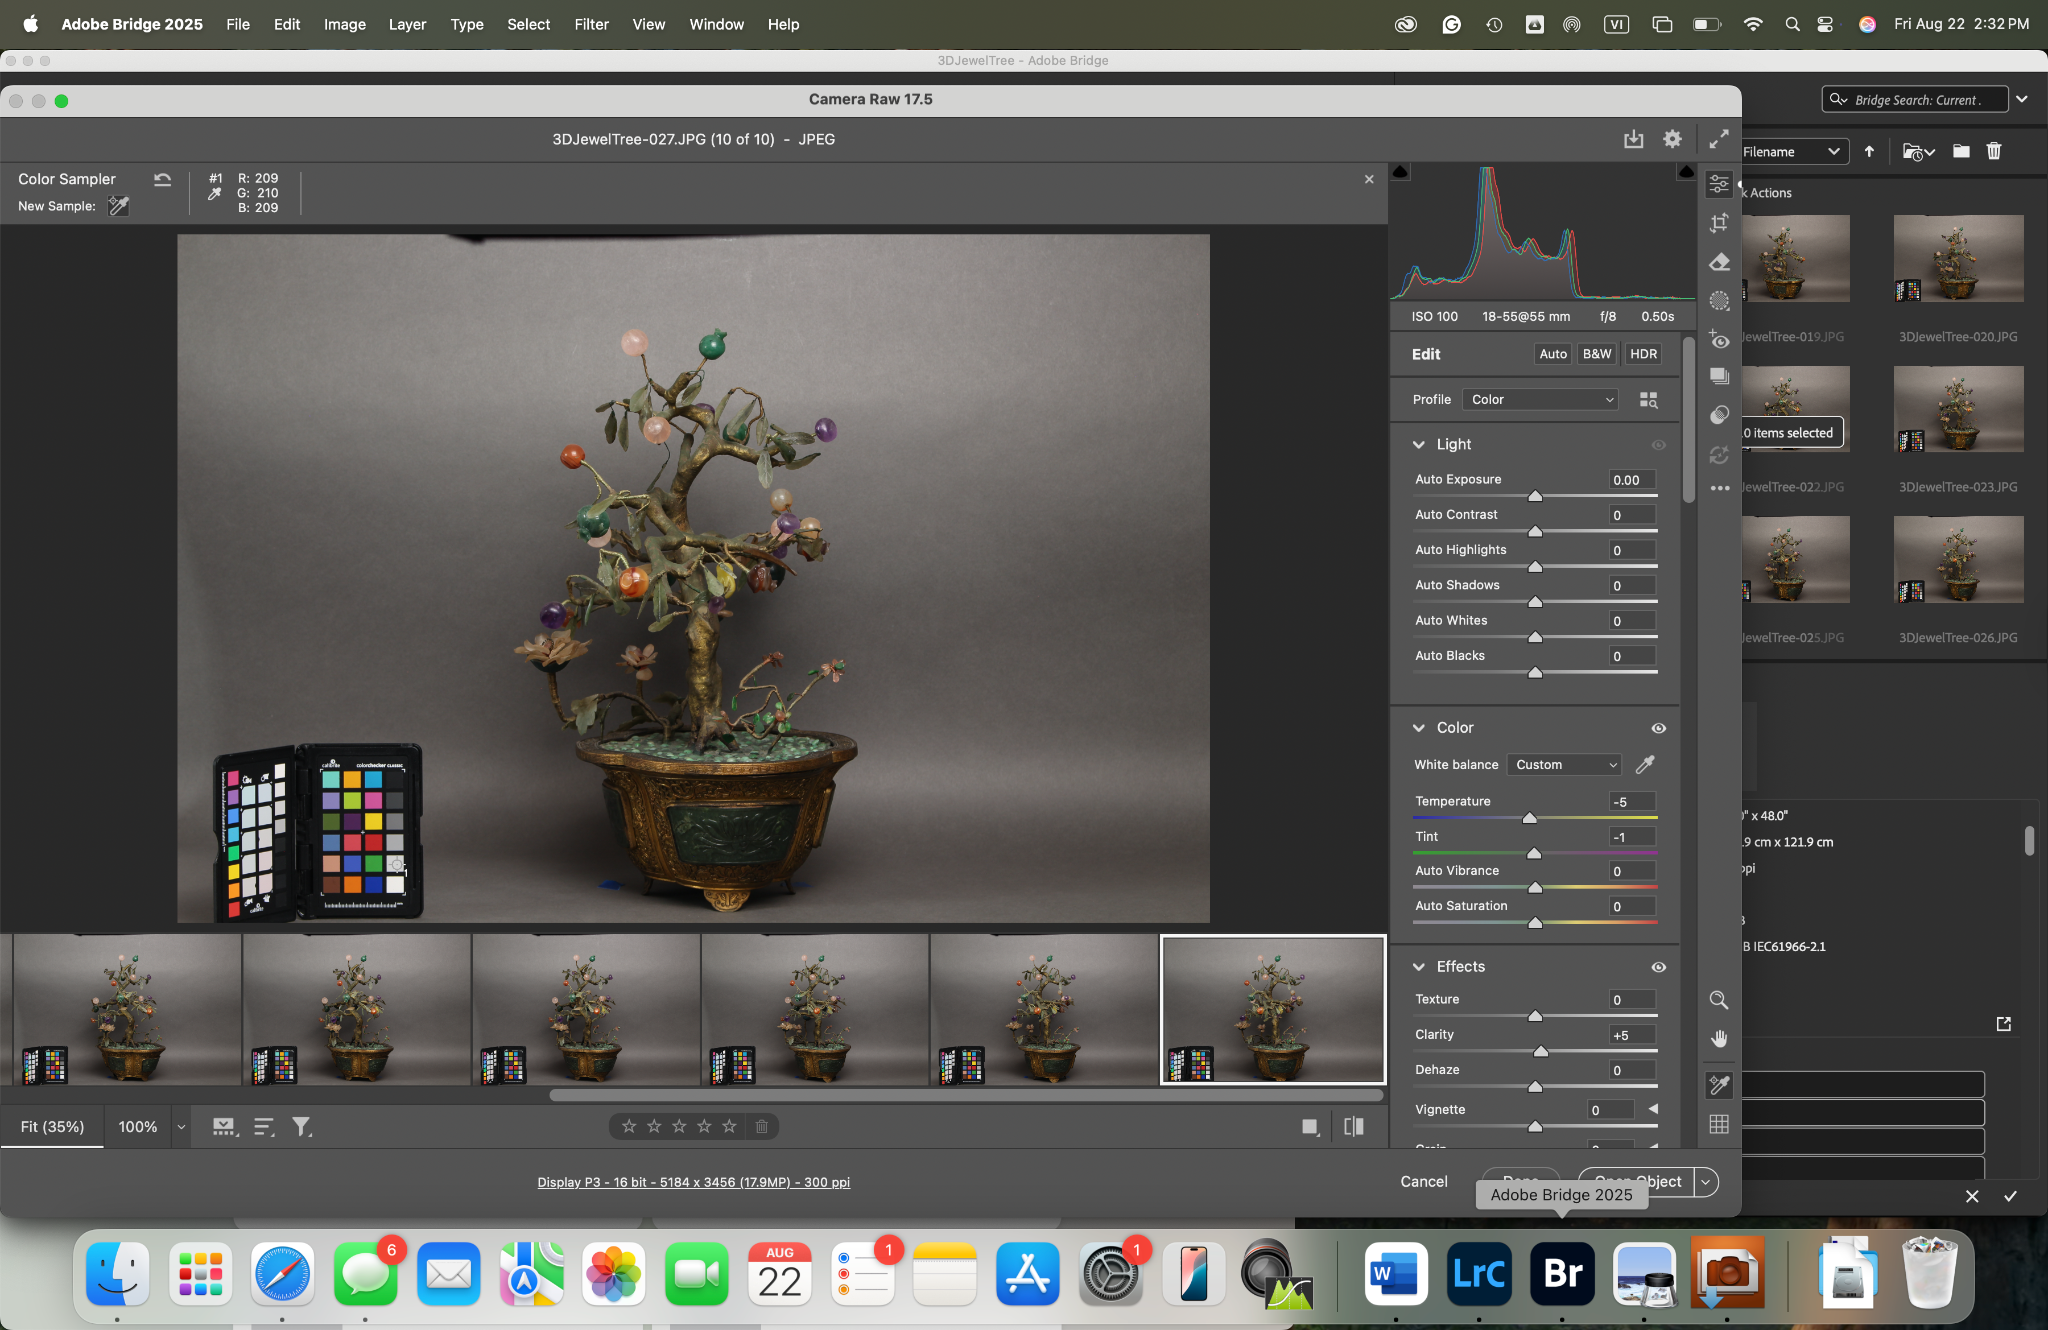
Editing color balance and exposure in Adobe Bridge’s Camera Raw. Files saved as .jpg.
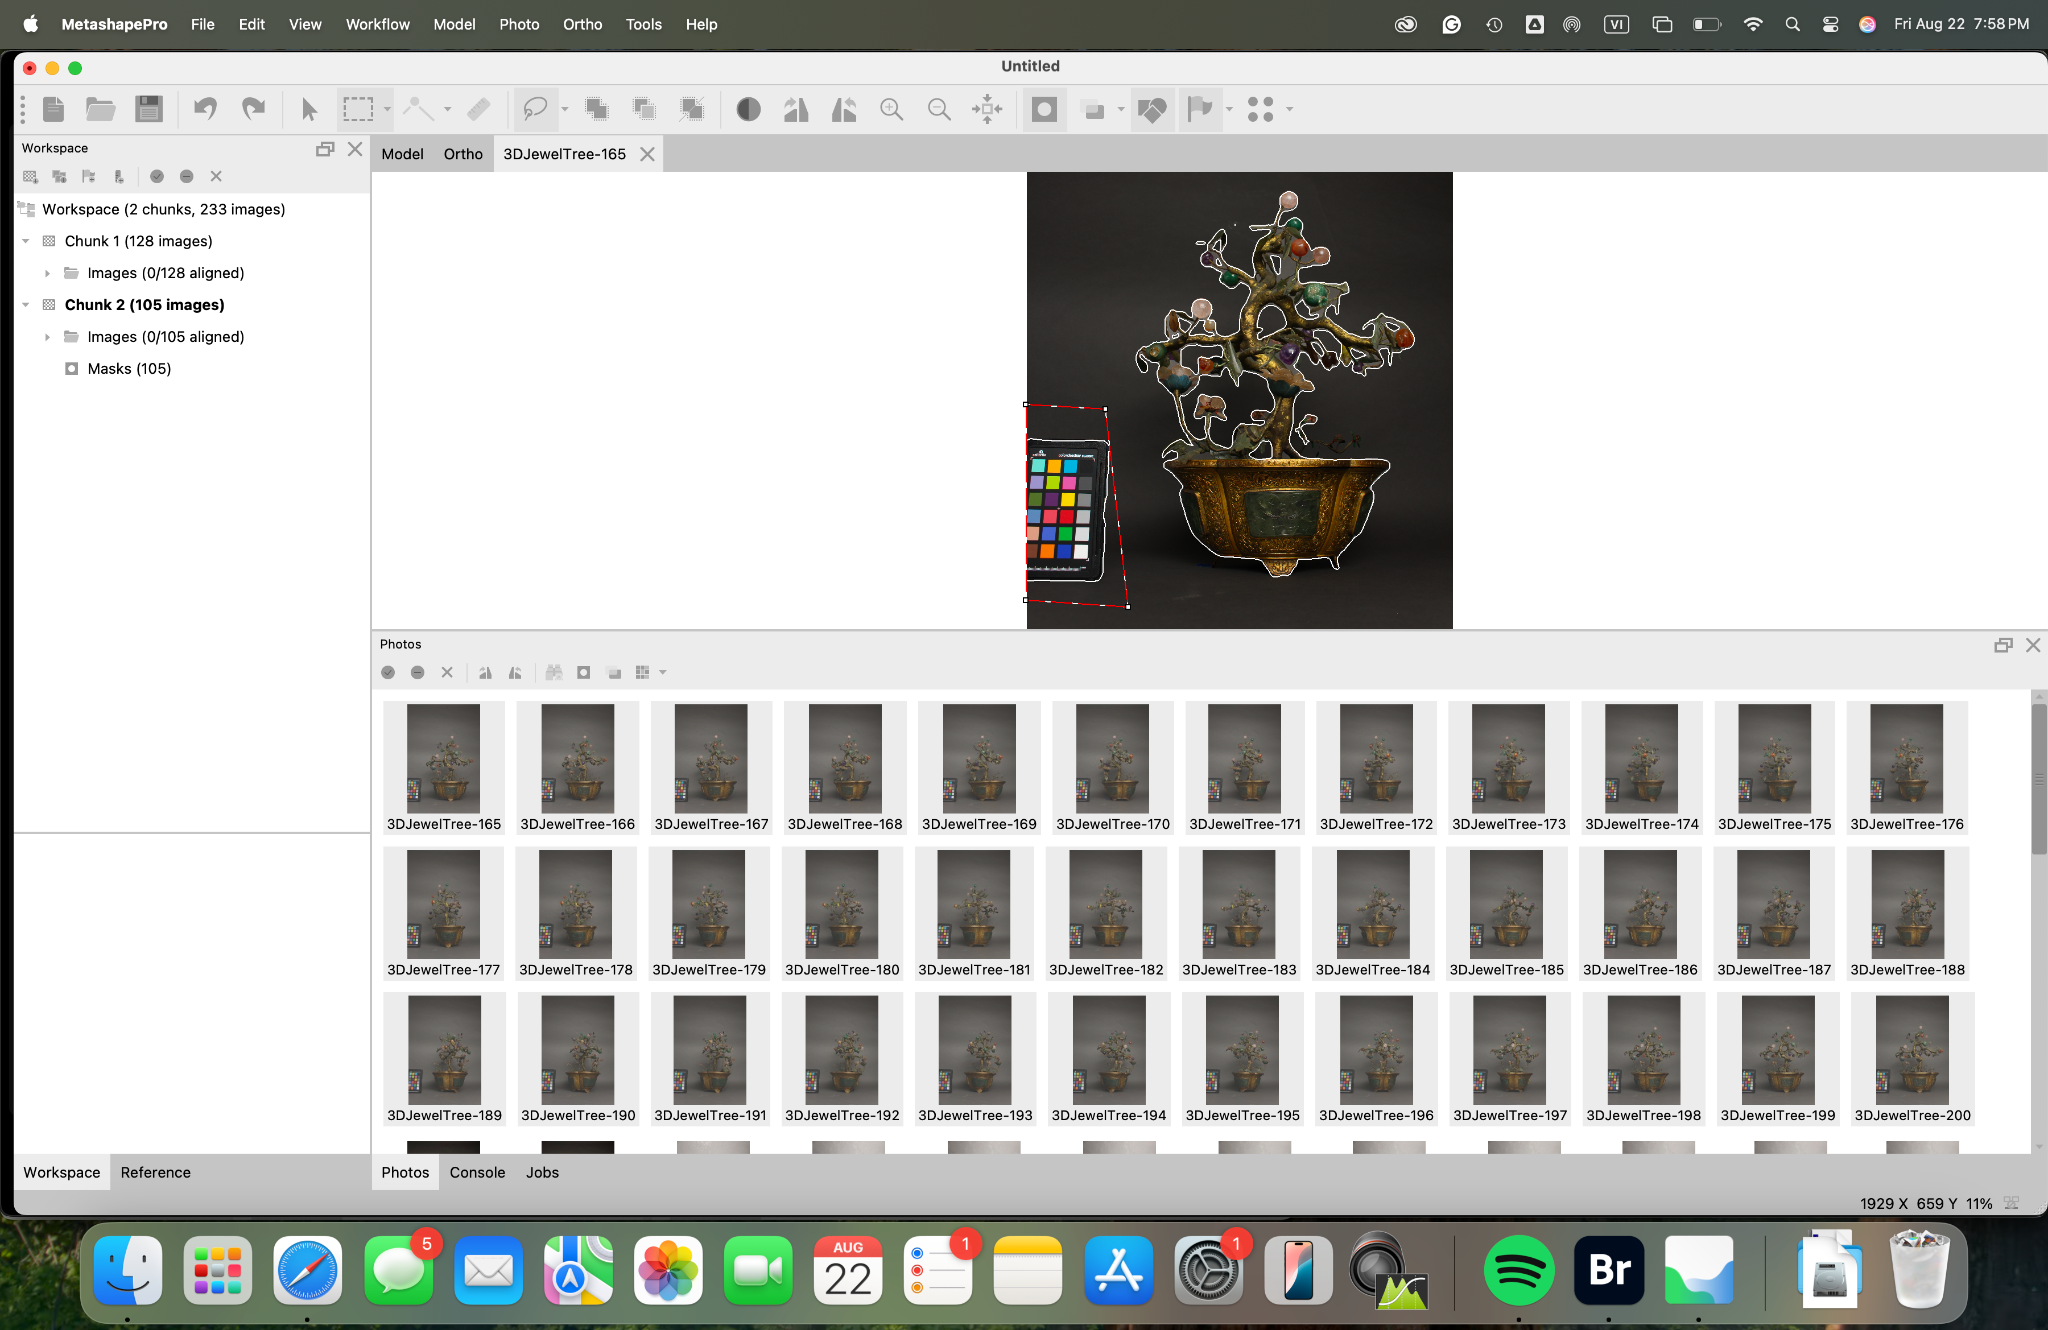
Importing photos in Agisoft Metashape and generating masks with AI.
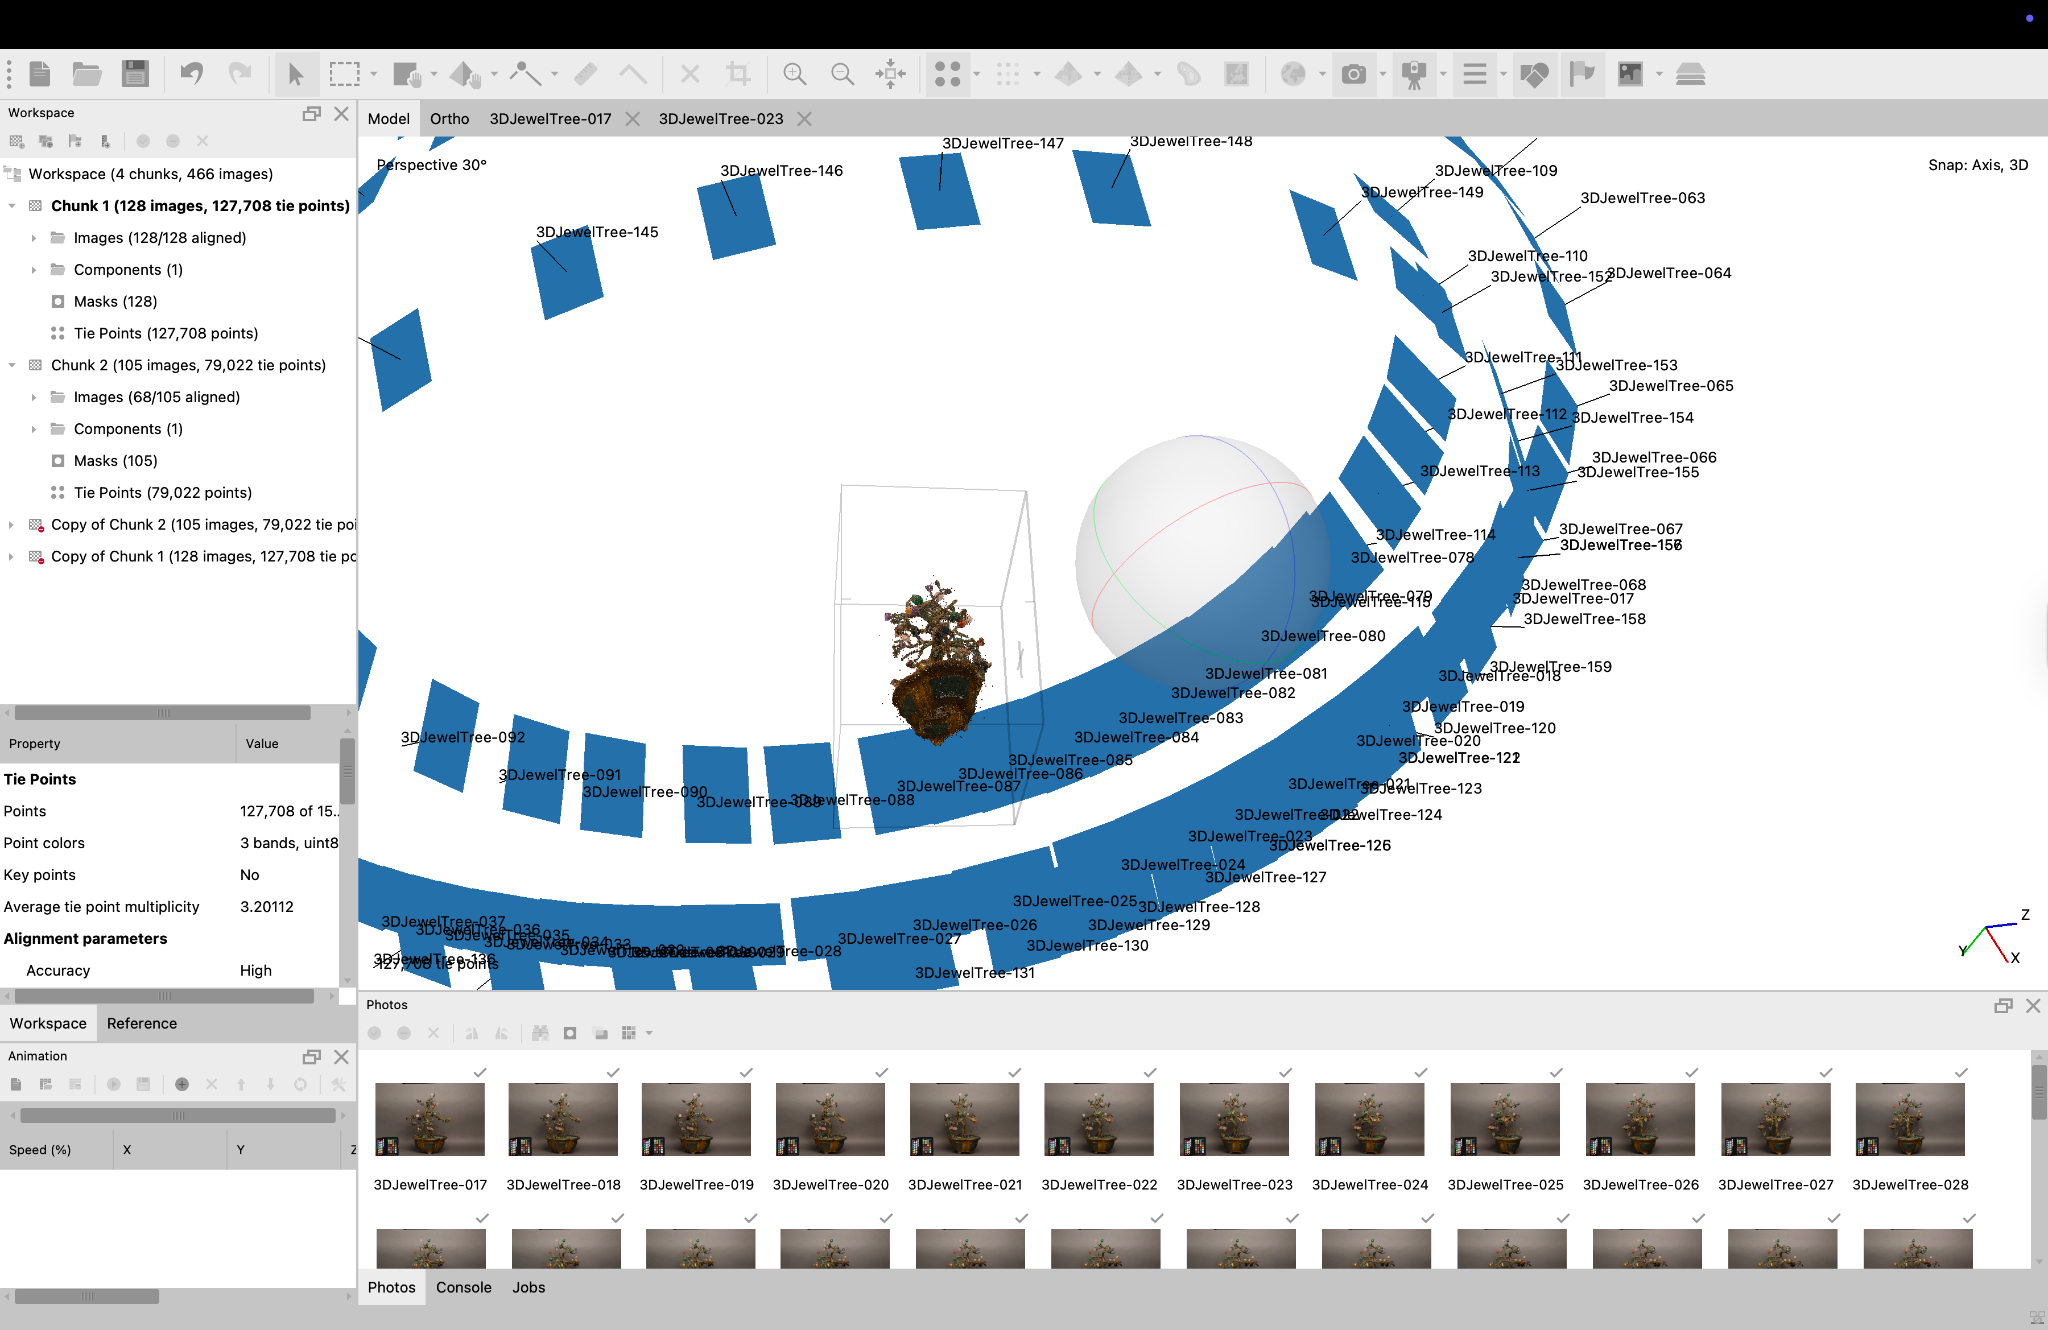
Aligning photos to generate tie points (Chunk 1: shot with Canon 55mm lens).
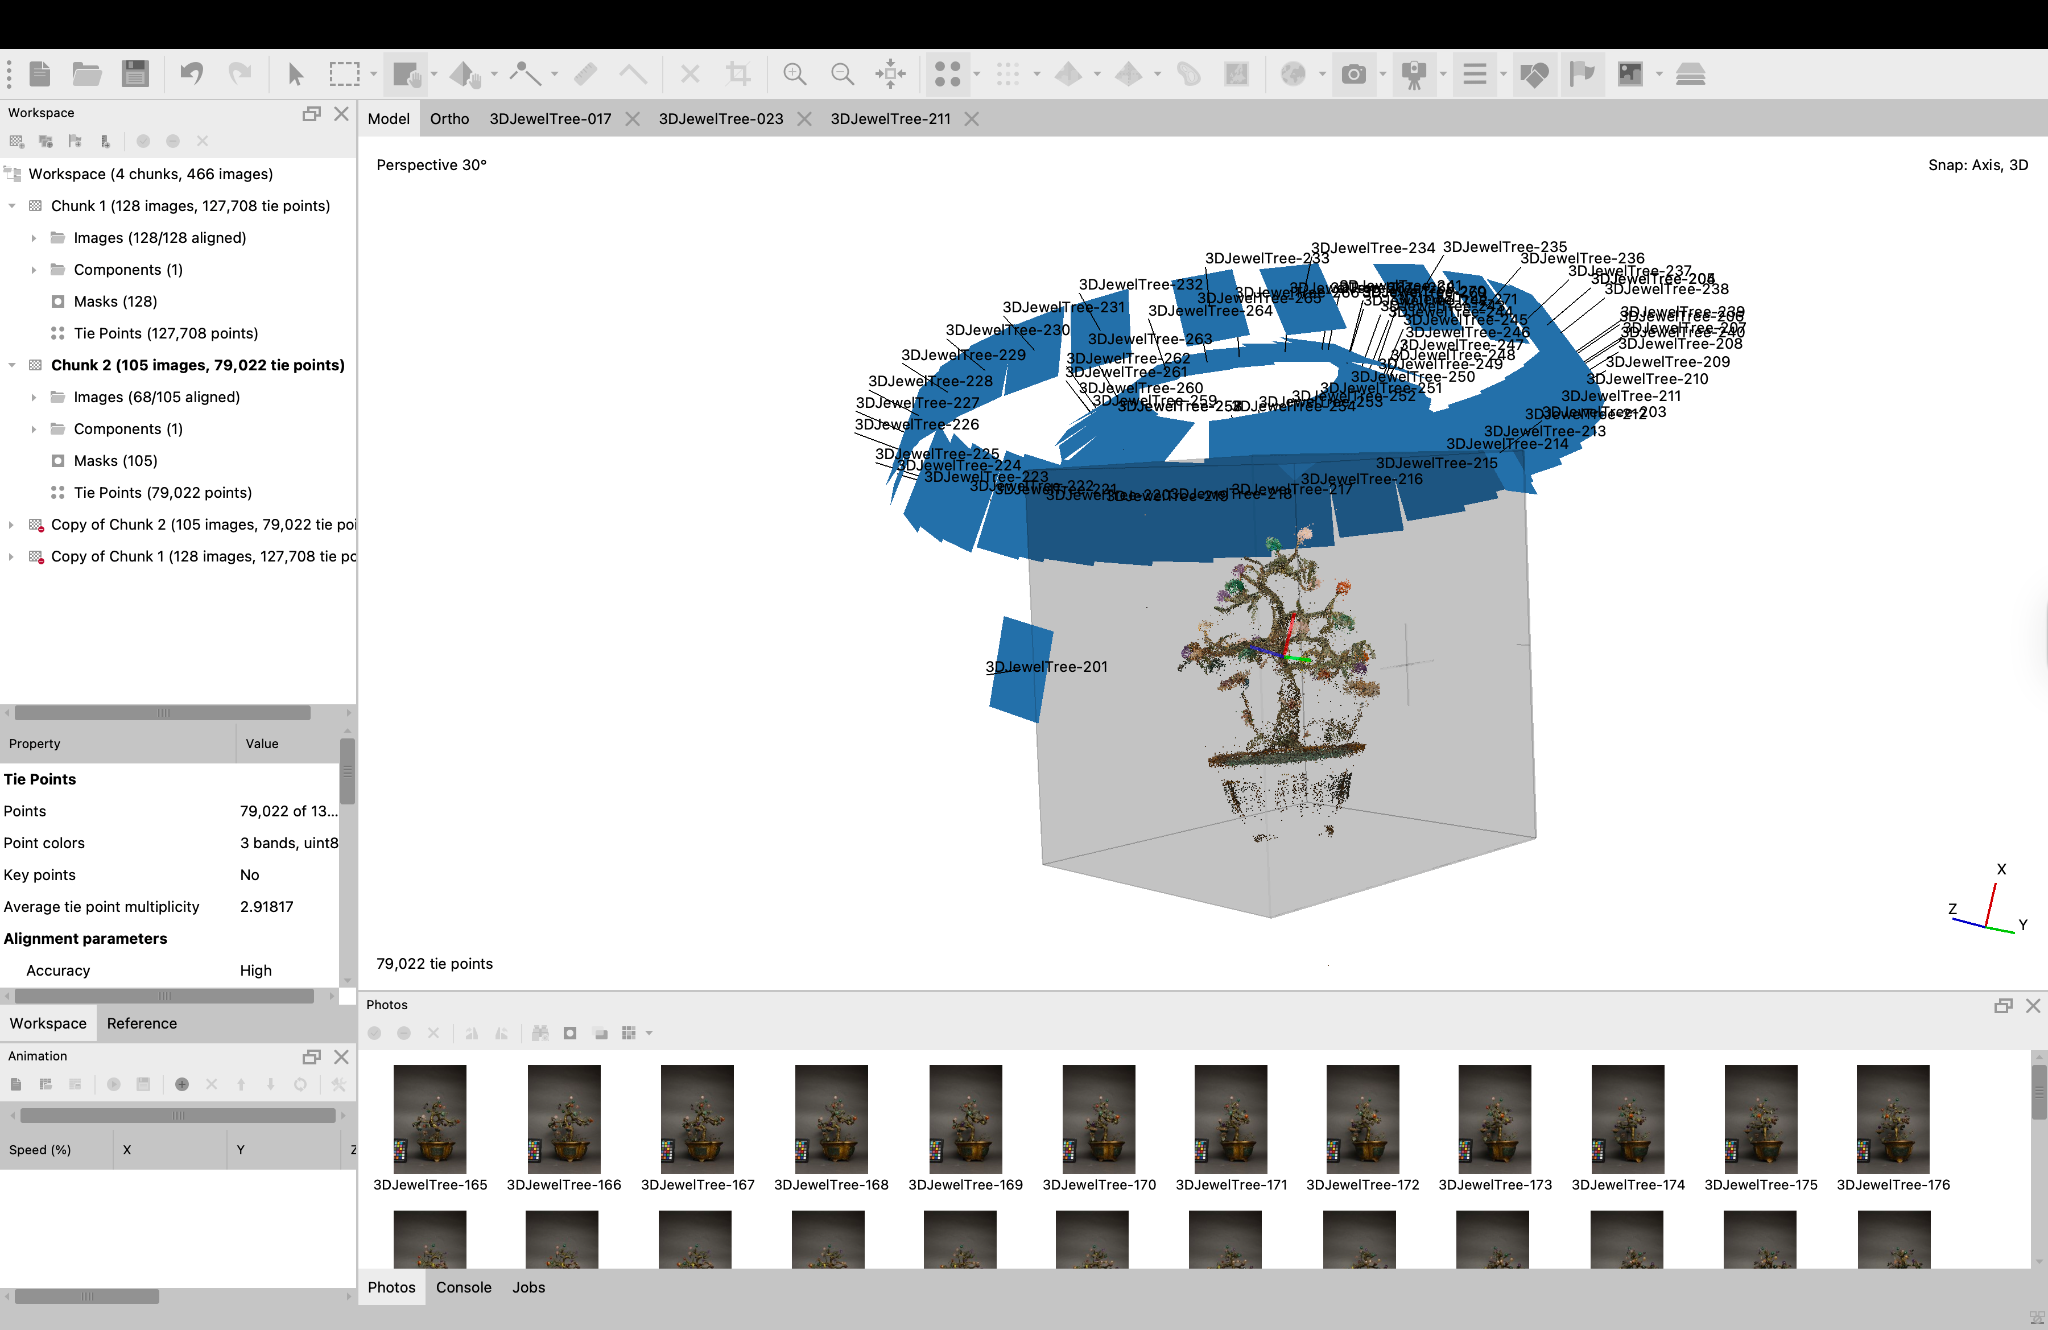
Aligning photos to generate tie points (Chunk 2: shot with Canon 18mm lens).
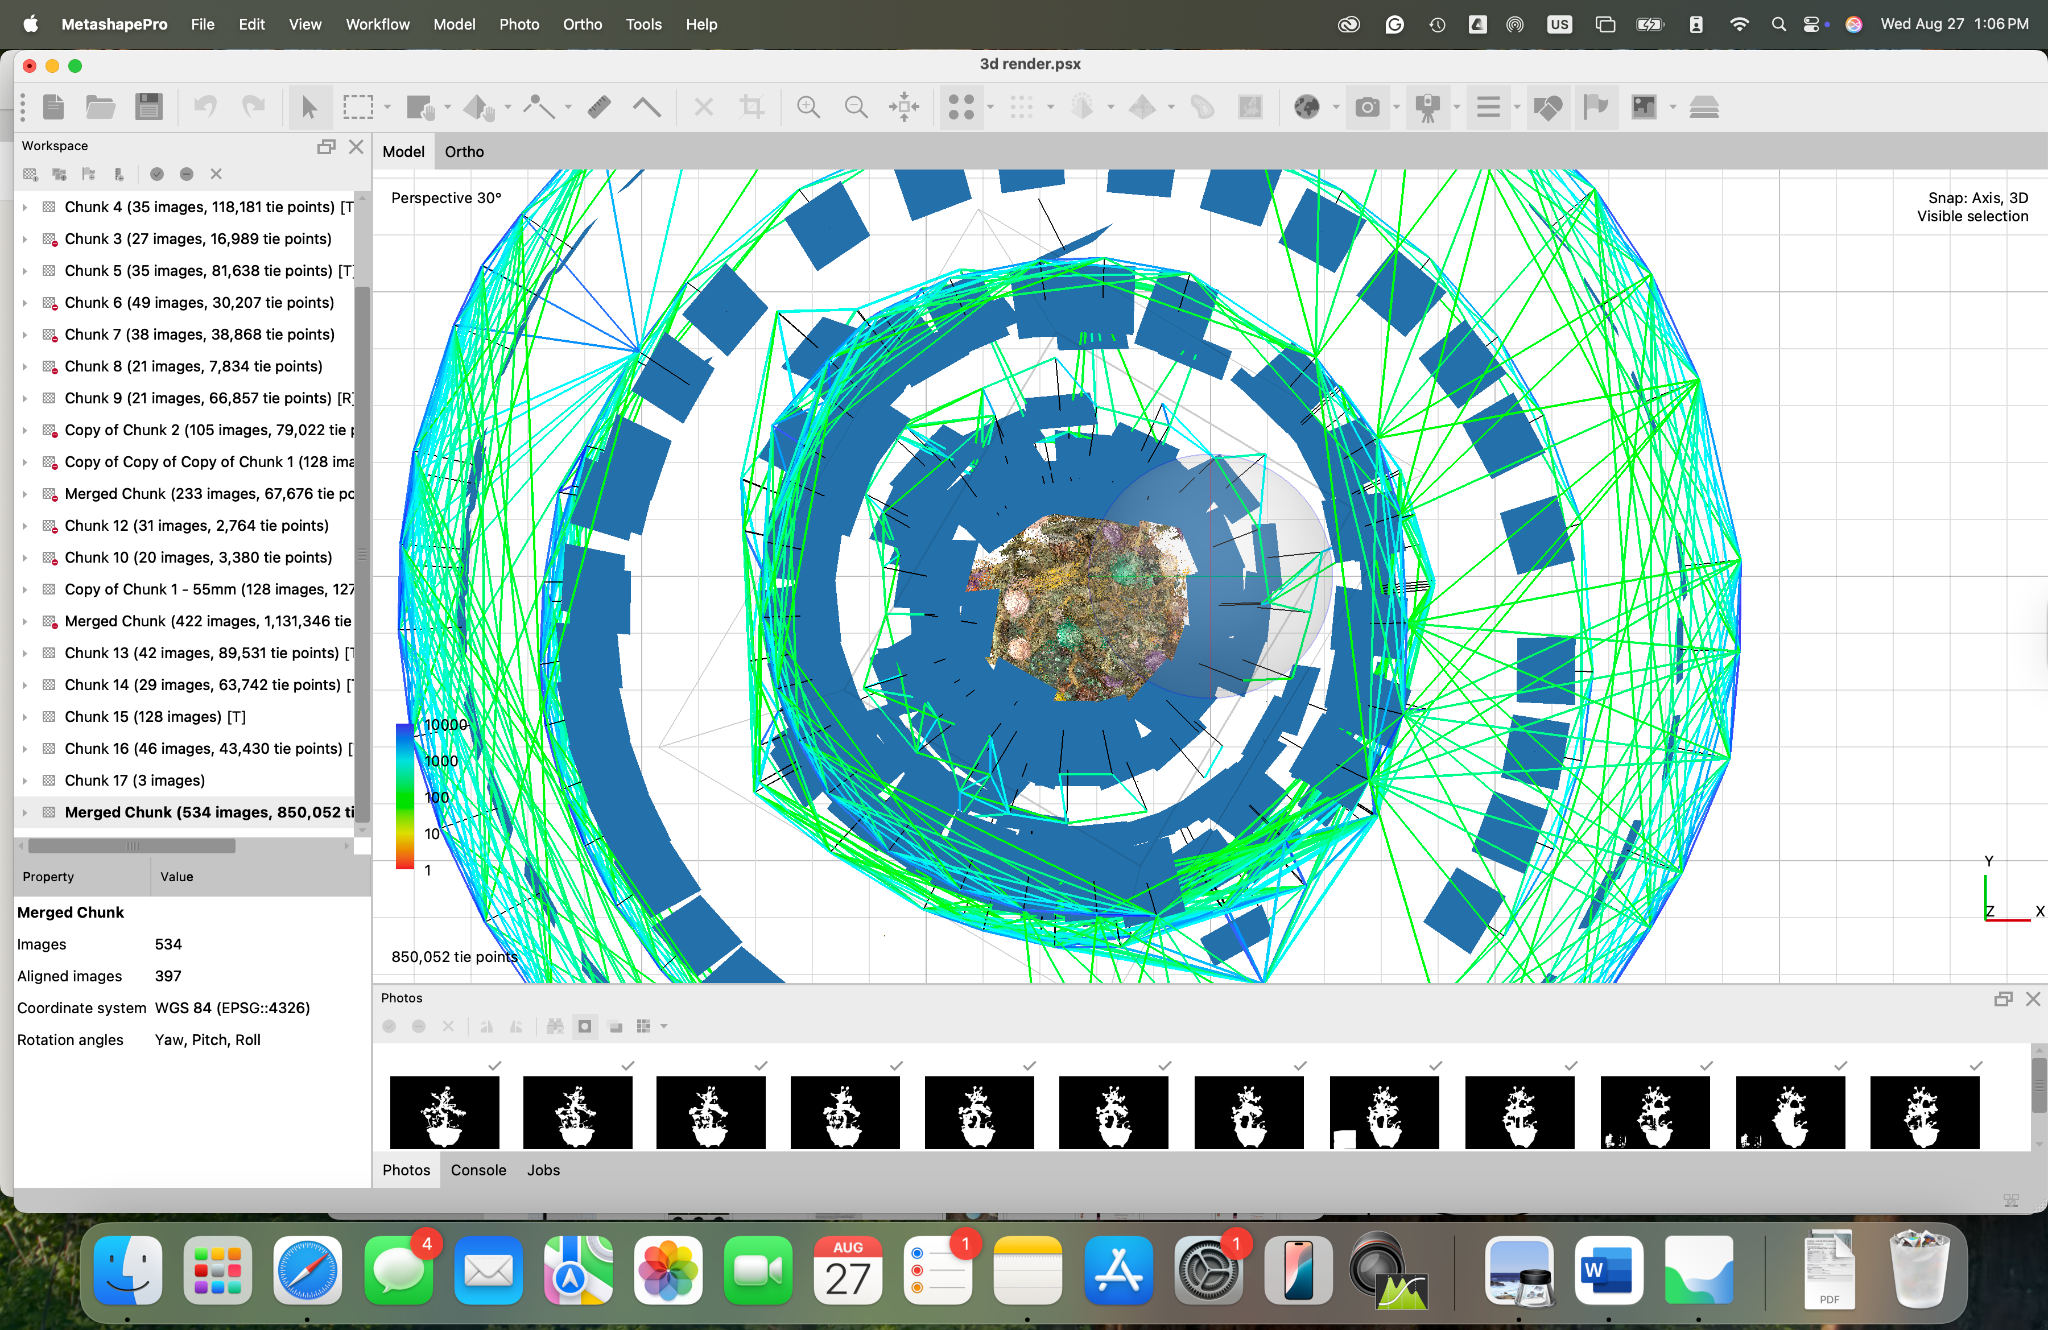
Ties points after merging chunks.
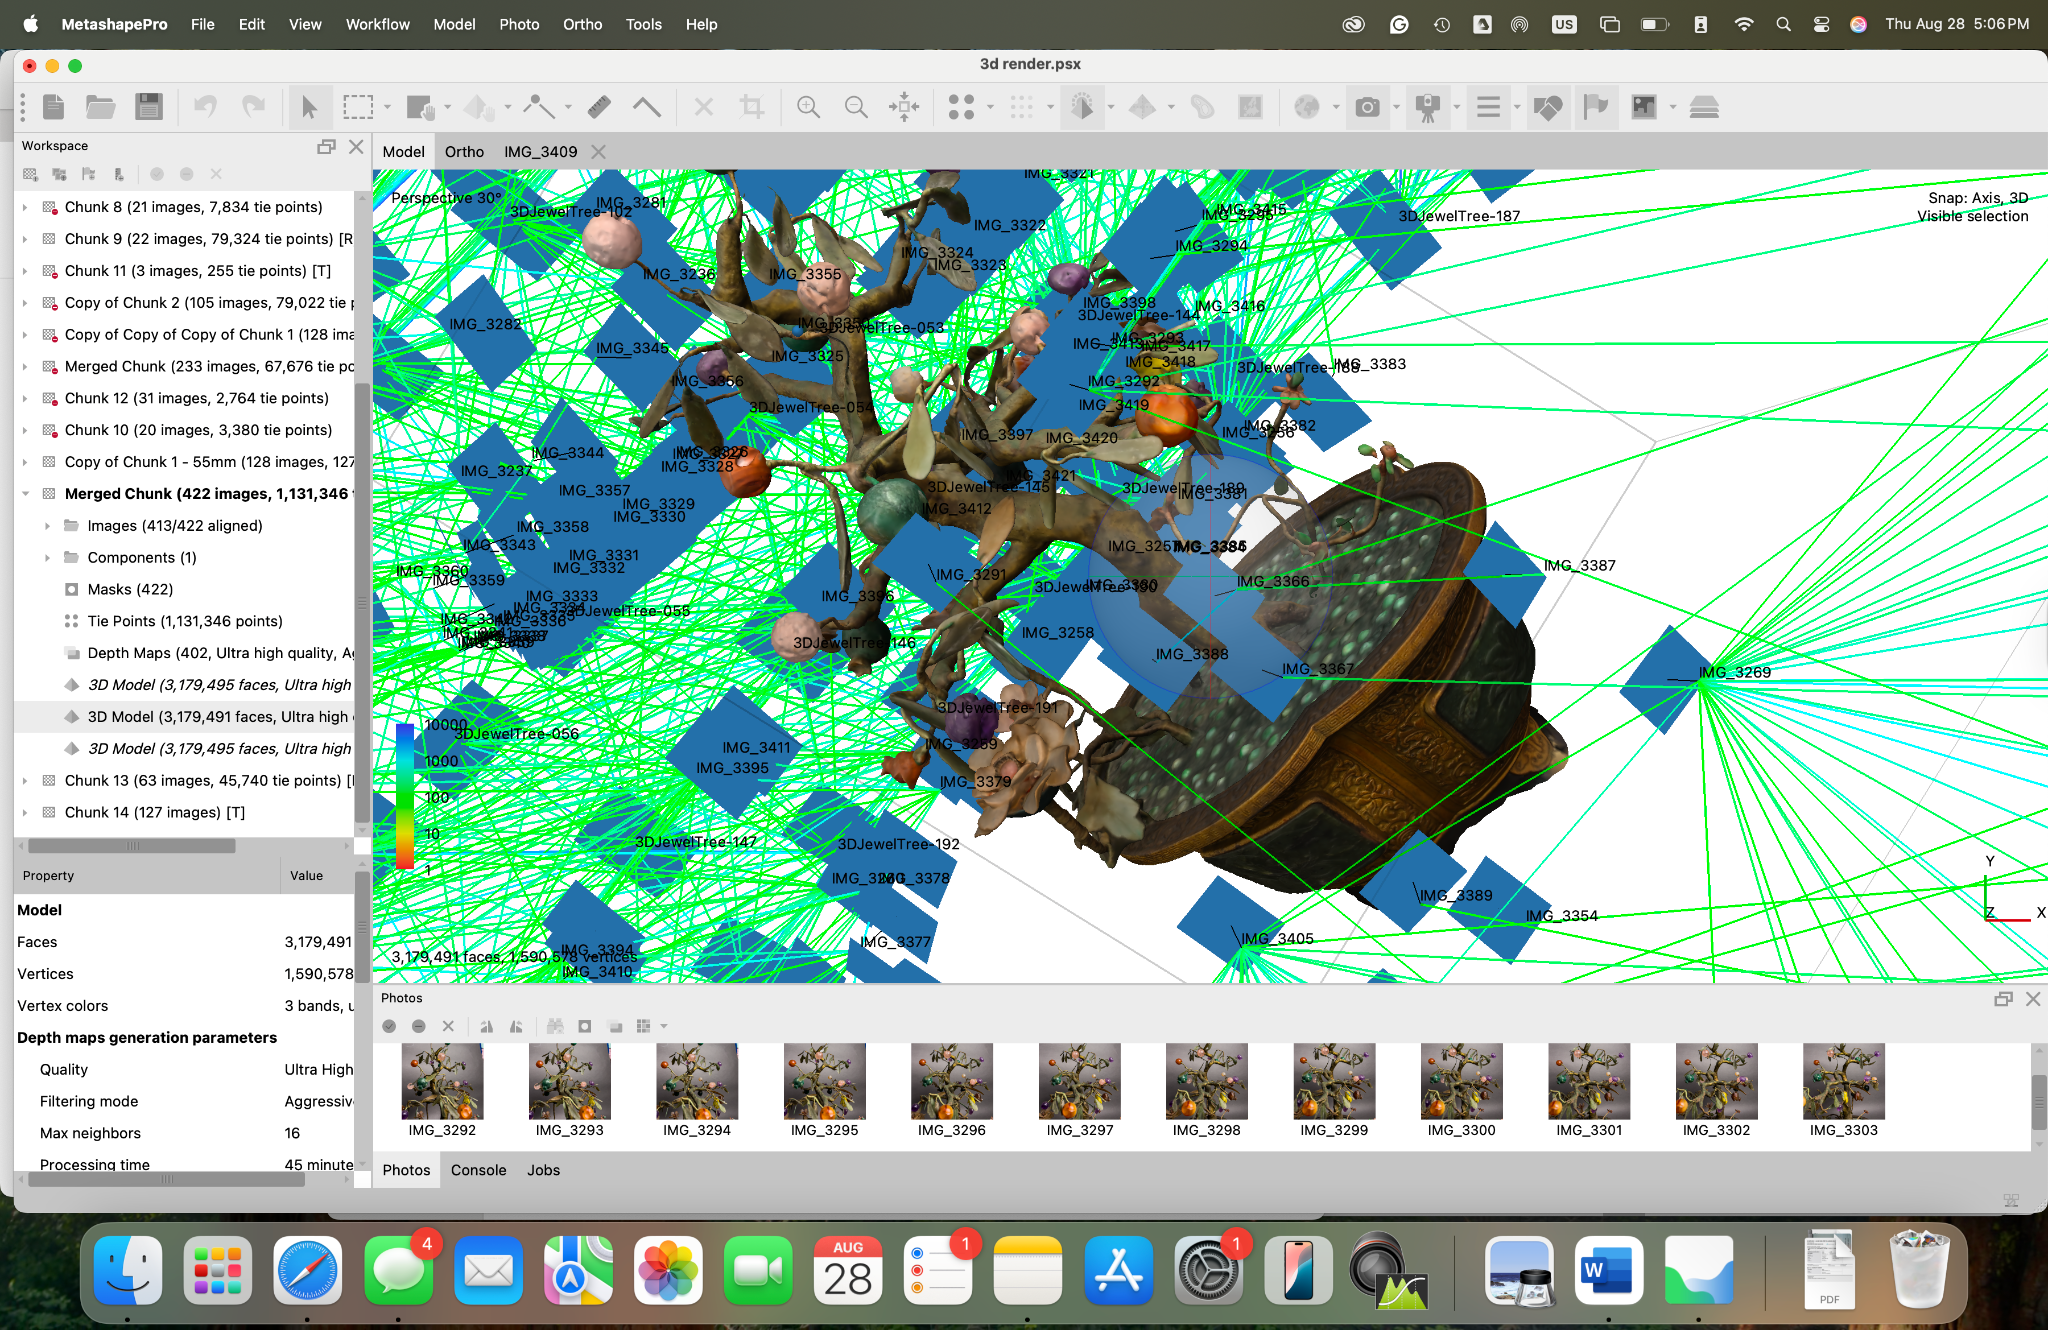
Build model.
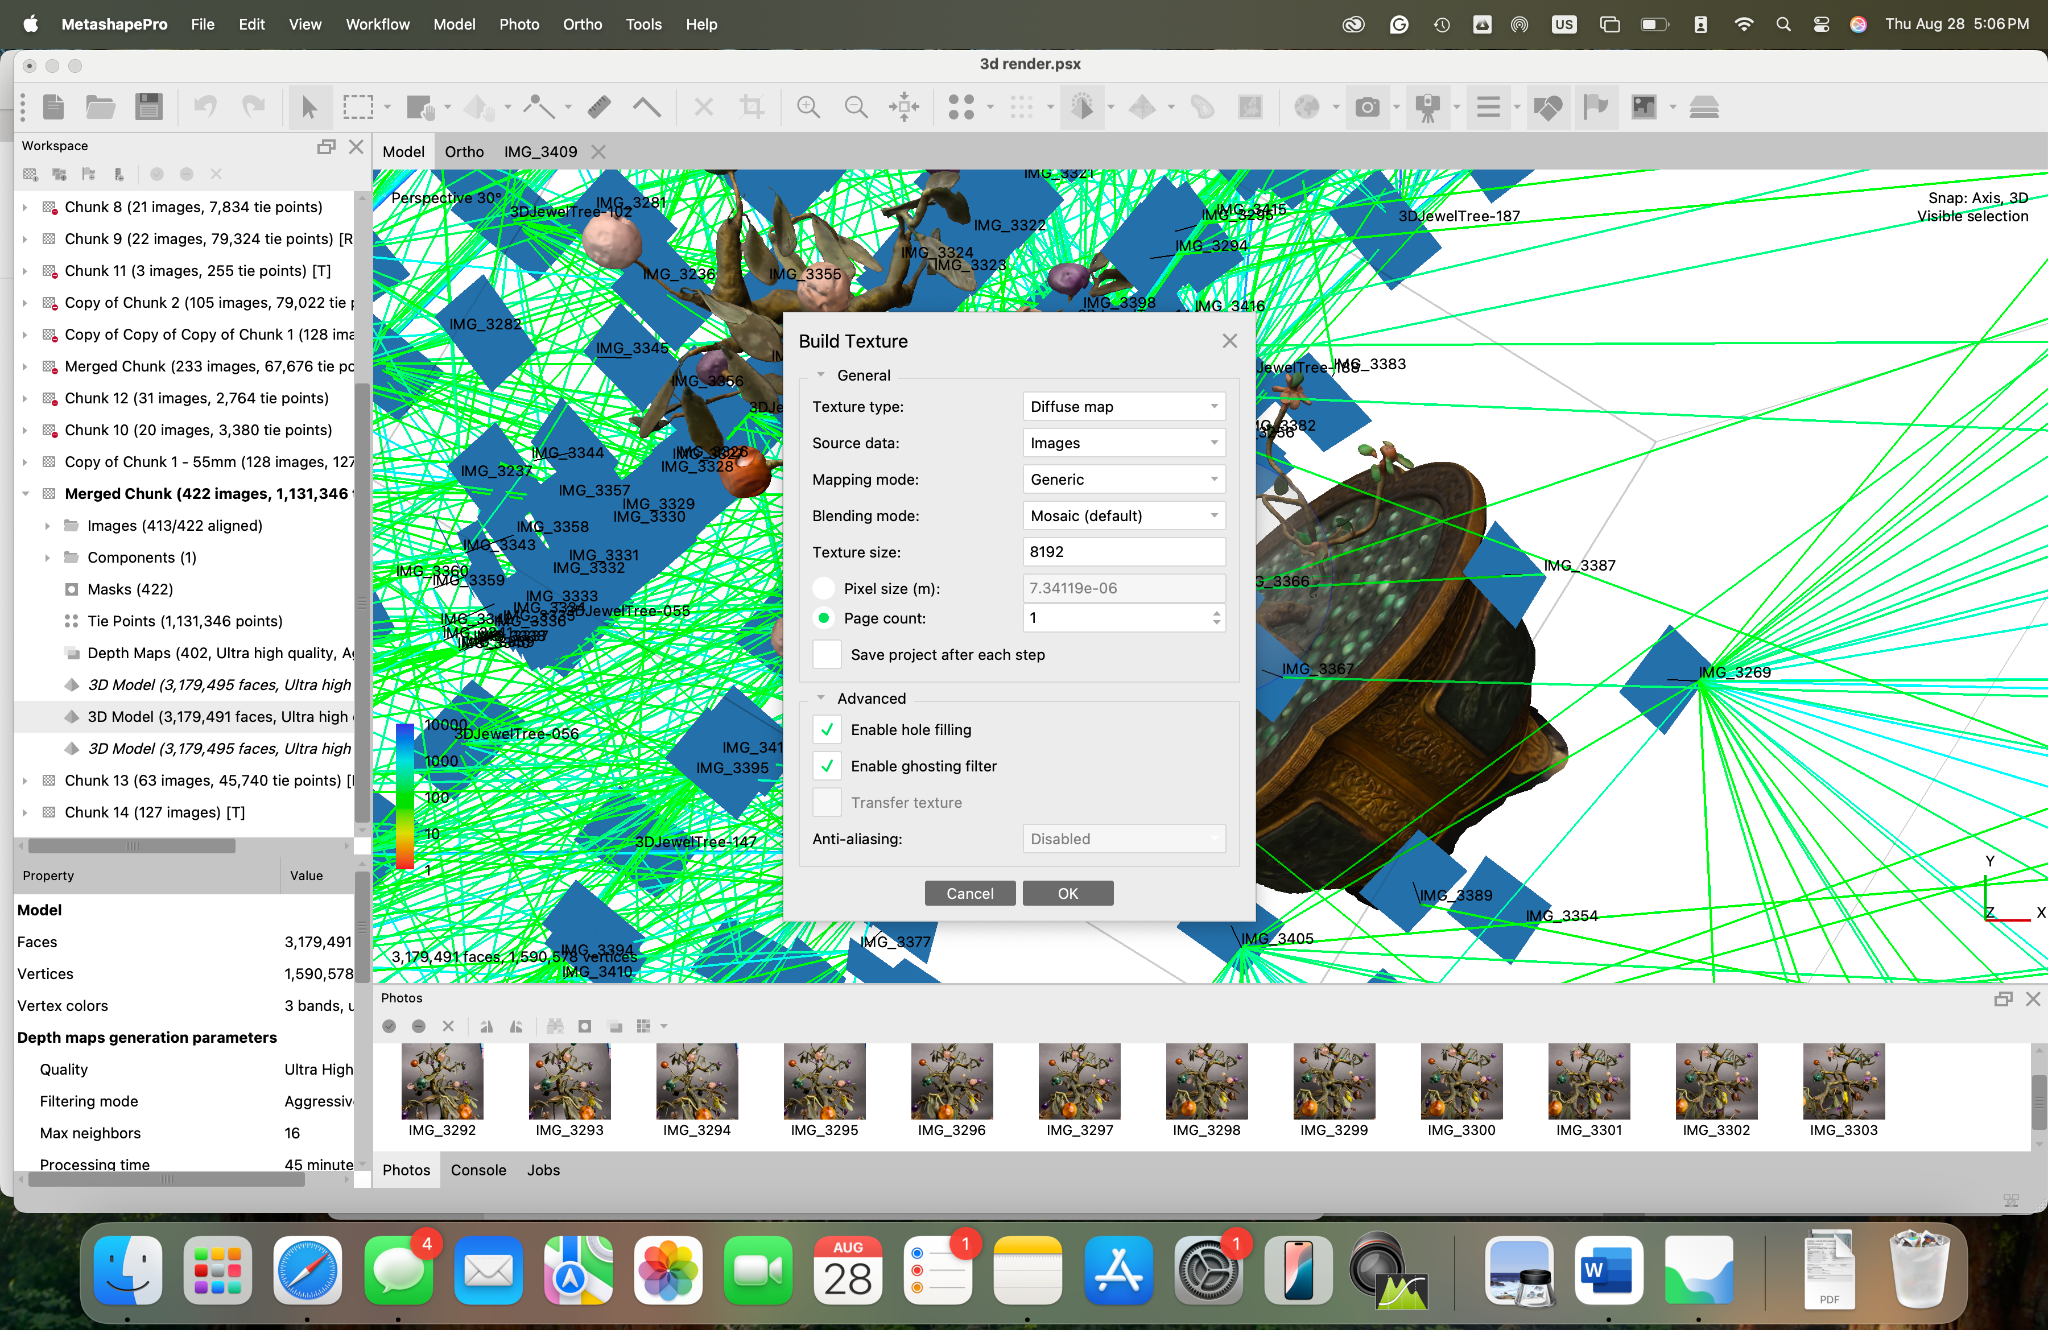
Build texture.
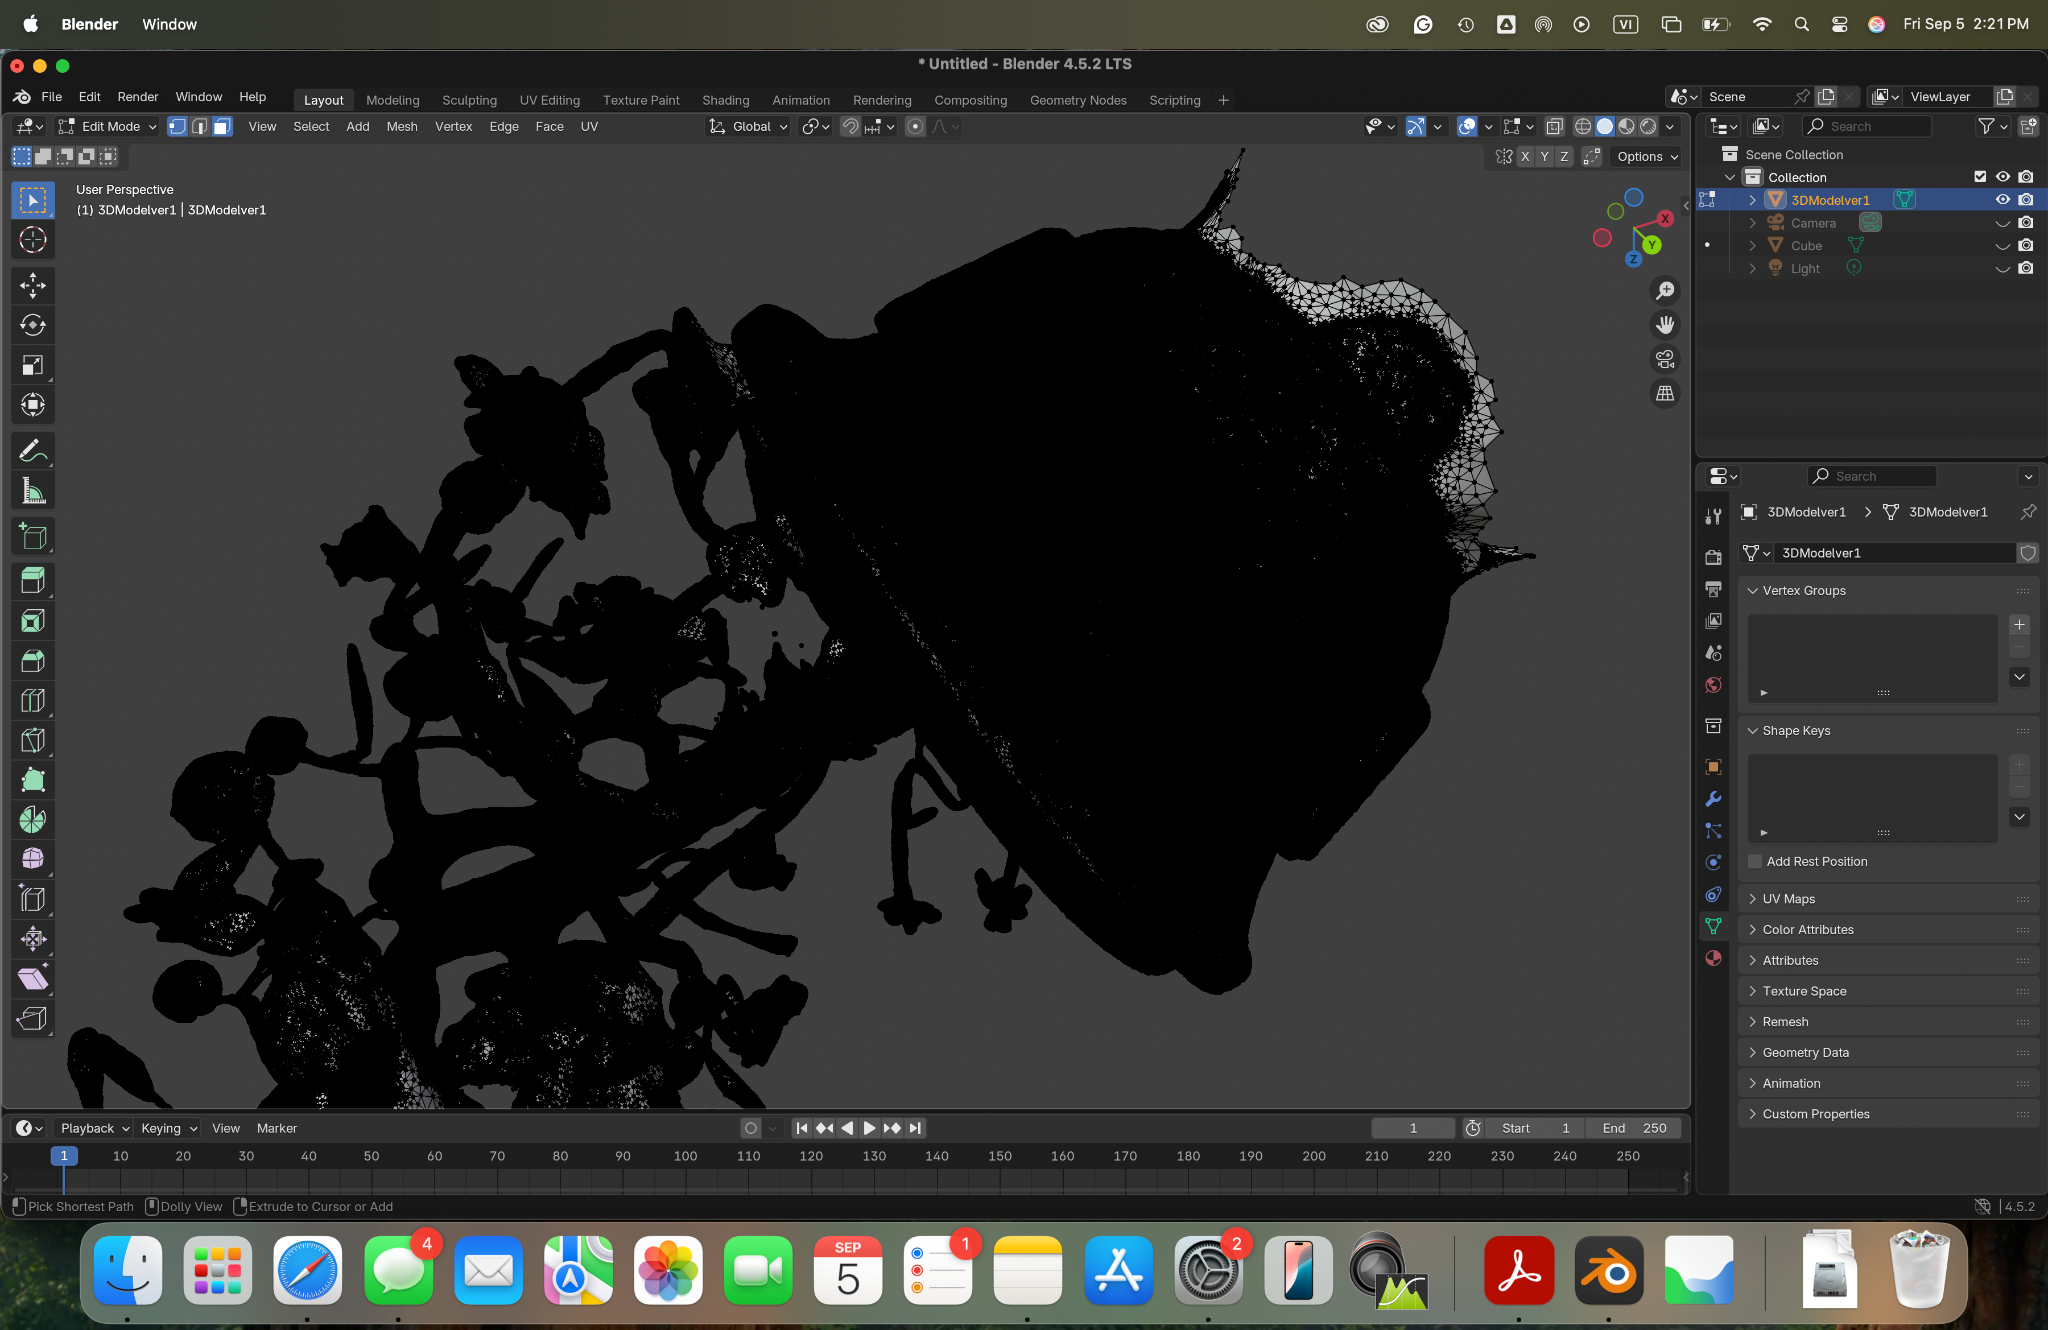
Import obj. file into Blender to edit the mesh.

Acknowledgement
I would like to extend my deepest gratitude to the dedicated team at Vizcaya Museum and Gardens for the invaluable opportunity to intern in the Collections Care department.
Special thanks to my supervisors and mentors, Stefania Marino, Ella Andrews, and Paris Bowers, whose guidance, expertise, and encouragement shaped my experience and deepened my passion for cultural heritage preservation.
I am also thankful to my fellow interns and colleagues, Sophie West, Saúl Chavira, Gibson Field, Bruce Williams, Ayla Toussaint, and many more for their collaboration and support throughout this journey.
This internship has been a transformative chapter in my professional development, and I am profoundly appreciative of the trust placed in me to contribute to the stewardship of Vizcaya's remarkable collections.